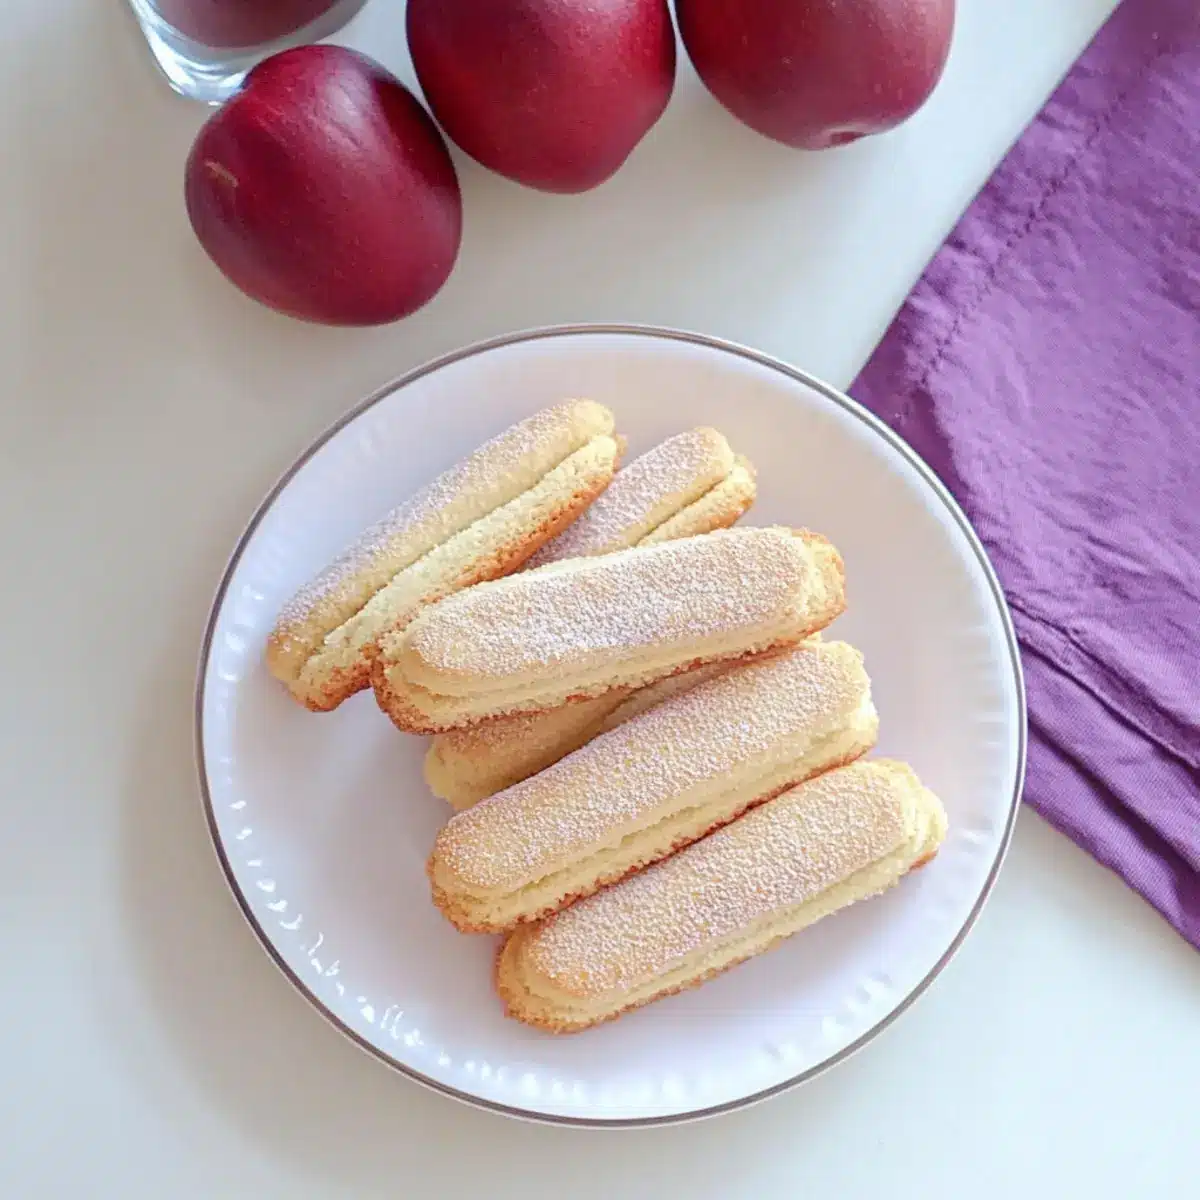
As I stood in my kitchen, a delightful aroma wafted in from the oven, reminding me of those charming Italian bakeries I’ve always adored. Homemade ladyfinger cookies are a must-have for any dessert lover and serve as the secret ingredient for an authentic Tiramisu. This simple recipe transforms basic ingredients into airy, delightful ladyfinger cookies that are not only a treat to make but also a joy to eat. These cookies are quick to prepare, and they freeze beautifully, making them a versatile addition to your baking repertoire. Whether you’re crafting a classic Tiramisu or enjoying them alongside a cup of espresso, these homemade ladyfingers are guaranteed to impress. Ready to elevate your dessert game with this timeless Italian delight?
Why are Homemade Ladyfinger Cookies a Must?
Irresistible Texture: Experience the delicate crunch on the outside, giving way to a soft, cloud-like interior. These ladyfinger cookies elevate any dessert!
Simple & Quick: With just a few ingredients, you’ll whip up a batch in no time—perfect for spontaneous baking sessions or when guests drop by unexpectedly.
Versatile Treat: Not just for Tiramisu, these cookies can also complement your favorite desserts or be enjoyed alone with coffee.
Freezer-Friendly: Make a double batch and freeze half for later! They retain their quality beautifully, ensuring you always have a sweet treat on hand.
Classically Delicious: Capture the essence of Italy in every bite! Pair these with your next cup of espresso for an authentic Italian experience.
For more delightful cookie recipes, check out my Chocolate Chip Cookies and Gooey Butter Cookies.
Ladyfinger Cookies Ingredients
For the Batter
• Eggs – Provides structure and moisture; use large, free-range eggs for the best results.
• Granulated Sugar – Sweetens cookies while aiding in the aeration process; consider coconut or cane sugar for healthy options.
• Salt – Enhances flavor; a pinch is all you need.
• Vanilla Extract – Adds depth of flavor; pure vanilla extract is ideal, but imitation can be used in a pinch.
• All-Purpose Flour – The main structure component; swap with a gluten-free flour blend for a gluten-free option.
• Cornstarch – Lightens the cookie texture; can be replaced with arrowroot starch if needed.
• Lemon Zest (optional) – Adds a touch of brightness; omit it for a more understated flavor.
For Dusting
• Powdered Sugar – Provides a decorative finish and slight sweetness; always use fresh for the best appearance.
Indulge in these exceptional ladyfinger cookies as the perfect addition to your favorite desserts!
Step‑by‑Step Instructions for Homemade Ladyfinger Cookies
Step 1: Preheat the Oven
Start by preheating your oven to 350°F (175°C). Position the oven rack in the middle to ensure even baking. This temperature is crucial for achieving the light, airy texture of your ladyfinger cookies. While the oven warms up, gather your equipment, including two baking sheets and parchment paper.
Step 2: Prepare Baking Sheets
Line two cookie sheets with baking paper to prevent sticking and ensure a perfect bake. This step not only aids in easy removal but also helps maintain the delicate structure of the ladyfinger cookies. Take a moment to smooth out any wrinkles in the parchment for an even baking surface.
Step 3: Whip the Egg Yolks
In a large mixing bowl, add the egg yolks along with half of the granulated sugar. Using a hand mixer or stand mixer, whip this mixture on medium speed until it becomes pale and fluffy—about 4-5 minutes. Incorporate the vanilla extract and, if desired, add lemon zest for an extra zing to your ladyfinger cookies.
Step 4: Whip the Egg Whites
In a separate bowl, add the egg whites and whisk until soft peaks form. Gradually sprinkle in the remaining sugar, continuing to whip until the whites hold stiff peaks. This aeration is essential for crafting light and fluffy ladyfinger cookies. The whites should be glossy and stand up straight when the whisk is removed.
Step 5: Combine Mixtures
Gently fold the whipped egg whites into the yolk mixture using a spatula. Be careful not to deflate the batter; the airy texture is key to your ladyfinger cookies. Use a gentle folding motion, combining them until no streaks remain but the mixture still retains volume.
Step 6: Add the Dry Ingredients
In another bowl, whisk together the all-purpose flour and cornstarch. Gradually fold this dry mixture into the wet batter, ensuring it is well combined without over-mixing. The cornstarch will help create the lightness needed for your ladyfinger cookies, providing the perfect balance to the structure.
Step 7: Pipe the Cookies
Transfer the batter into a piping bag fitted with a round tip. Pipe 3-inch long fingers onto the lined baking sheets, spacing them about an inch apart to allow room for expansion. This technique produces the signature shape of ladyfinger cookies and ensures even baking.
Step 8: Bake the Cookies
Before baking, dust the piped cookie shapes lightly with powdered sugar to create a delicate sweetness. Place the sheets in the preheated oven and bake for 12-15 minutes until they puff up and turn a light golden color. You’ll know they’re done when they are firm to the touch yet still slightly soft inside.
Step 9: Cool the Cookies
Once out of the oven, let the ladyfinger cookies cool on the tray for a few minutes before transferring them to a wire rack. Allowing them to cool completely ensures they retain their crispness. Store the cooled cookies in an airtight container to maintain their delightful texture, ready for your Tiramisu or enjoyable as they are!
Make Ahead Options
These homemade ladyfinger cookies are perfect for meal prep, allowing you to save valuable time on busy days! You can prepare the batter up to 24 hours in advance and refrigerate it until you’re ready to bake. Simply fill your piping bag with the batter, cover it, and store it in the fridge. For baked cookies, allow them to cool completely, then store them in an airtight container at room temperature for up to 3 weeks. To serve, simply dust with powdered sugar and enjoy their freshness! By pre-preparing these ladyfinger cookies, you’ll have delicious components ready for your Tiramisu or a sweet treat whenever the craving strikes!
What to Serve with Homemade Ladyfinger Cookies
Experience a symphony of flavors that transforms these delightful ladyfinger cookies into a show-stopping dessert spread!
-
Rich Mascarpone Cream: A classic pairing, this soft and creamy concoction enhances the cookies’ lightness, perfect for Tiramisu.
-
Fresh Berries: Juicy strawberries or raspberries lend a tangy contrast, brightening up the sweet ladyfingers for a refreshing touch.
-
Espresso: Bold and robust, a shot of rich espresso serves as a delightful backdrop, balancing the sweetness of the cookies.
-
Chocolate Sauce: Drizzle warm chocolate over the ladyfingers for an indulgent treat. This addition creates a luxurious flavor experience.
-
Lemon Curd: A zingy, sweet-tart lemon curd brings a burst of citrus that complements the delicate vanilla notes in the cookies.
-
Whipped Cream: Fluffy, lightly sweetened whipped cream adds a luscious layer that can be used alongside or as a filling for desserts.
-
Tiramisu: Use these homemade ladyfinger cookies as the base for a classic Tiramisu, layering them with coffee, mascarpone, and cocoa for an ultimate dessert dream.
-
Iced Tea: A refreshing glass of iced tea makes for a perfect palate cleanser, enhancing the tea-time experience with ladyfingers.
-
Pistachio Gelato: Creamy pistachio gelato pairs beautifully with the light cookies, adding crunchy texture and nutty flavor for a fantastic finish.
Variations & Substitutions for Ladyfinger Cookies
Customize your ladyfinger cookies to suit your taste and dietary needs with these delightful twists and swaps!
-
Gluten-Free: Replace all-purpose flour with a gluten-free flour blend for a celiac-friendly version without sacrificing texture.
-
Cocoa Indulgence: Add 2-3 tablespoons of cocoa powder for rich, chocolate-flavored ladyfingers—perfect for a decadent twist!
-
Citrus Kick: Enhance the flavor by using orange zest instead of lemon. It adds a fresh, bright note that complements your desserts beautifully.
-
Nutty Delight: Incorporate almond or hazelnut extract to create unique flavor profiles that dance on the palate. These subtle infusions elevate the cookie experience.
-
Dairy-Free: Substitute egg whites with a vegan egg replacer if you’re looking for a vegan adaptation while still achieving that delightful airy texture.
-
Spicy Warmth: Stir in a pinch of cinnamon or nutmeg for a cozy, aromatic note that can bring a whole new vibe to your ladyfinger cookies.
-
Fruity Dip: Pair your cookies with a fruity sauce instead of chocolate, like a raspberry coulis or homemade citrus glaze. The tanginess complements the sweetness perfectly!
For more sweet inspirations, check out my Chocolate Thumbprint Cookies or whip up some delightful Savory Rosemary Cookies.
Expert Tips for Perfect Ladyfinger Cookies
-
Stiff Peaks Essential: Ensure egg whites reach stiff peaks during whipping; this is critical to achieve the airy texture of your ladyfinger cookies.
-
Avoid Oven Peeking: Resist the temptation to open the oven while baking; even a slight temperature drop can deflate your cookies.
-
Piping Practice: For beautifully shaped cookies, practice your piping technique. Using a steady hand will result in uniform ladyfingers.
-
Temperature Awareness: Bake at the correct temperature of 350°F (175°C). If your oven runs hot, consider adjusting it slightly to avoid over-baking.
-
Cool Completely: Allow your cookies to cool completely before storing. This prevents moisture buildup, helping to maintain their crispness.
How to Store and Freeze Ladyfinger Cookies
Airtight Container: Store your ladyfinger cookies in an airtight container at room temperature for up to 3 weeks to maintain their crispness and delightful texture.
Fridge: If you live in a humid environment, you can refrigerate the cookies for up to 1 week, but be sure to allow them to reach room temperature before enjoying.
Freezer: Freeze unbaked ladyfinger cookie batter in portions for up to 1 month. Simply pipe out the desired amount, freeze on a baking sheet, then transfer to a zip-top bag for easy baking later.
Reheating: To refresh cookies, place them in a 300°F (150°C) oven for about 5 minutes, restoring their original crisp texture before serving.
Homemade Ladyfinger Cookies Recipe FAQs
How do I choose the right eggs for ladyfinger cookies?
Absolutely! When making homemade ladyfinger cookies, opt for large, free-range eggs. These not only provide excellent structure and moisture but also enhance the flavor due to the hens’ varied diets. Always choose the freshest eggs you can find; visually, they should have clean, uncracked shells without any signs of discoloration.
What is the best way to store ladyfinger cookies?
Very! Ladyfinger cookies can be stored in an airtight container at room temperature for up to 3 weeks. Make sure to keep them in a cool, dry place away from sunlight. If you notice that they are becoming soft or losing their crisp texture, try placing a piece of bread in the container to help maintain their firmness without compromising flavor.
Can I freeze homemade ladyfinger cookies?
Yes, indeed! To freeze your ladyfinger cookies, place them in a single layer on a baking sheet and freeze until solid. Once frozen, transfer the cookies to an airtight container or a zip-top freezer bag, where they can be stored for up to 3 months. When you’re ready to enjoy them again, simply let them thaw at room temperature or pop them in a low-temperature oven for a few minutes to regain crispness.
What should I do if my ladyfinger cookies turn out flat?
Oh no! If your ladyfinger cookies are flat, it’s likely due to under-whipped egg whites. Make sure you whip the egg whites until they reach stiff peaks—when you lift the whisk, the peaks should stand upright and not droop. Also, avoid over-folding the mixture when combining egg whites with the yolk mixture, as this can deflate the batter. Ensure your oven is properly preheated, and try not to open it during baking; temperature fluctuations can also cause flat cookies.
Are there any dietary considerations for ladyfinger cookies?
Great question! For those with gluten sensitivities, you can easily swap the all-purpose flour with a gluten-free flour blend. If you’re catering to a vegan diet, consider using aquafaba (the liquid from canned chickpeas) in place of eggs, but the texture may vary. Always check the labels of your ingredients for any allergens, especially in case of nut or dairy traces in packaged products.
Luscious Ladyfinger Cookies for Your Dreamy Tiramisu
Ingredients
Equipment
Method
- Preheat your oven to 350°F (175°C) and position the oven rack in the middle.
- Line two cookie sheets with baking paper.
- Whip the egg yolks with half of the granulated sugar until pale and fluffy, then add vanilla extract and lemon zest if using.
- Whisk egg whites until soft peaks form, then gradually add remaining sugar and whisk until stiff peaks hold.
- Fold whipped egg whites into the yolk mixture carefully to retain volume.
- Whisk together flour and cornstarch, then fold into the wet mixture without over-mixing.
- Pipe 3-inch long cookies onto the lined baking sheets, spaced an inch apart.
- Dust piped cookies lightly with powdered sugar and bake for 12-15 minutes until golden.
- Let cookies cool on the tray for a few minutes before transferring to a wire rack.
Leave a Reply