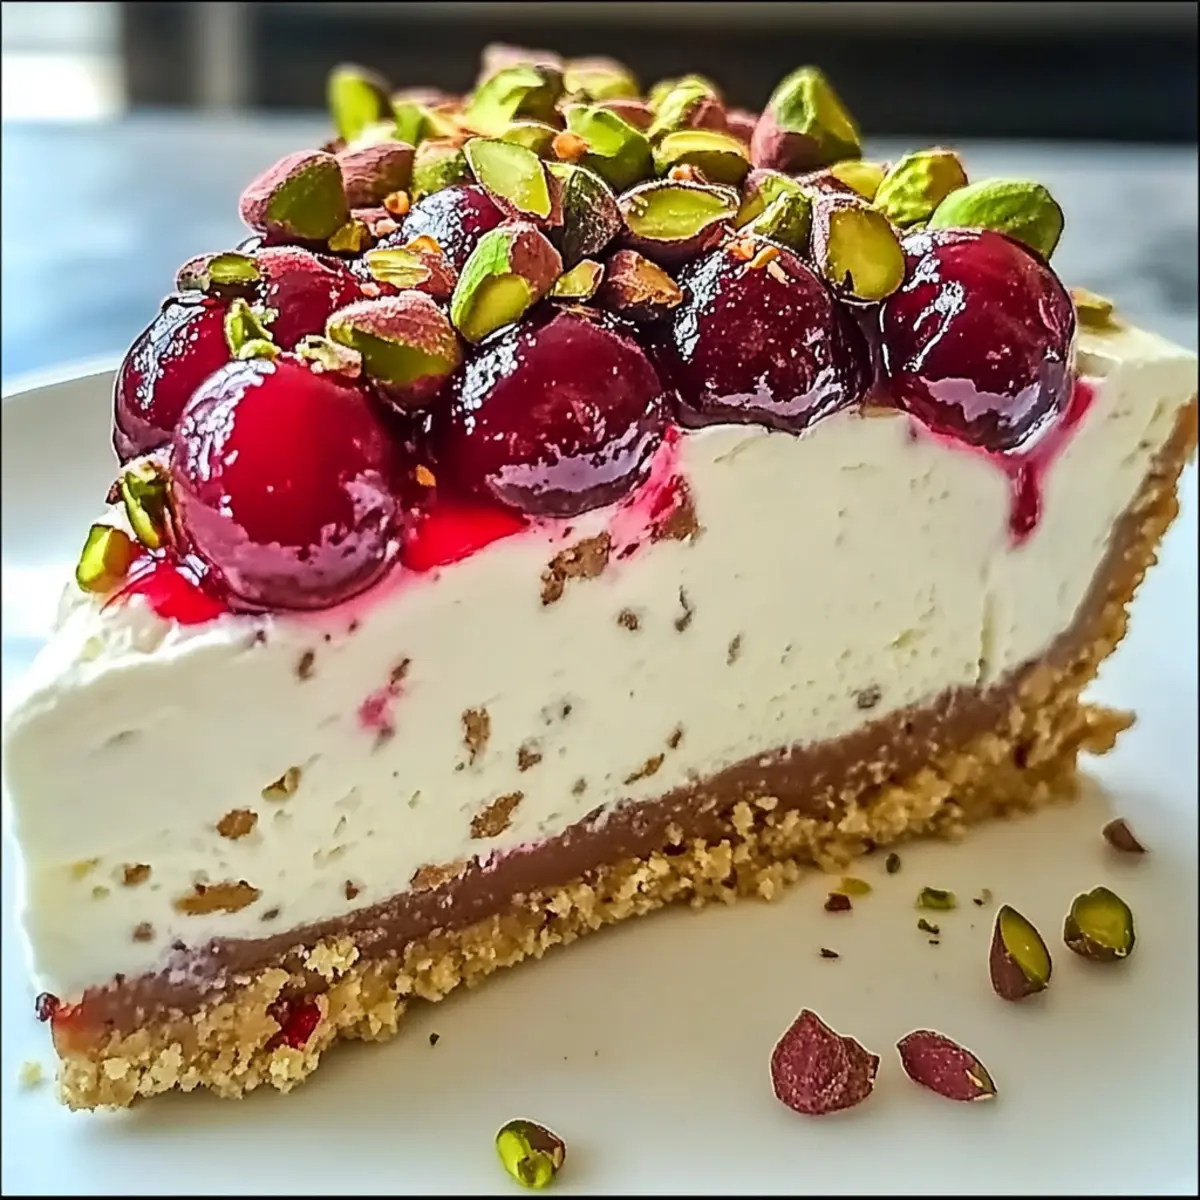
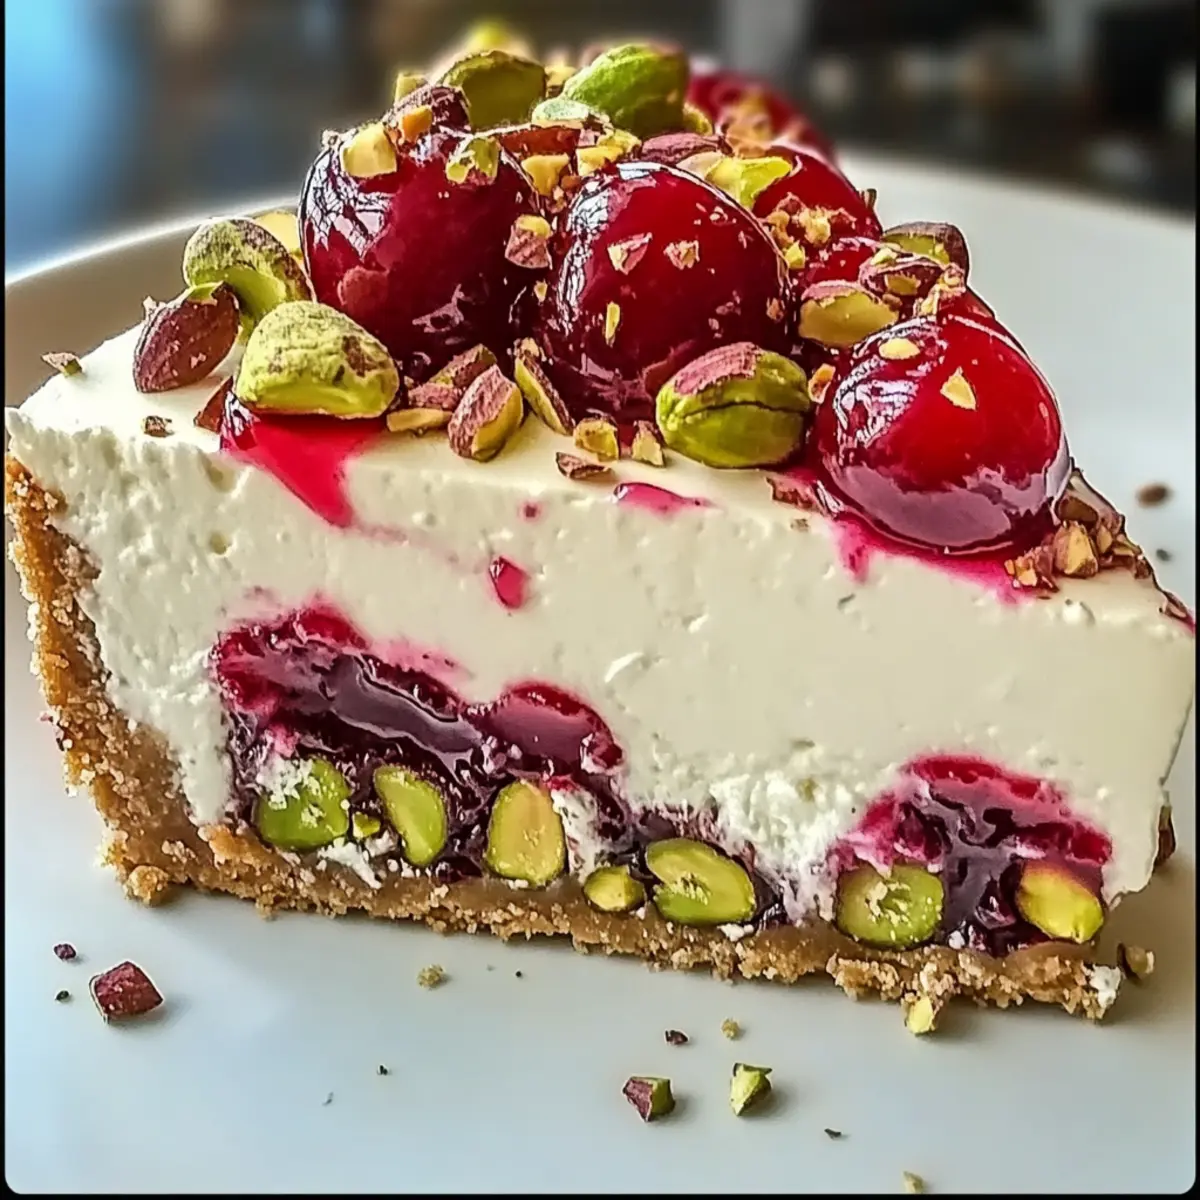
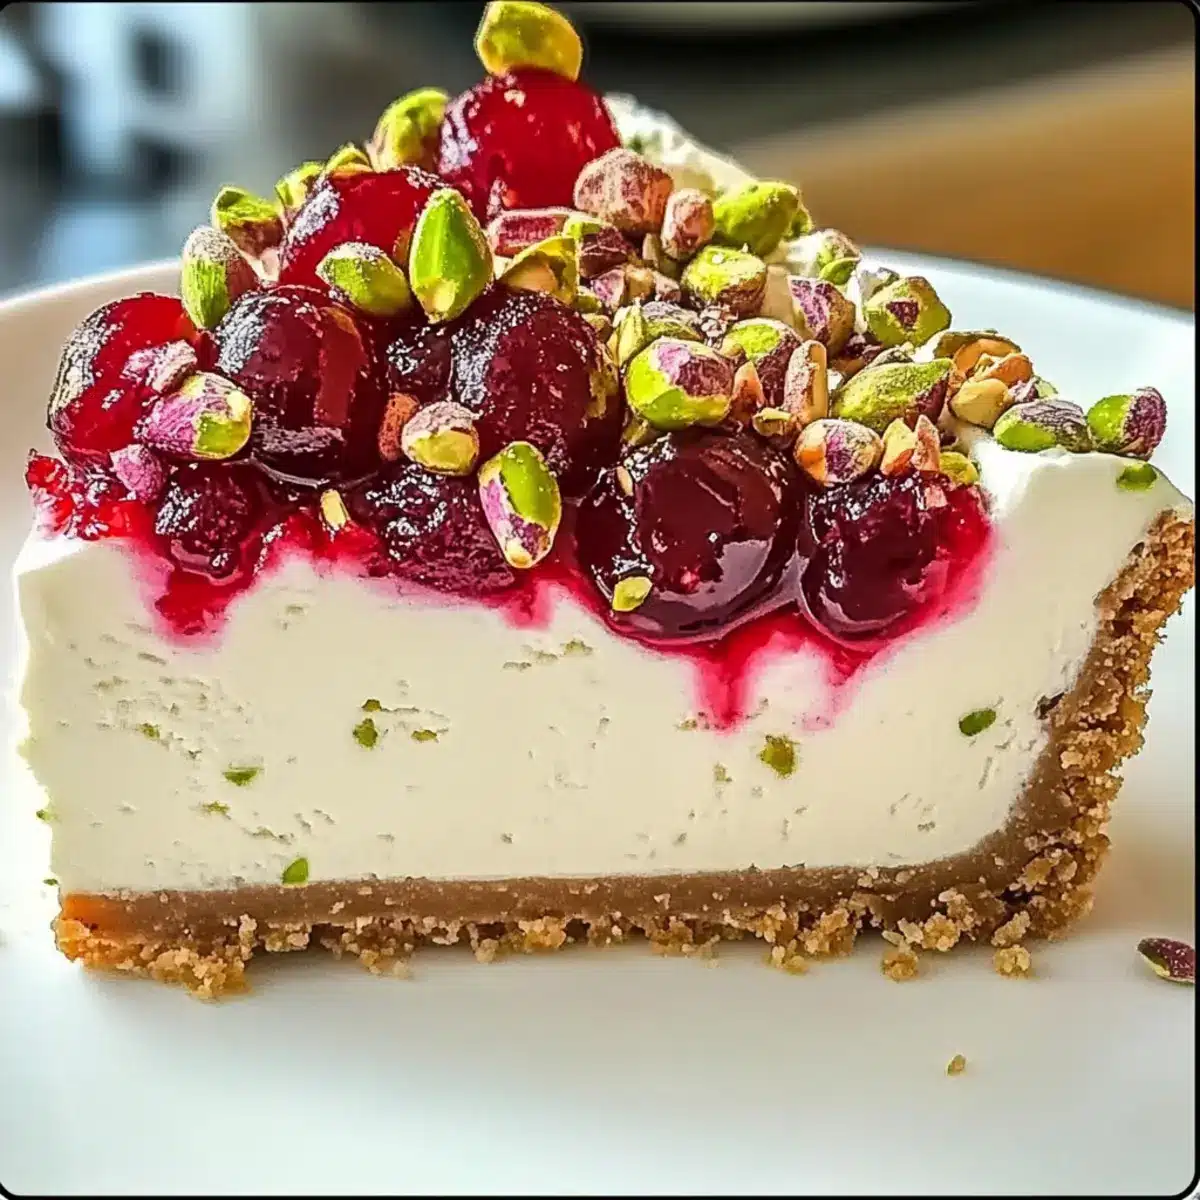
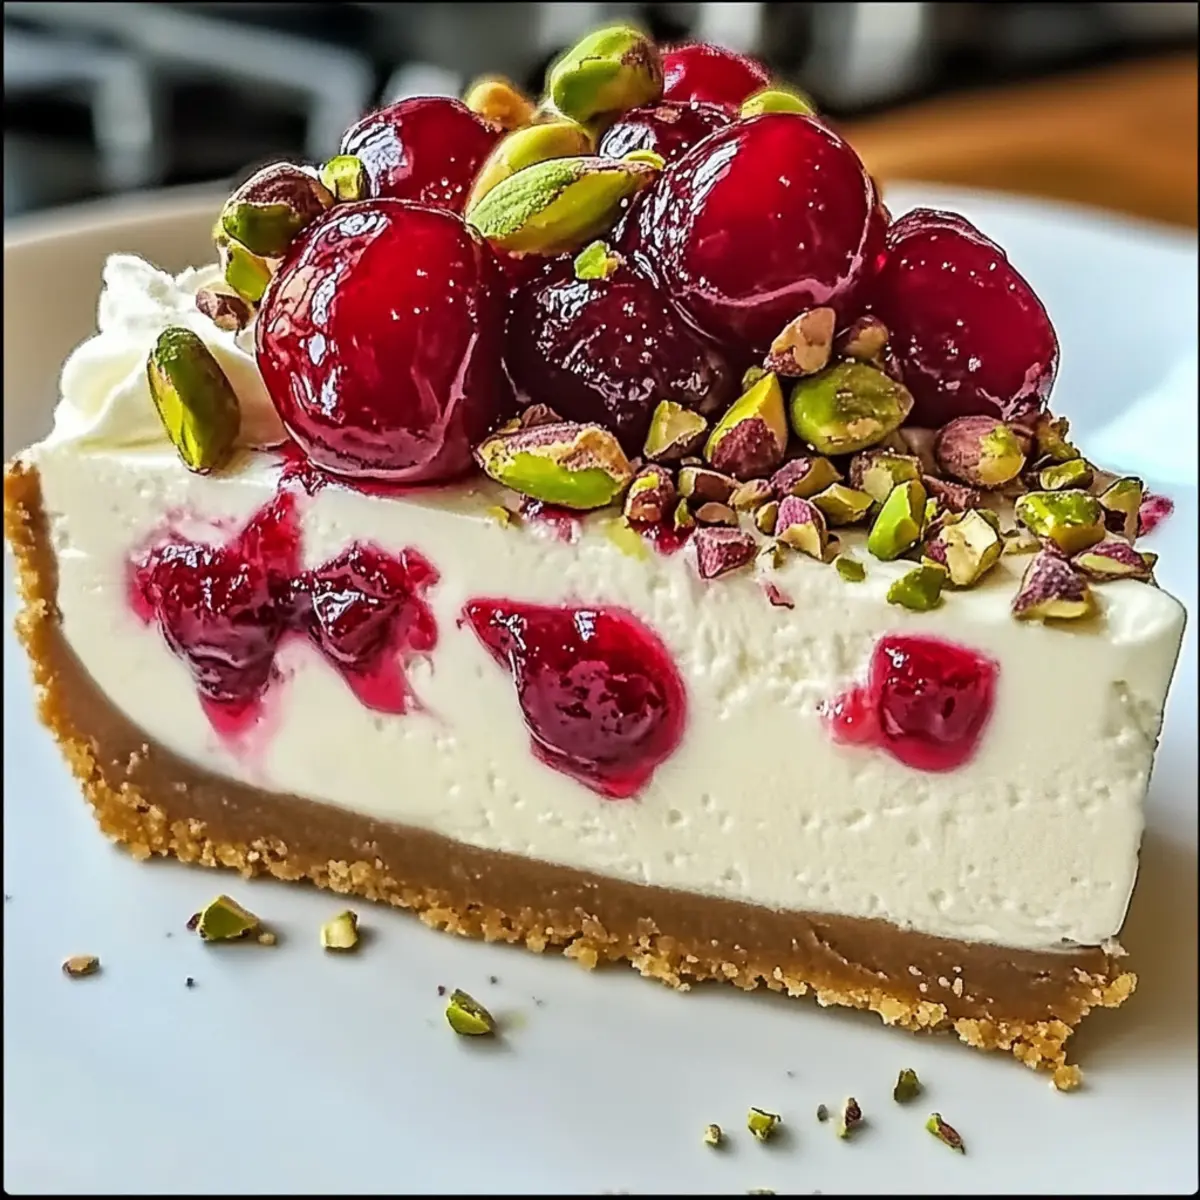
When the first hint of spring arrives, my thoughts always drift to the glorious Cherry Pistachio Cheesecake. This dessert is a vibrant celebration of flavors, with sweet maraschino cherries mingling with crunchy pistachios and a whisper of citrus zest. It’s not just an indulgent treat; it’s incredibly easy to whip up, making it a splendid centerpiece for special occasions like birthdays and holidays. As I took my first bite of this creamy delight, I realized how effortlessly it brings friends and family together, leaving everyone reaching for seconds. Plus, it can be made ahead of time, so you can spend more quality moments with your loved ones and less time in the kitchen. I can’t wait to share this recipe with you—what special occasion are you thinking of making it for?
Why is this cheesecake a must-try?
Rich, Creamy Indulgence: The Cherry Pistachio Cheesecake offers a delightfully creamy texture that melts in your mouth, leaving a lasting impression of luxury.
Vibrant Flavors: Sweet maraschino cherries combined with nutty pistachios create an irresistible flavor harmony that excites the taste buds.
Quick & Easy: With simple ingredients and straightforward steps, this cheesecake is perfect for busy bakers wanting to impress without the stress.
Crowd-Pleaser: Whether at a family gathering or a festive celebration, this stunning dessert will have everyone clamoring for a slice, just like my Cookie Butter Cheesecake Cups or Apple Cheesecake Bars.
Make Ahead Option: Ideal for planning ahead, this cheesecake only gets better after chilling in the fridge, freeing up your time to enjoy the festivities!
Cherry Pistachio Cheesecake Ingredients
For the Crust
- Graham Cracker Crumbs – A sweet and buttery base that provides structure for the cheesecake. Substitute: Use crushed digestive biscuits if you prefer a different flavor.
- Melted Butter – Binds the crust ingredients together and adds richness. Substitution: Coconut oil can be used for a dairy-free option.
- Granulated Sugar – Sweetens the crust for a balanced flavor. No direct substitutes; try brown sugar for a hint of molasses flavor.
For the Filling
- Cream Cheese – The star of the show, providing creamy richness and a smooth texture. Ensure it’s softened to avoid lumps before mixing.
- Sour Cream – Adds a touch of creaminess and tang, balancing the sweetness beautifully. Substitution: Greek yogurt is a healthier swap that works well.
- Pistachio Pudding Mix (dry powder) – Enhances flavor and thickens the filling. Optional: Omit for a more pronounced cherry flavor without nutty notes.
- Large Eggs – Vital for structure and helping the cheesecake set perfectly. Avoid overmixing after adding to prevent cracks in the surface.
- Vanilla Extract – Elevates the overall flavor profile of the cheesecake. Substitution: Almond extract can impart an enticing twist to the flavor.
For the Topping
- Cherry Pie Filling – Provides a vibrant, sweet topping that contrasts with the creamy cheesecake. For a fresher option, use chopped fresh or frozen cherries instead.
- Chopped Pistachios – Sprinkled on top for added crunch and visual appeal. Use toasted pistachios for an extra layer of flavor.
Enjoy preparing this Cherry Pistachio Cheesecake, the perfect indulgent treat for your next celebration!
Step‑by‑Step Instructions for Cherry Pistachio Cheesecake
Step 1: Preheat the Oven
Begin by preheating your oven to 325°F (165°C). While the oven heats up, prepare a 9-inch springform pan by greasing it or lining it with parchment paper. This will ensure that your Cherry Pistachio Cheesecake comes out smoothly after baking.
Step 2: Make the Crust
In a mixing bowl, combine 1½ cups of graham cracker crumbs, ¼ cup of finely ground pistachios, 3 tablespoons of sugar, and 5 tablespoons of melted butter. Stir the mixture until evenly coated. Press it firmly into the bottom of the prepared pan and bake in the preheated oven for 8 minutes until slightly golden. Once baked, let it cool completely.
Step 3: Prepare the Filling
In a large mixing bowl, beat 16 oz of softened cream cheese with ½ cup of sugar using an electric mixer until the mixture is smooth and creamy. Add in 2 large eggs one at a time, mixing well after each addition. Then, blend in ½ cup sour cream, ¼ cup pistachio pudding mix, and 1 teaspoon of vanilla extract until fully combined and no lumps remain.
Step 4: Bake the Cheesecake
Carefully pour the creamy filling over the cooled crust in the springform pan. Smooth the top with a spatula for an even surface. Place it into the oven and bake for 45–50 minutes, or until the edges are set but the center still has a slight jiggle. This ensures a creamy texture for your Cherry Pistachio Cheesecake.
Step 5: Cool Gradually
After baking, turn off the oven but leave the cheesecake inside with the door slightly ajar for 1 hour. This gradual cooling process helps prevent any cracks in the cheesecake. Once cooled, transfer it to the refrigerator and let it chill for at least 4 hours, ideally overnight to enhance its flavor and texture.
Step 6: Add the Topping
Before serving, open a can of cherry pie filling and spread it generously over the surface of the chilled cheesecake. Sprinkle with chopped pistachios to add a delightful crunch and visual appeal. Your Cherry Pistachio Cheesecake is now ready to be sliced and enjoyed at your next special occasion.
Cherry Pistachio Cheesecake Variations & Substitutions
Feel free to let your creativity shine and customize your Cherry Pistachio Cheesecake with these delightful options!
-
Fresh Cherries: Swap out maraschino cherries for fresh, chopped cherries for a burst of natural flavor. The juiciness of fresh cherries elevates each bite.
-
Nut Alternatives: Use almonds, hazelnuts, or even white chocolate chips in place of pistachios to suit your taste or dietary needs. Experimenting adds a unique touch to the recipe!
-
Mini Cheesecakes: Adapt this recipe into mini cheesecakes using muffin tins—simply reduce the baking time to 18-22 minutes. Perfect for personalizing portions for gatherings!
-
Citrus Zest: Add a sprinkle of lemon or orange zest to the filling for a refreshing citrus twist, enhancing the overall flavor profile beautifully. A little zing makes a big difference.
-
Sugar-Free Variation: Substitute granulated sugar with a sugar alternative like erythritol for a lower-calorie option, perfect for those watching their sugar intake.
-
Chocolate Drizzle: A drizzle of chocolate sauce on top complements the nuttiness, adding a rich layer of flavor that chocolate lovers will adore.
-
Vegan Option: For a plant-based take, use vegan cream cheese, coconut cream instead of sour cream, and a flax egg instead of large eggs. A delicious way to go dairy-free!
-
Gourmet Garnish: Instead of traditional cherry pie filling, top your cheesecake with a mix of mixed berries or a homemade berry compote for a gourmet flair, perfect for impressing guests.
For even more inspiration, why not try my Cookie Butter Cheesecake Cups or the classic Sugar Cookie Cheesecake? Each of these recipes offers unique twists that will further tease your creativity and passion for desserts!
Expert Tips for Cherry Pistachio Cheesecake
-
Room Temperature Ingredients: Make sure your cream cheese and eggs are at room temperature to prevent lumps and ensure a smooth filling.
-
Mind the Mixing: Avoid overmixing once the eggs are added. This helps prevent cracks in your Cherry Pistachio Cheesecake as it bakes.
-
Cool Gradually: Allow the cheesecake to cool in the oven to prevent sudden temperature changes, which can cause cracks on the surface.
-
Smooth Slices: Clean your knife with warm water between slices for perfectly smooth cuts—this keeps the presentation pristine.
-
Chill Time Matters: For the best flavor and texture, refrigerate the cheesecake overnight if possible. It allows the flavors to meld beautifully.
How to Store and Freeze Cherry Pistachio Cheesecake
Fridge: Keep the cheesecake covered in an airtight container or wrapped tightly in plastic wrap; it will stay fresh for up to 5 days.
Freezer: For longer storage, freeze the cheesecake sliced or whole in a well-sealed container for up to 2 months. Thaw it in the fridge overnight before serving.
Reheating: This cheesecake is best enjoyed chilled, so no reheating is necessary. Just add your favorite toppings after thawing for the best presentation.
Tip: If you freeze a whole Cherry Pistachio Cheesecake, slice before freezing to make serving easier later on!
What to Serve with Cherry Pistachio Cheesecake
Looking to create a delightful spread alongside your luscious cheesecake? Elevate your dessert experience with these perfect pairings that balance flavors and textures beautifully.
-
Whipped Cream: Light and airy, it adds a creamy counterpart to the cheesecake’s richness, enhancing every bite.
-
Fresh Berries: A medley of strawberries, blueberries, and raspberries brings a burst of tartness that complements the sweetness of the cheesecake perfectly.
-
Chocolate Drizzle: A warm chocolate sauce drizzled over slices adds a touch of decadence and additional flavor depth that chocolate lovers will adore.
-
Coffee or Espresso: The boldness of coffee balances the sweet flavors, creating an inviting experience for those who love a cozy finish.
-
Vanilla Ice Cream: A scoop of vanilla ice cream melting on a slice of cheesecake provides a delightful temperature contrast that feels indulgent and elegant.
-
Candied Nuts: Sweet, crunchy nuts sprinkled on top introduce an extra layer of texture, enhancing the nutty pistachio notes in the cheesecake.
-
Sparkling Wine: For a celebratory touch, serve with a glass of bubbly; the effervescence cuts through the richness, making for a sophisticated pairing.
These delightful accompaniments will transform your Cherry Pistachio Cheesecake into the centerpiece of a memorable dessert spread, sure to impress friends and family alike!
Make Ahead Options
Preparing your Cherry Pistachio Cheesecake ahead of time is a fantastic way to save time and ensure a stress-free serving experience. You can make the cheesecake base and refrigerate it for up to 3 days before adding the topping. Simply follow the baking instructions, let it cool, then wrap it tightly with plastic wrap and refrigerate. The flavors will develop beautifully, making it just as delicious if not better! On the day of serving, remove it from the fridge, top with cherry pie filling, and sprinkle with chopped pistachios for a fresh finish. This way, you can impress your guests without the last-minute rush!
Cherry Pistachio Cheesecake Recipe FAQs
What type of cherries should I use?
Absolutely! While the recipe calls for maraschino cherries, you can also use fresh or frozen cherries for a fresher taste. Just make sure to chop them and, if using frozen, thaw and drain excess liquid beforehand to prevent a soggy cheesecake.
How long does Cherry Pistachio Cheesecake last in the fridge?
Very fresh! The cheesecake can be stored in the refrigerator for up to 5 days. Ensure it’s covered in an airtight container or tightly wrapped with plastic wrap to maintain its deliciousness.
Can I freeze Cherry Pistachio Cheesecake?
Definitely! You can freeze it either whole or in slices. Wrap it tightly in plastic wrap and then in aluminum foil, or use a well-sealed container. It will keep for up to 2 months. Just remember to thaw it in the fridge overnight before serving, and add your toppings after it’s thawed for the best appearance.
What if my cheesecake cracks during baking?
Don’t worry; it happens! To avoid cracks, ensure that all ingredients are at room temperature and avoid overmixing once the eggs are added. If cracks do appear, consider topping with cherry pie filling or whipped cream, which will beautifully hide any imperfections.
Are there any allergies to consider with this recipe?
Absolutely! This cheesecake contains dairy and eggs, which can be allergens for some individuals. If you’re making it for guests, you might also want to check if anyone has nut allergies since pistachios are included. Always best to ask first to ensure everyone can enjoy this indulgent dessert!
How do I get the best flavor from my cheesecakes?
For the richest flavor, give your cheesecake ample time to chill! I recommend refrigerating overnight if you can, as it allows the flavors to meld beautifully. Also, don’t forget to let your cream cheese come to room temperature to avoid lumps for a creamy texture!
Cherry Pistachio Cheesecake: Indulgent Bliss for Any Celebration
Ingredients
Equipment
Method
- Preheat the oven to 325°F (165°C) and prepare a 9-inch springform pan by greasing it or lining it with parchment paper.
- In a mixing bowl, combine graham cracker crumbs, finely ground pistachios, granulated sugar, and melted butter. Press into the bottom of the prepared pan and bake for 8 minutes.
- In a large mixing bowl, beat softened cream cheese and sugar until smooth. Add eggs one at a time, mixing well after each addition, then blend in sour cream, pistachio pudding mix, and vanilla extract until fully combined.
- Pour the filling over the cooled crust and smooth the top before baking for 45–50 minutes.
- After baking, turn off the oven and leave the cheesecake inside with the door slightly ajar for 1 hour. Transfer to the refrigerator and chill for at least 4 hours.
- Spread cherry pie filling over the surface of the chilled cheesecake and sprinkle with chopped pistachios.
Leave a Reply