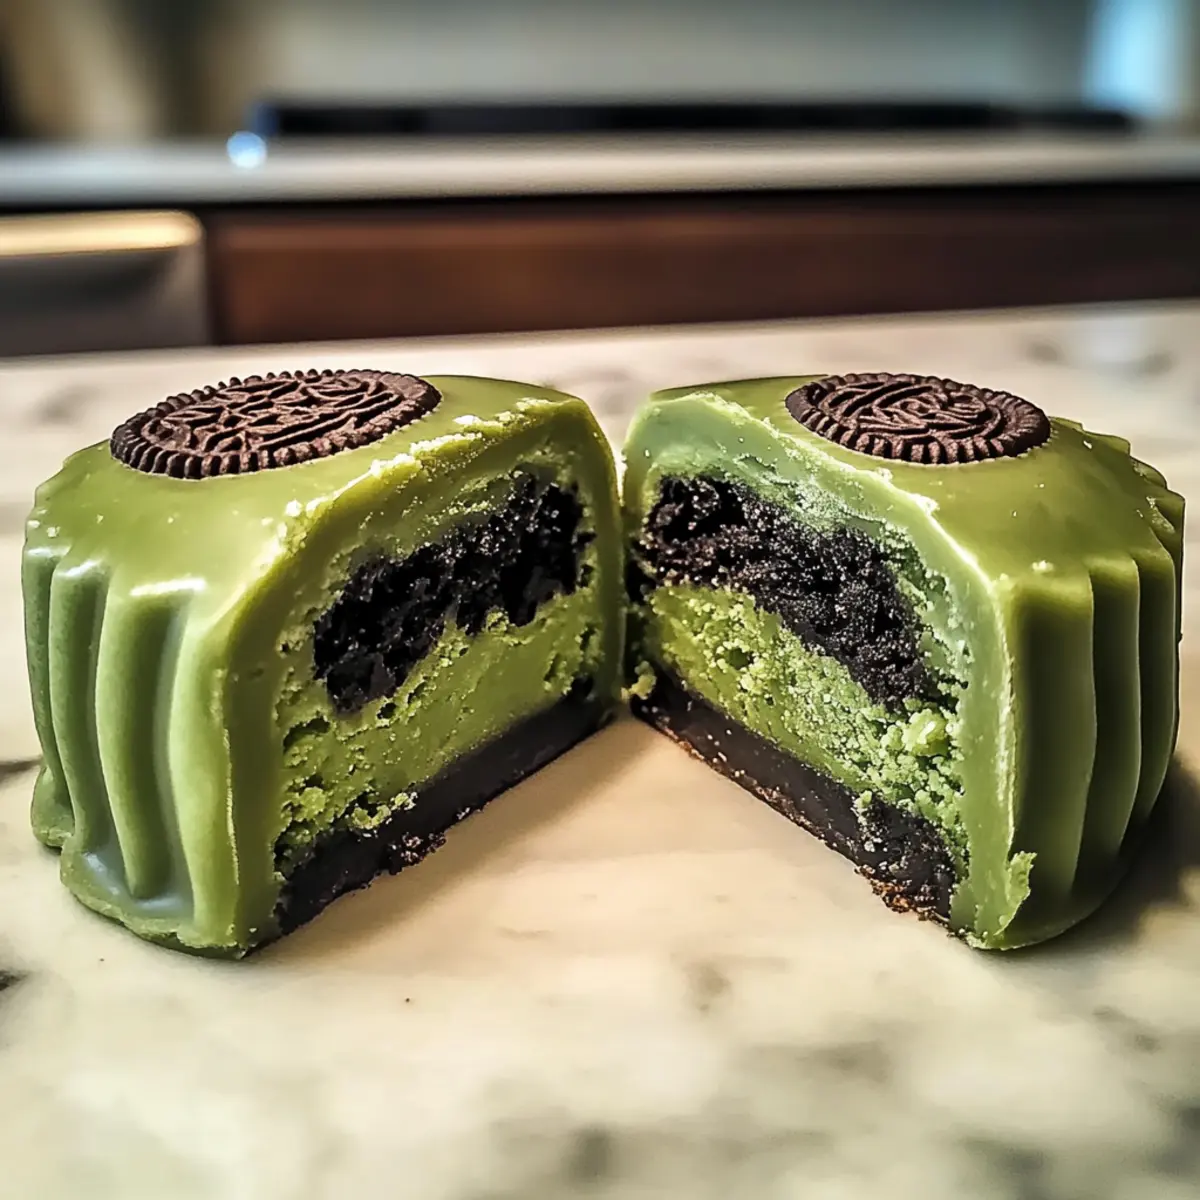
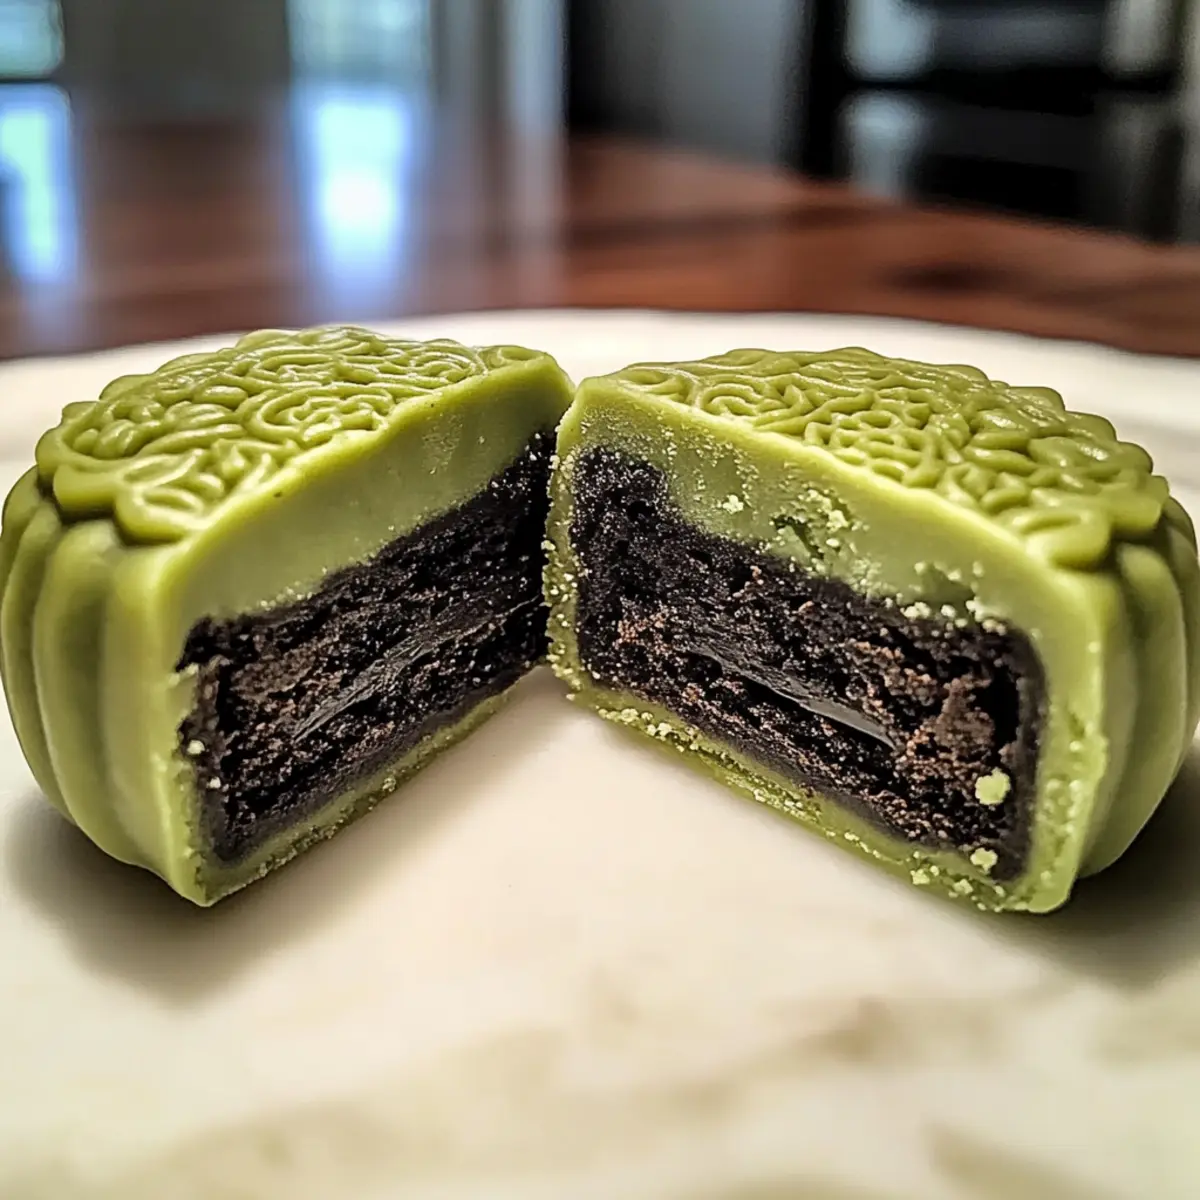
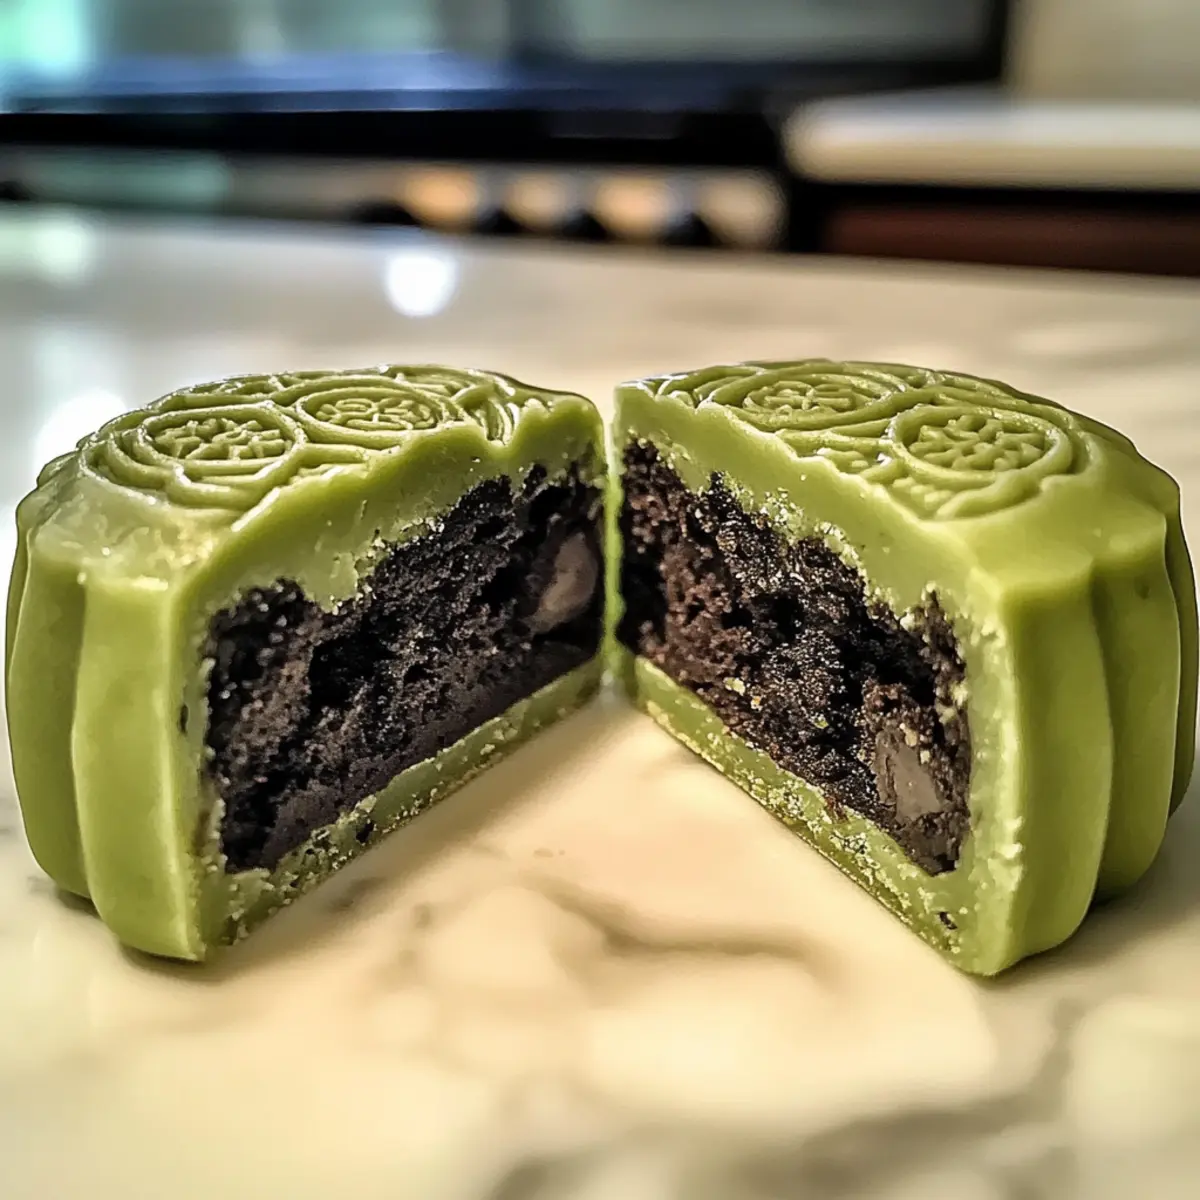
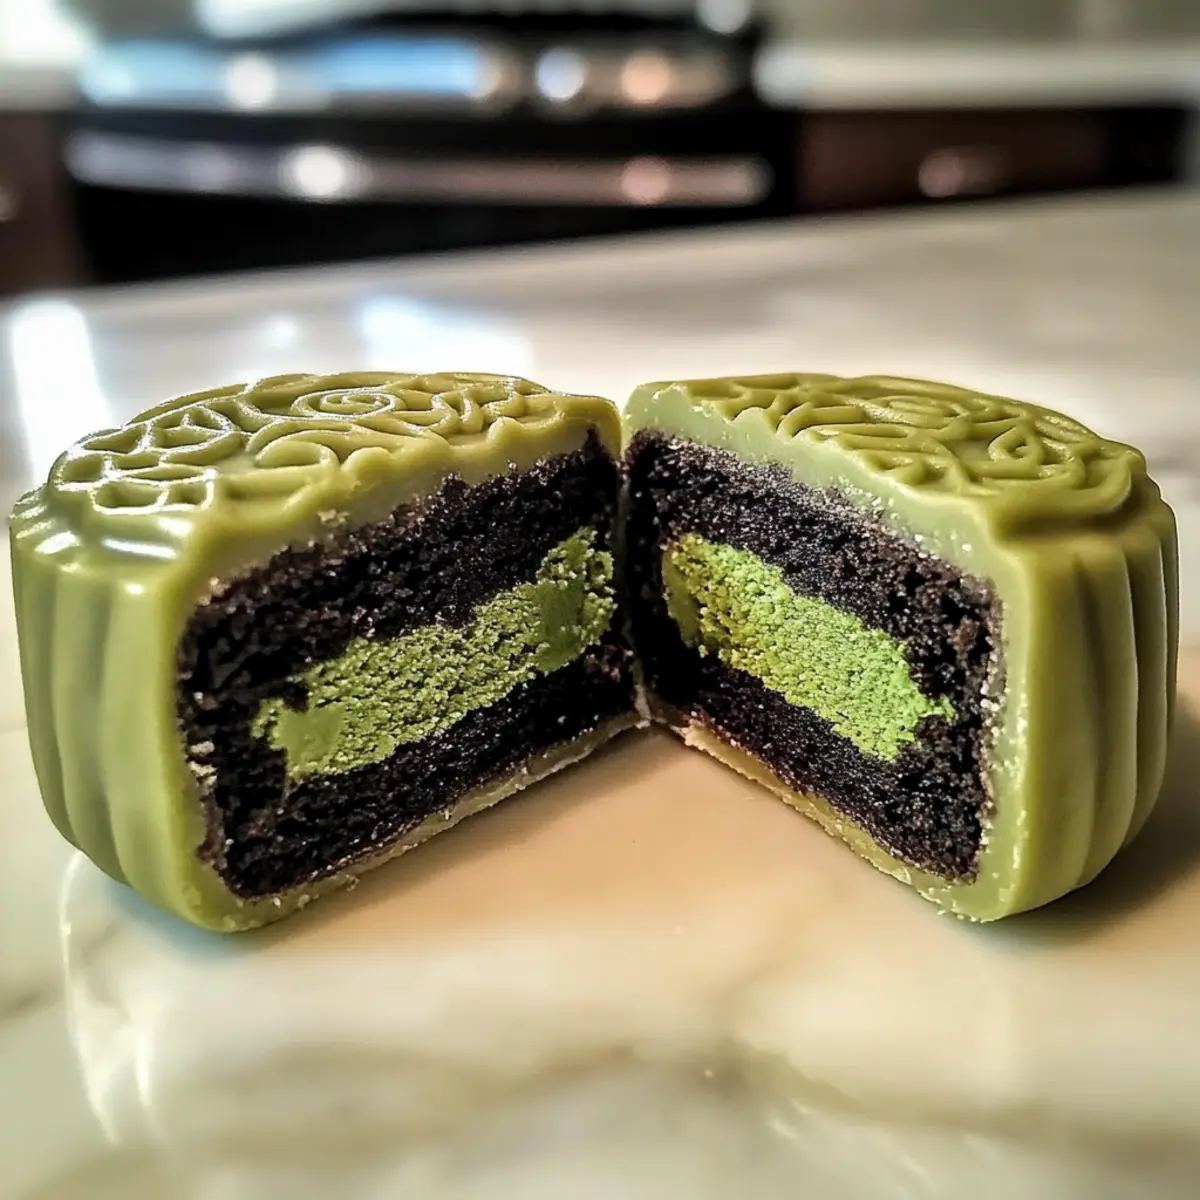
As the sun sets on a warm summer evening, the sweet aroma of fresh, creamy treats wafts through the air, beckoning everyone to gather around. That’s exactly how I felt when I first made these No-Bake Matcha Ice Cream Mooncakes—an unforgettable fusion of tradition and modern flavor. With their luscious white chocolate shell and the vibrant taste of matcha, these mooncakes are not only delicious but also incredibly simple to whip up, making them the perfect dessert for relaxed family gatherings or festive celebrations. Plus, they’re customizable for any palate—whether you prefer a vegan twist or an extra crunch with Oreos, there’s a delightful version just for you. So, are you ready to elevate your dessert game with these charming creations? Let’s dive into the recipe and bring some excitement to the dinner table!
Why Try Matcha Ice Cream Mooncakes?
Ease of Preparation: These mooncakes require absolutely no baking, making them the perfect dessert for busy evenings or warm days.
Unique Flavor Profile: The blend of earthy matcha and creamy white chocolate creates a deliciously intriguing taste that will surprise your taste buds.
Customizable Delight: Want a twist? Try adding seasonal berries or switching to cocoa powder for a chocolate version—there’s no limit to your creativity!
Crowd-Pleaser: Whether it’s a family dinner or a festive gathering, these beautiful mooncakes are sure to impress your guests and leave them craving more.
Fun for Everyone: Making these matcha mooncakes can be a fun cooking activity with family or friends; everyone will love putting their own spin on them!
For a refreshing drink to pair with your dessert, consider serving them with Italian Cream Soda; it’s a delightful complement!
Matcha Ice Cream Mooncake Ingredients
• Create these delightful treats with just a few simple ingredients!
For the Shell
- White Chocolate – Provides a sweet and creamy outer shell; Substitution: Use dark chocolate for a more intense flavor.
- Coconut Oil – Ensures a smooth chocolate mixture; Substitution: Vegetable oil can also be used.
- Matcha Powder – Infuses both the shell and filling with vibrant flavor; Note: Use high-quality matcha for the best results.
For the Filling
- Cream Cheese – Forms the rich, creamy filling; Prep Note: Ensure it’s softened for easy mixing.
- Granulated Sugar – Adds sweetness to the filling; Note: Adjust according to taste preferences.
- Heavy Cream – Contributes to the lightness of the filling; Prep Note: Whip until slightly thickened.
- Crushed Oreos – Adds a crunchy texture and contrasting flavor; Substitution: Swap with your favorite cookies if desired.
Step‑by‑Step Instructions for Matcha Ice Cream Mooncakes
Step 1: Prepare Oreos
Begin by crushing the Oreo cookies into fine crumbs using a food processor or by placing them in a zip-top bag and using a rolling pin. Aim for a texture that resembles sand. Once crushed, set the cookie crumbs aside for later use in the creamy filling of your Matcha Ice Cream Mooncakes.
Step 2: Soften Cream Cheese
Take the cream cheese out of the refrigerator and let it sit at room temperature for about 30 minutes. This will ensure it softens appropriately, making it easier to blend smoothly. A creamy texture is essential to create a delicious filling for your mooncakes.
Step 3: Prepare Molds
While the cream cheese softens, clean and thoroughly dry your silicone mooncake molds. It’s important to ensure there’s no moisture inside, as this could cause the chocolate to seize. Dry molds will help your Matcha Ice Cream Mooncakes maintain their beautiful shape.
Step 4: Melt Chocolate
In a double boiler, combine the white chocolate and coconut oil. Heat gently over low flame until the chocolate is completely melted and smooth, stirring occasionally to prevent burning. Once melted, add the matcha powder and mix until fully dissolved and vibrant in color.
Step 5: Coat Molds
Pour a thin layer of the matcha chocolate mixture into the prepared silicone molds. Use a spatula to spread it evenly if needed. Place the filled molds in the freezer for 15-20 minutes, or until the chocolate is firm to the touch, providing a solid shell for your mooncakes.
Step 6: Mix Filling
In a mixing bowl, beat the softened cream cheese with granulated sugar until the mixture is smooth and creamy. Gently fold in the matcha powder, whipped heavy cream, and crushed Oreo bits, blending until it achieves a light and airy consistency ready to fill your mooncakes.
Step 7: Assemble Mooncakes
After the chocolate shells have set, carefully pipe or spoon the creamy filling into each chocolate shell, leaving a bit of space at the top. Once filled, pour the remaining matcha chocolate over the top of each mold to seal them, and place them back in the freezer for 3-4 hours until fully set.
Step 8: Unmold
Once your Matcha Ice Cream Mooncakes have set, remove them from the freezer. Let them sit for a few minutes at room temperature to slightly soften. This will help you gently unmold them without breaking. Carefully push each mooncake out of the mold for a beautiful presentation.
Step 9: Serve
Allow the mooncakes to sit at room temperature for a few minutes before serving, as this will enhance their creamy texture. These tantalizing Matcha Ice Cream Mooncakes are now ready to delight your family and friends—enjoy the vibrant flavors!
What to Serve with No-Bake Matcha Ice Cream Mooncakes?
Indulging in the vibrant flavors of matcha mooncakes calls for delicious pairings to create an unforgettable dessert experience.
-
Sweet Red Bean Soup: This traditional dish adds warmth and a pleasant sweetness that balances the richness of the mooncakes. Its silky texture creates an enjoyable contrast.
-
Green Tea Latte: A refreshing, slightly bitter beverage that beautifully enhances the matcha flavor in your mooncakes, making every bite a harmonious delight.
-
Fresh Berries: Juicy strawberries or tangy raspberries add a pop of color and tartness, complementing the creamy, sweet filling and elevating overall freshness.
-
Whipped Coconut Cream: This dairy-free option offers a light, luscious counterpart to the mooncakes, providing an added layer of texture and tropical flavor.
-
Almond Cookies: Their crunchy texture and nutty flavor create a delightful contrast to the softness of the matcha mooncakes, making for a satisfying treat.
-
Mint Iced Tea: The refreshing and cool qualities of mint tea cleanse the palate, making each mooncake feel like a new experience with every bite.
-
Chocolate Dipped Fruit: Offer a variety of fruits like banana or pineapple dipped in dark chocolate to add a fun and decadent twist to your dessert spread.
-
Pistachio Ice Cream: This nutty treat complements the earthiness of matcha while adding a creaminess that delights the senses, making for a perfect pairing.
These pairing suggestions not only elevate your dinner table aesthetics but also enhance the incredible experience of savoring No-Bake Matcha Ice Cream Mooncakes!
Storage Tips for Matcha Ice Cream Mooncakes
Fridge: Store your Matcha Ice Cream Mooncakes in an airtight container for up to 3 days. This helps maintain their creamy texture and vibrant flavor.
Freezer: If you want to keep them longer, they can be frozen for 1-2 weeks. Just ensure they are well-wrapped to prevent freezer burn.
Thawing: When ready to enjoy, let the mooncakes sit at room temperature for about 5-10 minutes before serving. This will enhance their creamy filling.
Flash Freezing: For extra precaution, consider flash freezing individual mooncakes on a baking sheet before transferring them to a container. This prevents them from sticking together while frozen.
Matcha Ice Cream Mooncakes Variations
Feel free to get creative with your Matcha Ice Cream Mooncakes to suit your taste buds and dietary needs!
- Chocolate Variation: Swap out matcha powder for cocoa powder to create a rich, chocolatey mooncake that still brings the same delightful texture.
- Berry Bliss: Stir in seasonal berries, like raspberries or strawberries, into the filling for a burst of color and fruity sweetness.
- Vegan Version: Use dairy-free cream cheese and whipped coconut cream, making it a deliciously creamy vegan treat that everyone can enjoy.
- Nutty Crunch: Add chopped nuts, such as almonds or walnuts, into the filling for an unexpected crunch that elevates your mooncakes.
- Spiced Delight: Incorporate a pinch of cinnamon or ginger into your filling for a warm flavor twist that pairs beautifully with the matcha.
- Coconut Dream: Replace crushed Oreos with toasted coconut flakes in the filling to give your mooncakes a tropical flair, perfect for summer gatherings.
- Extra Creamy: Increase the amount of heavy cream for an even richer filling, creating a silkier mouthfeel that melts in your mouth.
- Heat It Up: For those who like a kick, try adding a small amount of chili powder or cayenne pepper to the filling, providing an exciting surprise.
For a delightful beverage pairing, why not serve your mooncakes with a refreshing Italian Cream Soda? It’s a sweet and bubbly complement to your creamy dessert that you won’t want to miss!
Make Ahead Options
These No-Bake Matcha Ice Cream Mooncakes are a fantastic choice for meal prep enthusiasts! You can prepare the chocolate shells and filling up to 24 hours in advance, allowing you to spend more time enjoying the moment. To do this, simply melt the white chocolate and matcha, coat your molds, and allow the shells to set in the freezer. Meanwhile, mix your cream cheese filling without the crushed Oreos to retain that delightful crunch. Store both components separately in airtight containers in the refrigerator. When ready to serve, just fill the chocolate shells with the creamy mixture, sprinkle in the Oreos, and pop them back in the freezer for several hours. This approach ensures your mooncakes are just as delicious and fresh when served!
Expert Tips for Matcha Ice Cream Mooncakes
-
Choosing Quality Matcha: Use high-quality matcha powder for the best flavor. Lower-quality matcha can taste overly bitter and affect your final dessert.
-
Temperature Matters: Ensure cream cheese is at room temperature before mixing; this helps achieve a smooth filling without lumps.
-
Avoid Moisture: Ensure your molds are completely dry when coating with chocolate, as any moisture can cause the chocolate to stick and ruin your mooncakes.
-
Watch Your Consistency: If your melted chocolate feels too soft, check your coconut oil ratio; adjusting it can help achieve a firmer shell for your Matcha Ice Cream Mooncakes.
-
Experiment with Fillings: Don’t hesitate to mix in your favorite flavors or textures, like nuts or dried fruit, to create a truly custom filling that suits your taste!
-
Freezing Times: Allow enough time for the mooncakes to set in the freezer; rushing this step can lead to a soft, unsettled filling.
Matcha Ice Cream Mooncakes Recipe FAQs
How do I choose the right matcha powder?
Absolutely! For the best flavor in your Matcha Ice Cream Mooncakes, it’s crucial to select high-quality matcha powder. Look for a vibrant green color and a fine texture. Ceremonial grade matcha is ideal for desserts, as it has a rich, smooth taste without the bitterness that can come from lower-quality powders.
How should I store leftover mooncakes?
Very simply! You can store your Matcha Ice Cream Mooncakes in an airtight container in the fridge for up to 3 days. This keeps them fresh and maintains their creamy texture. If you need to keep them longer, they can be frozen for 1-2 weeks. Just be sure they are well-wrapped to prevent freezer burn.
Can I freeze these mooncakes? If so, how?
Absolutely! To freeze your Matcha Ice Cream Mooncakes, first let them set in the freezer for 3-4 hours as instructed in the recipe. Once they are fully frozen, consider flash freezing them individually on a baking sheet, ensuring they do not touch each other. Once solid, transfer them to an airtight container with parchment paper between layers to avoid sticking. They can last for about 1-2 weeks in the freezer.
What can I do if my chocolate shell is too soft?
Don’t worry; this is a common issue! If your melted chocolate feels too soft when coating the molds, it may have too much coconut oil. Next time, try reducing the amount by a teaspoon at a time until you achieve a firmer consistency. Additionally, ensure that your melted chocolate is not overheated, as this can also affect its texture.
Are there any dietary considerations for these mooncakes?
Very much so! If you’re catering to dietary restrictions, these Matcha Ice Cream Mooncakes can easily be tailored. For a vegan variation, substitute cream cheese with dairy-free cream cheese and replace heavy cream with coconut cream. Also, check the ingredients of your chocolate and Oreos, as some may contain milk or other allergens.
How long do these mooncakes keep their texture?
A great question! When stored properly in the fridge, your mooncakes should maintain their delightful creamy texture for up to 3 days. If frozen, allow 5-10 minutes of thawing at room temperature before serving to ensure the filling is perfectly soft and enjoyable. This will help preserve the beautiful balance of flavors!
Matcha Ice Cream Mooncakes: No-Bake Delight You’ll Love
Ingredients
Equipment
Method
- Begin by crushing the Oreo cookies into fine crumbs using a food processor or by placing them in a zip-top bag and using a rolling pin. Aim for a texture that resembles sand. Once crushed, set the cookie crumbs aside for later use in the creamy filling of your Matcha Ice Cream Mooncakes.
- Take the cream cheese out of the refrigerator and let it sit at room temperature for about 30 minutes. This will ensure it softens appropriately, making it easier to blend smoothly. A creamy texture is essential to create a delicious filling for your mooncakes.
- While the cream cheese softens, clean and thoroughly dry your silicone mooncake molds. It’s important to ensure there’s no moisture inside, as this could cause the chocolate to seize. Dry molds will help your Matcha Ice Cream Mooncakes maintain their beautiful shape.
- In a double boiler, combine the white chocolate and coconut oil. Heat gently over low flame until the chocolate is completely melted and smooth, stirring occasionally to prevent burning. Once melted, add the matcha powder and mix until fully dissolved and vibrant in color.
- Pour a thin layer of the matcha chocolate mixture into the prepared silicone molds. Use a spatula to spread it evenly if needed. Place the filled molds in the freezer for 15-20 minutes, or until the chocolate is firm to the touch, providing a solid shell for your mooncakes.
- In a mixing bowl, beat the softened cream cheese with granulated sugar until the mixture is smooth and creamy. Gently fold in the matcha powder, whipped heavy cream, and crushed Oreo bits, blending until it achieves a light and airy consistency ready to fill your mooncakes.
- After the chocolate shells have set, carefully pipe or spoon the creamy filling into each chocolate shell, leaving a bit of space at the top. Once filled, pour the remaining matcha chocolate over the top of each mold to seal them, and place them back in the freezer for 3-4 hours until fully set.
- Once your Matcha Ice Cream Mooncakes have set, remove them from the freezer. Let them sit for a few minutes at room temperature to slightly soften. This will help you gently unmold them without breaking. Carefully push each mooncake out of the mold for a beautiful presentation.
- Allow the mooncakes to sit at room temperature for a few minutes before serving, as this will enhance their creamy texture. These tantalizing Matcha Ice Cream Mooncakes are now ready to delight your family and friends—enjoy the vibrant flavors!
Leave a Reply