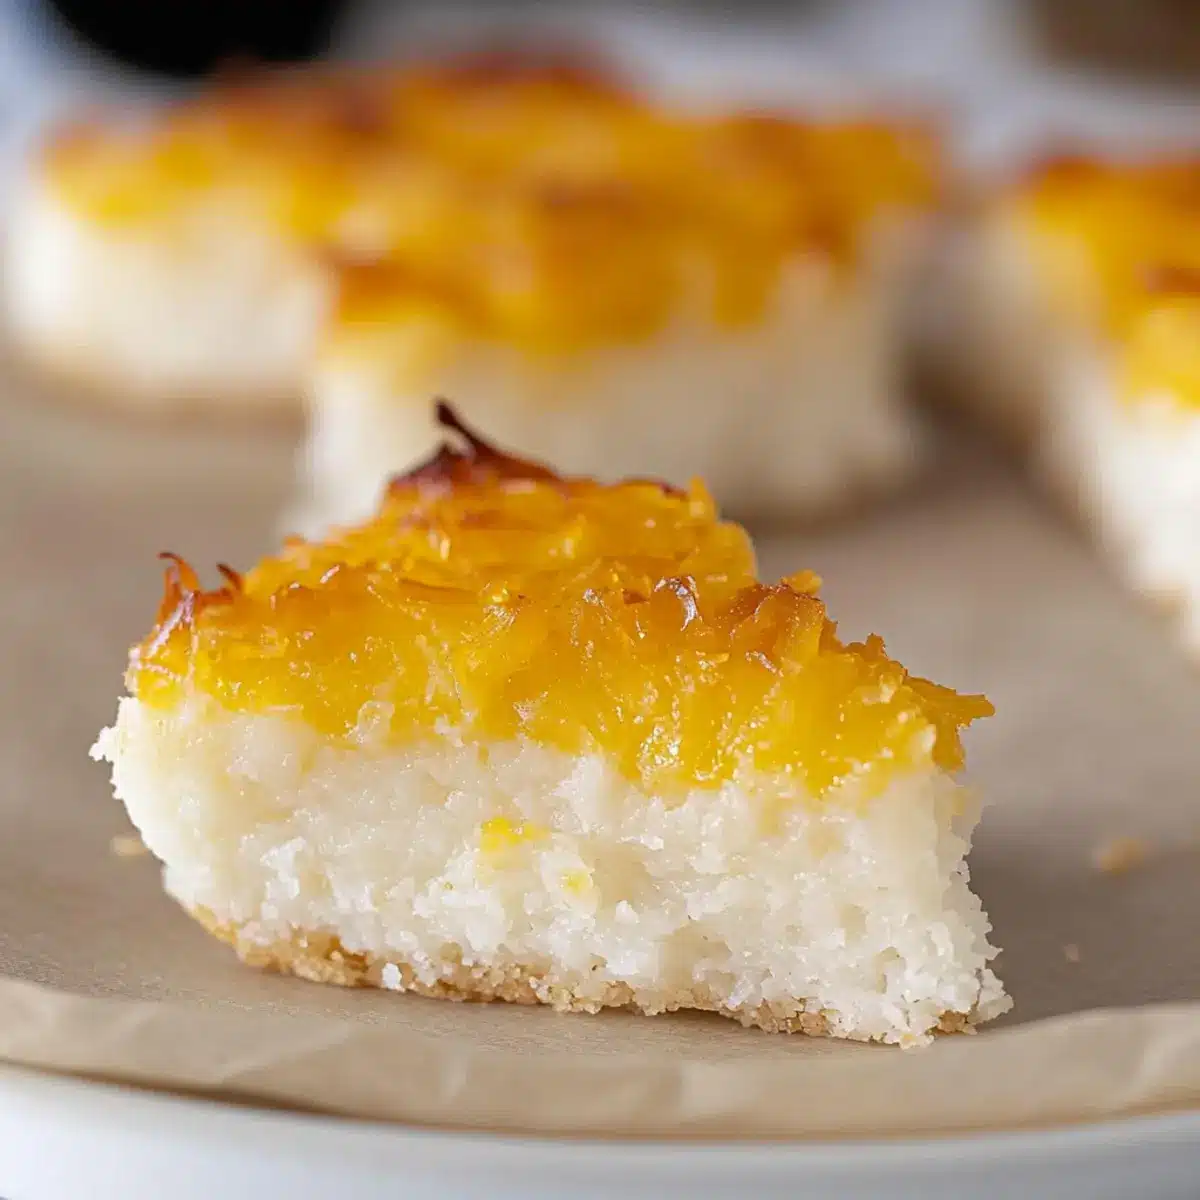
The first slice of this Gluten-Free Indonesian Sticky Coconut Cake is always a delightful surprise. As I prepare this fudgy, chewy treat, I can almost hear the streets of Indonesia bustling with life, where Wingko Babat is sold in vibrant markets. This dessert is a crowd-pleaser, bringing together loved ones and flavors that dance on your palate. It’s a breeze to whip up, perfect for those afternoons when you want something special without spending hours in the kitchen. Rich, sticky, and full of coconut goodness, every bite is a small celebration of tradition and creativity. Plus, it’s gluten-free, making it accessible for everyone to enjoy! Ready to step into the world of Indonesian flavors with me? Let’s get started!
Why Is This Cake a Must-Try?
Delightful Texture: The blend of glutinous rice flour and coconut creates a chewy, sticky bite that’s truly unique among desserts.
Quick Preparation: In just a bit over an hour, you can have this delightful cake ready, making it perfect for unexpected guests or a sweet afternoon treat.
Coconut Lovers’ Dream: If you adore coconut, this recipe delivers with a rich flavor profile that fully embraces its tropical essence.
Adaptable Ingredients: Whether you prefer a vegan option with aquafaba or want to experiment with coconut sugar, this recipe welcomes creativity.
Cultural Connection: Bringing a piece of Indonesia to your home, this cake echoes the vibrant street food scene and offers a taste of tradition in every bite.
Want to try more delightful treats? Check out my Gingerbread Latte Cake or treat yourself to some indulgent Sticky Toffee Pudding!
Sticky Coconut Cake Ingredients
For the Batter
- Eggs (2, separated) – These provide structure and moisture; you can substitute with aquafaba for a vegan version.
- Granulated Sugar (1¼ cup) – This ingredient adds sweetness and moisture retention; no direct substitutes are recommended.
- Full Fat Canned Coconut Milk (2¼ cup) – A rich flavor base; make sure to shake it before use to combine, or mix if separated.
- Shredded Sweetened Coconut (3 cups) – This is the primary flavor and texture component; feel free to replace it with unsweetened coconut if you prefer less sweetness.
- Glutinous Rice Flour (1½ cup) – Essential for achieving the cake’s chewy texture; can be substituted with mochiko, but regular all-purpose flour will not work.
- Vanilla Extract (1 teaspoon) – A flavor enhancer that rounds out the taste; no substitutions needed here.
Ready to bake? The journey towards creating your mouthwatering sticky coconut cake starts with gathering these wonderful ingredients!
Step‑by‑Step Instructions for Sticky Coconut Cake
Step 1: Preheat the Oven
Begin by preheating your oven to 350°F (175°C) to ensure an even bake. While the oven warms up, gather your tools, including an 8×8-inch baking pan, mixing bowls, and a whisk. This Indonesian Sticky Coconut Cake needs a hot environment to become beautifully sticky and chewy, so starting with the right temperature is key.
Step 2: Whisk the Egg Whites and Sugar
In a large mixing bowl, combine the egg whites and granulated sugar. Using your whisk, beat them together until well blended and frothy, approximately 2-3 minutes. This mixture will provide the necessary volume and sweetness for your cake, contributing to its delightful texture. You want a smooth base before moving on to the next step.
Step 3: Add Coconut Milk and Ingredients
Gradually pour in the full-fat canned coconut milk to the egg and sugar mixture, whisking continuously to integrate fully. Next, fold in the shredded coconut, glutinous rice flour, and vanilla extract, ensuring there are no lumps. This step is essential for achieving that rich and sticky consistency of the cake, characteristic of Indonesian Sticky Coconut Cakes.
Step 4: Pour the Batter into the Pan
Carefully pour the batter into your prepared 8×8-inch baking pan, smoothing the top with a spatula. Make sure to evenly distribute the mixture to promote uniform baking. Once the batter is settled, pop it into the preheated oven, and let it bake for approximately 45 minutes, or until the top is a lovely golden brown and a toothpick comes out clean.
Step 5: Brush with Egg Yolks
Once the cake is baked, remove it from the oven and allow it to cool slightly. Meanwhile, in a small bowl, mix the reserved egg yolks with a splash of water to create an egg wash. Gently brush this mixture over the warm cake, giving it a beautiful glossy finish that enhances its appearance and adds richness to the flavor.
Step 6: Broil for Golden Perfection
Switch your oven to the broiler setting and carefully return the cake to the oven. Broil for 5-10 minutes, keeping a close eye on it to prevent burning. The top should turn a golden brown, creating a wonderful contrast with the chewy interior. This step is crucial for creating that inviting crispy layer on top of your Sticky Coconut Cake.
Step 7: Cool and Refrigerate
After broiling, let the cake cool at room temperature for about 30 minutes. Once it’s cooled, cover the cake with plastic wrap and refrigerate it overnight. This resting period allows the flavors to meld and the texture to set properly, making it much easier to cut and handle later, enhancing the overall experience of your Sticky Coconut Cake.
Step 8: Cut and Serve
The next day, when you’re ready to serve, remove the cake from the fridge. Using a sharp knife, cut the chilled dessert into squares or triangles. You can serve the Sticky Coconut Cake cold or at room temperature, allowing everyone to relish in this delightful fusion of flavors that captures the essence of Indonesian street food.
Make Ahead Options
These Gluten-Free Indonesian Sticky Coconut Cakes are a fantastic option for meal prep, as most of the work can be done ahead of time! You can mix the batter and refrigerate it up to 24 hours in advance, which not only saves time but also lets the flavors develop beautifully. Simply pour the mixture into the baking pan and bake when you’re ready to eat. For even better results, let the finished cake cool, cover it, and refrigerate it overnight to ensure it sets properly—this makes cutting it tidy and easy. When you’re ready to serve, brush with egg yolk and broil it for that golden touch. Trust me, it will be just as delicious, saving you precious time on busy weeknights!
Expert Tips for Sticky Coconut Cake
-
Measure Precisely: Accurate measurements of ingredients are crucial for achieving the right chewy texture in your sticky coconut cake.
-
Mix Well: Make sure to whisk the mixture thoroughly to avoid lumps, especially when combining the coconut milk and flour. This step is key for the cake’s consistency.
-
Avoid Over-Baking: Keep an eye on the cake while it’s baking and broiling. Over-baking can dry it out and change that delightful texture you aim for.
-
Cool Properly: Allow the cake to cool completely before refrigerating. This helps set the flavors and makes cutting easier, ensuring each piece is just right.
-
Storage Matters: For the best experience, store the cake in an airtight container in the refrigerator and consume within two weeks. You can also freeze portions for later enjoyment!
What to Serve with Gluten-Free Indonesian Sticky Coconut Cake?
Indulge in a complete dining experience as you pair your delicious dessert with complementary flavors and textures.
- Fresh Tropical Fruit: Slices of mango or pineapple provide a refreshing contrast, balancing the sweetness of the cake perfectly.
- Coconut Whipped Cream: A dollop of creamy coconut whipped cream enhances the cake’s rich coconut flavor, creating a lush mouthfeel.
- Iced Coffee or Tea: The café-style freshness of iced coffee or herbal tea makes for a delightful sip alongside this luxurious treat.
- Roasted Nuts: A handful of salted roasted cashews or almonds offers a satisfying crunch, elevating the cake’s sticky texture.
- Sweet Tea with Lime: A glass of sweet iced tea infused with lime brightens up the palate, adding zing between bites of dessert.
- Chocolate Drizzle: A touch of melted dark chocolate drizzled over the cake adds decadence and a delightful richness to each bite.
- Chilled Coconut Milk: Enjoy a glass of chilled coconut milk for a refreshing and soothing drink that resonates with the cake’s essence.
- Pandan Ice Cream: This unique ice cream flavor adds an aromatic touch that beautifully complements the cake’s tropical notes.
- Fruit Salad with Mint: A vibrant fruit salad, garnished with mint, revives the taste buds while accentuating the cake’s flavors.
Sticky Coconut Cake Variations & Substitutions
Feel free to explore these delightful twists and substitutions to make this cake uniquely yours, enhancing its flavor and appeal!
-
Vegan Option: Replace eggs with aquafaba (approximately 6 tablespoons) for a plant-based treat that retains all the chewiness.
-
Lower Sugar: Try using coconut sugar instead of granulated sugar for a deeper, caramel-like flavor that pairs wonderfully with coconut.
-
Flavor Boost: Add 1-2 teaspoons of almond or coconut extract in place of vanilla to elevate the cake’s aroma with delicate nutty notes.
-
Texture Twist: Fold in chopped nuts or seeds, like almonds or sunflower seeds, to add a satisfying crunch amidst the chewy goodness.
-
Fruitful Addition: Mix in fresh chopped mango or pineapple for bursts of tropical sweetness that enhance the cake’s fruity flavors.
-
Spiced Version: Add a pinch of cinnamon or nutmeg to the batter for a subtle warmth, perfectly complementing the sweet coconut essence.
-
Delightfully Sweet: For those who prefer a less sweet bite, opt for unsweetened shredded coconut instead of sweetened; it adds a great texture too.
-
Chocolate Lovers: Swirl in some cocoa powder or chocolate chips for an indulgent twist that combines coconut with rich chocolatey goodness.
Want to indulge in more coconut magic? Don’t miss my Baked Cod Coconut for a savory treat or try a slice of the Gingerbread Latte Cake for a festive flair!
How to Store and Freeze Sticky Coconut Cake
Fridge: Store your sticky coconut cake in an airtight container for up to 2 weeks. This helps maintain its moist, chewy texture and means you can enjoy it for longer!
Freezer: For longer storage, wrap individual pieces in plastic wrap and then place them in a freezer-safe bag. The cake can be frozen for up to 3 months, preserving that delightful coconut flavor.
Thawing: When you’re ready to indulge, thaw the frozen cake in the fridge overnight or at room temperature for a few hours. Enjoy it chilled or at room temperature!
Reheating: If you prefer it warm, gently reheat individual pieces in the microwave for about 10-15 seconds, or until just warmed through. This enhances the cake’s sticky and fudgy qualities!
Gluten-Free Indonesian Sticky Coconut Cake (Wingko Babat) Recipe FAQs
How do I select the best coconut milk for this recipe?
Absolutely! Look for full-fat canned coconut milk, which provides the highest richness and flavor. Shake the can well before opening to mix any separated layers. I recommend choosing organic or BPA-free brands to ensure the best taste and quality.
How should I store my Sticky Coconut Cake after baking?
Very important! Store your cake in an airtight container in the fridge for up to 2 weeks. This helps maintain its moist, chewy texture. If you want to keep it longer, you can freeze individual pieces wrapped in plastic wrap and placed in a freezer-safe bag for up to 3 months.
Can I freeze this cake, and if so, how?
Of course! To freeze your Sticky Coconut Cake, first cut it into individual squares or triangles. Wrap each piece tightly in plastic wrap, then place them in a freezer-safe bag or container. This protects the cake from freezer burn and preserves its delightful coconut flavor. When you’re ready to enjoy, just thaw the pieces in the fridge overnight or at room temperature for a few hours.
What should I do if my cake isn’t setting properly?
If your cake isn’t setting, it might need more baking time. Sometimes ovens can vary in temperature; I’d recommend checking it at the 45-minute mark but keeping it in a little longer if it still looks underbaked. If it’s too sticky, ensure the ratio of ingredients, especially glutinous rice flour to coconut milk, is correct next time.
Are there any allergens in this recipe I should be aware of?
Great question! This recipe contains eggs and coconut, which are common allergens. If you’re making this for someone with dietary restrictions, you can substitute the eggs with aquafaba for a vegan option. The cake itself is gluten-free, so it’s safe for those with gluten sensitivities! Always double-check ingredient labels based on individual allergies.
What variations can I try to make this cake different?
The more the merrier! You can experiment with substituting coconut sugar for all granulated sugar, which gives the cake a deeper flavor. Additionally, try incorporating different flavored extracts like almond or even a splash of rum for a unique twist.
Irresistible Sticky Coconut Cake That Melts in Your Mouth
Ingredients
Equipment
Method
- Preheat your oven to 350°F (175°C). Gather your tools including an 8x8-inch baking pan, mixing bowls, and a whisk.
- In a large mixing bowl, whisk egg whites and granulated sugar until frothy, about 2-3 minutes.
- Gradually add the coconut milk to the egg and sugar mixture, whisking continuously. Fold in coconut, glutinous rice flour, and vanilla until smooth.
- Pour the batter into the prepared pan, smoothing the top, and bake for about 45 minutes.
- Mix reserved egg yolks with a splash of water to create an egg wash and brush over cake after baking.
- Broil the cake for 5-10 minutes for a golden top, watching closely to prevent burning.
- Let the cake cool at room temperature for about 30 minutes, then refrigerate overnight.
- Cut the chilled cake into squares or triangles and serve cold or at room temperature.
Leave a Reply