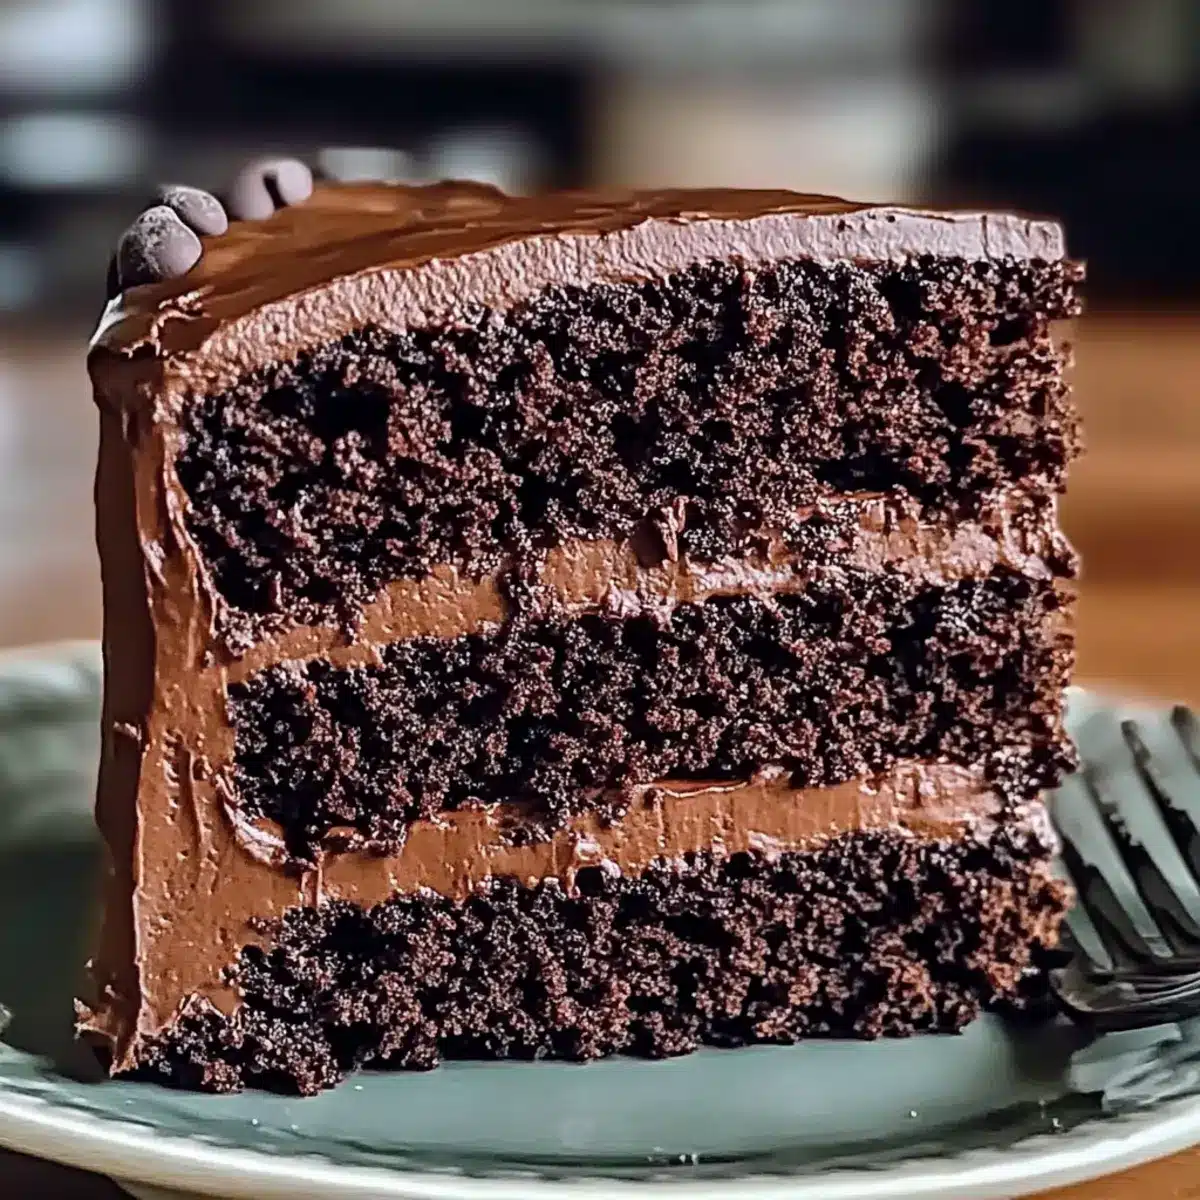
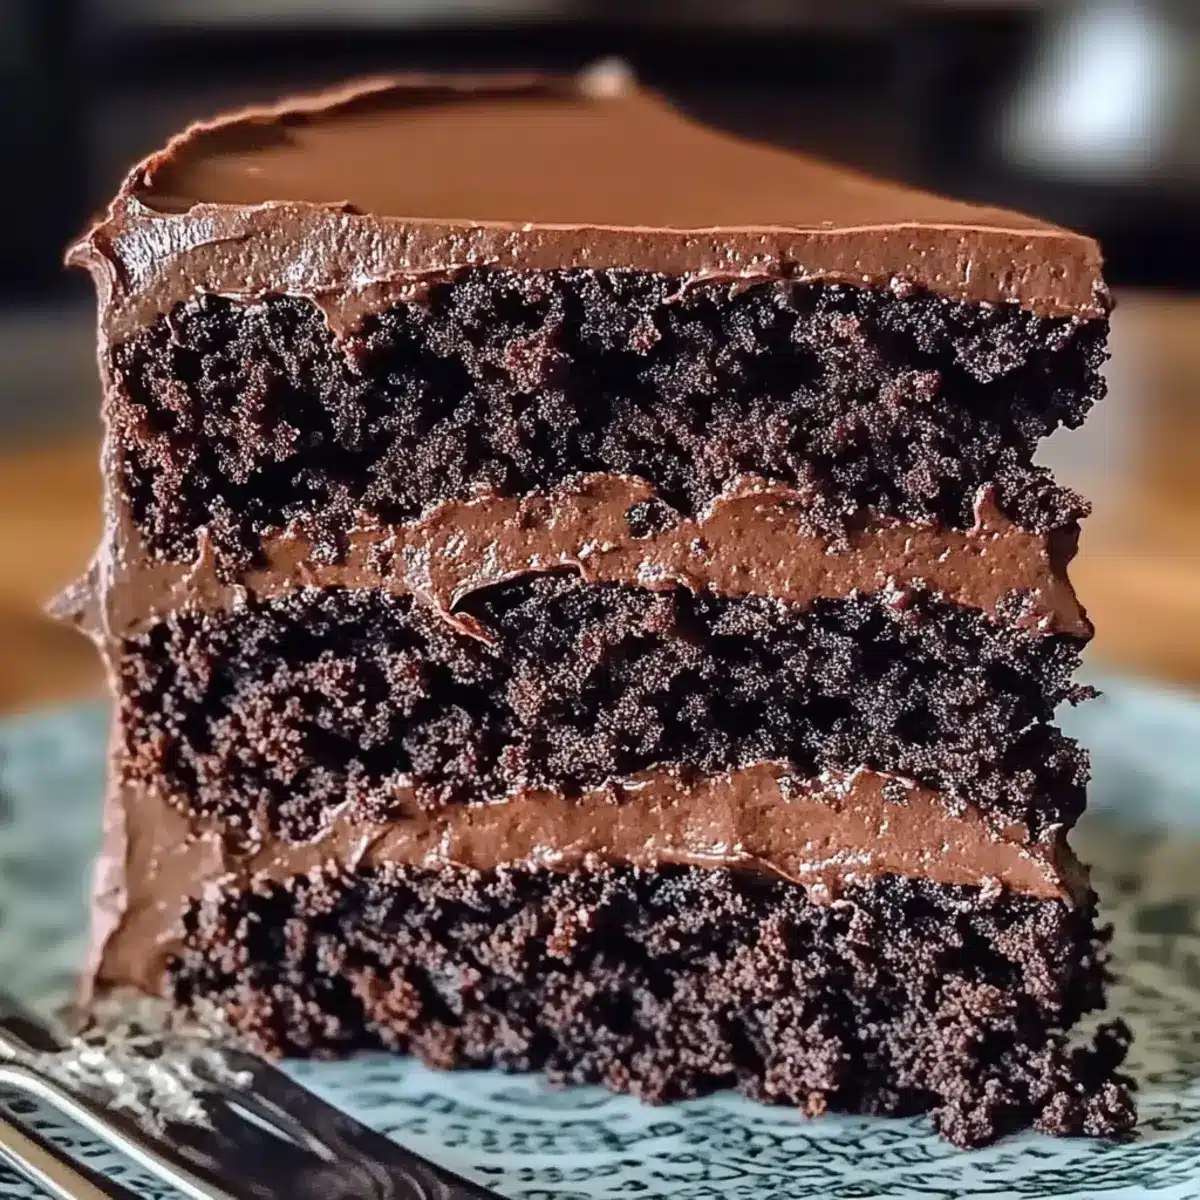
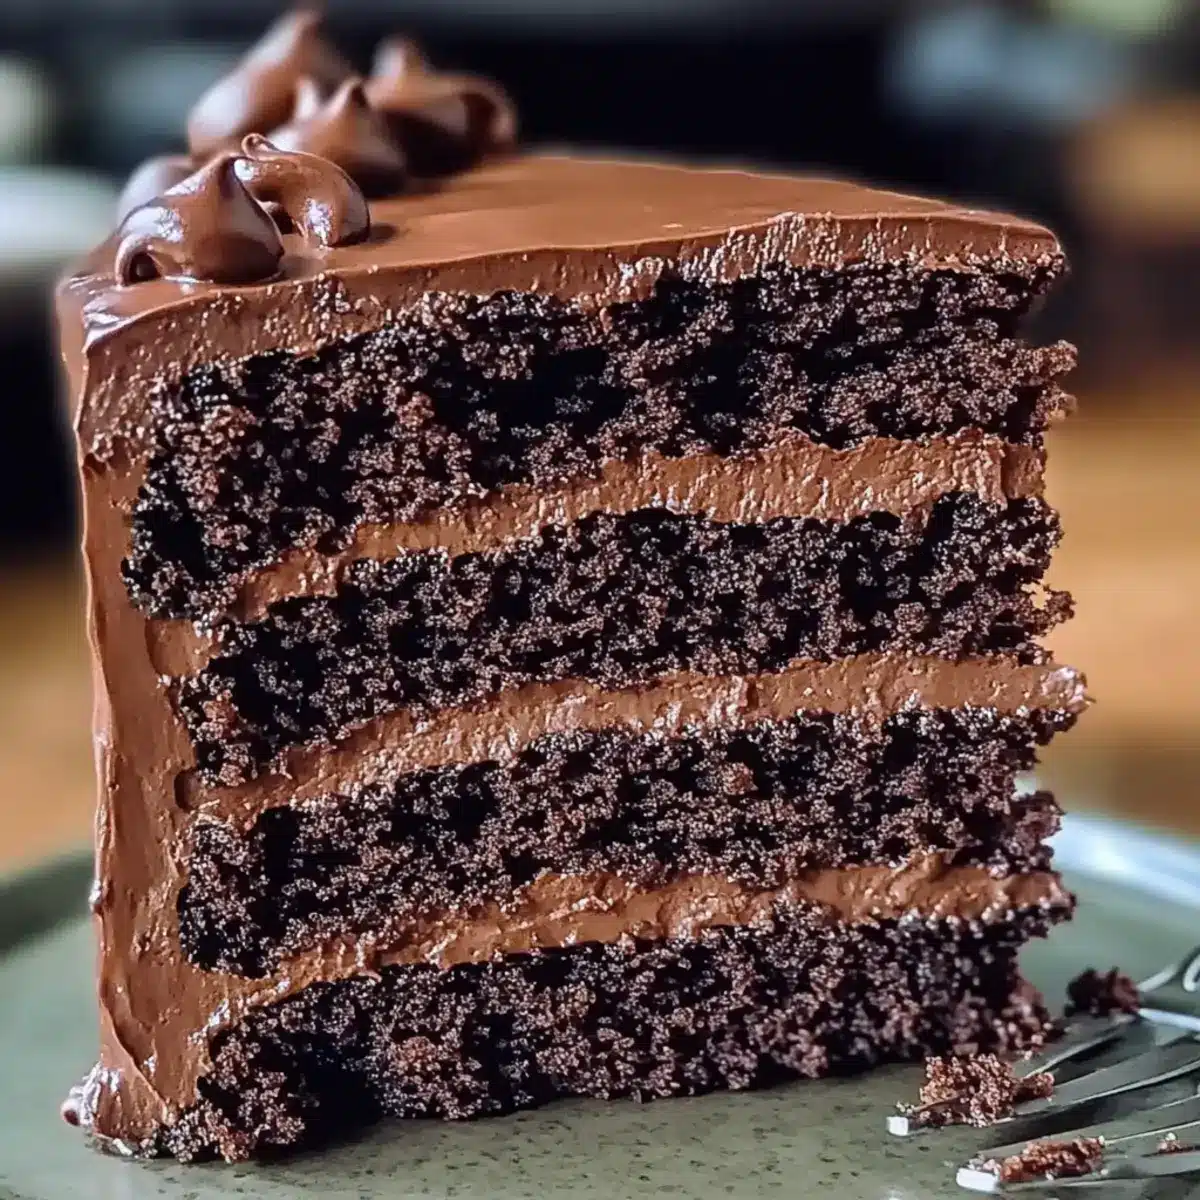
“Just one bite of this Matilda Chocolate Cake and you’ll feel the magic.” Inspired by the enchanting world of Roald Dahl, this rich dessert brings joy and nostalgia to family gatherings and special occasions. Our ultra-moist triple chocolate cake features a delightful blend of fudgy layers and glossy ganache that’s sure to impress any chocolate lover. Plus, it’s surprisingly easy to whip up, making it a go-to choice for busy bakers wanting to create something memorable. From birthdays to cozy movie nights, this cake is a crowd-pleaser that caters to all ages. Curious about how to bring this dreamy chocolate creation to life? Let’s dive into the recipe!
Why is Matilda Chocolate Cake a must-try?
Decadent flavor: The rich combination of dark chocolate and Dutch-processed cocoa creates an unforgettable chocolate experience that leaves everyone craving more.
Ultra-moist texture: Each bite offers a meltingly soft, fudgy delight reminiscent of brownies, making it perfect for all chocolate enthusiasts.
Nostalgic inspiration: Drawing from Roald Dahl’s beloved story, this cake adds a whimsical touch to your celebrations.
Versatile options: Whether you want a gluten-free version or wish to experiment with white chocolate chips, this recipe allows for creativity while staying true to its roots.
Quick and easy: With straightforward steps, busy home bakers can impress friends and family without spending hours in the kitchen.
Matilda Chocolate Cake Ingredients
For the Cake
- Dark Chocolate – High-quality, chopped; provides deep chocolate flavor and moisture, use 60-70% cocoa for best results.
- Dutch-Processed Cocoa Powder – Sifted; adds richness and enhances the chocolatey taste, no substitutions recommended.
- All-Purpose Flour – Essential for structure; substitute with gluten-free flour if needed in a 1:1 ratio.
- Granulated Sugar – Adds sweetness; brown sugar can be used as a partial substitute for added moisture.
- Light Brown Sugar – Packed; enhances moisture and adds depth of flavor.
- Unsalted Butter – Room temperature; adds richness and tenderness, can be substituted with vegan butter for a dairy-free version.
- Large Eggs – Room temperature; essential for binding and moisture.
- Buttermilk – Adds tanginess and moisture; substitute with milk plus vinegar or yogurt if unavailable.
- Baking Soda & Baking Powder – Provide leavening; avoid substitutions for best results.
- Espresso Powder – Optional; enhances overall chocolate flavor without adding coffee taste, omit if undesired.
- Pure Vanilla Extract – Adds depth; no substitutions, though imitation vanilla can be used.
- Salt – Essential to balance sweetness; enhances flavor.
- Semi-Sweet Chocolate Chips – Adds texture and pockets of melted chocolate; substitute with any favorite chocolate type (dark or milk).
For the Ganache
- Heavy Cream – Heated just until simmering; combines with chocolate to create a luxurious ganache.
- Additional Butter – Improves richness and shine; don’t skip for the best glossy finish.
- Extra Vanilla Extract – For added flavor depth; can be adjusted to taste.
With these ingredients at hand, you’re all set to create the most delightful Matilda Chocolate Cake!
Step‑by‑Step Instructions for Matilda Chocolate Cake
Step 1: Preheat the Oven
Begin by preheating your oven to 350°F (175°C). Prepare two 9-inch round cake pans by lining the bottoms with parchment paper and lightly greasing the sides. This ensures your Matilda Chocolate Cake layers release easily after baking and helps achieve a beautifully smooth finish.
Step 2: Melt the Chocolate
In a microwave-safe bowl or double boiler, melt the chopped dark chocolate until just smooth, stirring every 30 seconds to avoid burning. Once melted, allow the chocolate to cool slightly while you move on to the next step, ensuring it retains a luscious texture without solidifying again.
Step 3: Cream the Butter and Sugars
In a large mixing bowl, combine the room-temperature unsalted butter, granulated sugar, and light brown sugar. Using an electric mixer, beat on medium speed for about 3 minutes until the mixture is fluffy and pale. This step is crucial for incorporating air, making your Matilda Chocolate Cake rise beautifully.
Step 4: Incorporate the Eggs
Add the large eggs, one at a time, to the butter and sugar mixture, ensuring each egg is fully incorporated before adding the next. After mixing in the eggs, add the pure vanilla extract, combining everything until smooth. This adds richness and binds the ingredients together.
Step 5: Mix in the Melted Chocolate
Gently fold the melted chocolate into the butter mixture until fully incorporated. You should have a glossy, rich batter that embodies the essence of the Matilda Chocolate Cake. Take your time here to ensure even distribution of the chocolate for the best flavor.
Step 6: Combine the Dry Ingredients
In a separate bowl, whisk together the all-purpose flour, Dutch-processed cocoa powder, baking soda, baking powder, espresso powder (if using), and salt. This step not only mixes the dry ingredients but also aerates them, helping create a lighter cake texture in the final baked product.
Step 7: Alternate Adding Dry Ingredients and Buttermilk
Begin adding the dry ingredients to the chocolate mixture, alternating with the buttermilk. Start and end with the dry ingredients, mixing gently after each addition just until combined. This technique ensures your Matilda Chocolate Cake remains moist and tender without overmixing.
Step 8: Fold in the Chocolate Chips
Using a rubber spatula, gently fold in the semi-sweet chocolate chips until evenly distributed throughout the batter. This creates delightful pockets of melted chocolate in your cake, enhancing its flavor and richness with every bite.
Step 9: Bake the Cakes
Divide the batter equally between the prepared cake pans. Place in the preheated oven and bake for 30-35 minutes, or until a toothpick inserted into the center comes out with moist crumbs. Keep an eye on them; you want the cakes to spring back slightly when pressed.
Step 10: Cool the Cakes
Once baked, remove the pans from the oven and let them cool in the pans for about 10 minutes. Carefully transfer the cakes to a wire rack to cool completely. This step is important to ensure a stable cake structure before adding the luscious ganache.
Step 11: Prepare the Ganache
For the ganache, heat the heavy cream in a small saucepan until just simmering. Remove from heat and pour it over the chopped chocolate in a bowl. Let it sit for 2 minutes, then stir in the extra butter and a splash of vanilla extract until smooth and shiny.
Step 12: Assemble the Cake
Once your cakes are completely cooled, place one layer on a serving platter and spread a generous layer of ganache on top. Add the second cake layer and pour the remaining ganache over the entire cake, letting it drip down the sides for a beautiful finish. Let the ganache set before slicing into your decadent Matilda Chocolate Cake.

How to Store and Freeze Matilda Chocolate Cake
Airtight Container: Store leftover Matilda Chocolate Cake in an airtight container at room temperature for up to 3 days to maintain its delicious moisture and flavor.
Refrigeration: If you need to keep the cake longer, refrigerate it for up to a week, ensuring it’s well-covered to prevent it from drying out.
Freezing: For longer storage, wrap slices or the whole cake tightly in plastic wrap and aluminum foil before placing in the freezer, where it can last for up to 3 months.
Reheating: Thaw the cake overnight in the fridge, then allow it to come to room temperature before serving for the best taste experience.
Expert Tips for Matilda Chocolate Cake
-
Room Temperature Ingredients: Ensure all ingredients are at room temperature to achieve a lighter, fluffier cake, avoiding a dense texture that can ruin your Matilda Chocolate Cake.
-
Chocolate Quality Matters: Use high-quality chocolate for both the cake and ganache. The better the chocolate, the richer and more satisfying your cake will taste.
-
Mix with Care: Avoid overmixing the batter after adding the flour, as this can lead to toughness. Gently fold the ingredients to maintain a moist and tender texture.
-
Cool Completely: Allow cakes to cool fully before applying ganache. This ensures a smooth application and prevents the chocolate from melting and sliding off.
-
Don’t Skip the Cooling Period: Let the cake layers cool in their pans for about 10 minutes before transferring to a wire rack. This helps maintain their structure for a gorgeous finish.
What to Serve with Matilda Chocolate Cake?
Indulging in a slice of Matilda Chocolate Cake opens the door to endless possibilities for delightful pairings that elevate your dessert experience.
- Vanilla Ice Cream: A scoop of creamy vanilla ice cream provides a cool, sweet balance to the rich chocolate flavor, enhancing every bite.
- Fresh Berries: Raspberries or strawberries add a burst of fresh, tart flavor that contrasts beautifully with the cake’s richness.
- Whipped Cream: Light and airy whipped cream offers a perfect fluffiness that cuts through the dense chocolate, creating a delightful texture contrast.
- Chocolate Sauce: For the ultimate chocolate lover, drizzling extra chocolate sauce provides an indulgent touch, amplifying the dessert’s decadent flavors.
- Coffee: Pair with a steaming cup of freshly brewed coffee for a classic combination—its warmth and bitterness can beautifully enhance the cake’s sweetness.
- Mint Tea: A refreshing mint tea after the cake is light and soothing, providing a pleasant herbal note that rounds out the meal beautifully.
- Mint Chocolate Chip Cookies: Serve these alongside the cake for a crunchy and fresh experience that echoes the pleasures of the main dessert.
- Pecan Pie: The nuttiness and sweetness of pecan pie create a glorious contrast to the chocolate and offer a variety of textures on the dessert table.
- Sparkling Water: A crisp sparkling water cleanses the palate and provides a refreshing contrast to the rich flavors of the cake.
Let your imagination run wild with these pairings to create a memorable experience everyone will cherish!
Make Ahead Options
These Matilda Chocolate Cakes are perfect for meal prep, allowing you to create this indulgent dessert with minimal effort on the day of your gathering! You can prepare the cake layers up to 3 days in advance; simply bake, cool completely, and wrap them tightly in plastic wrap before refrigerating. The ganache can also be made up to 2 days ahead; store it in the fridge, and reheat gently before pouring over the cake for a freshly-made taste. When it’s time to serve, assemble the layers with the ganache, and you’ll enjoy a rich, ultra-moist Matilda Chocolate Cake that’s just as delicious as when freshly baked!
Matilda Chocolate Cake Variations & Substitutions
Feel free to unleash your creativity and personalize this Matilda Chocolate Cake with these delightful twists and swaps that will make your taste buds dance.
- Gluten-Free: Substitute all-purpose flour with a high-quality gluten-free flour blend, ensuring a 1:1 ratio for similar texture.
- Dairy-Free: Use vegan butter and coconut milk instead of buttermilk for a dairy-free delight without sacrificing flavor.
- Extra Chocolatey: Add chocolate hazelnut spread between the layers for an indulgent chocolate kick, paired with the ganache for extra richness.
- Different Sweetness: Mix in maple syrup in place of granulated sugar for a unique, flavorful sweetness that complements the chocolate beautifully.
- White Chocolate Chips: Replace semi-sweet chocolate chips with white chocolate chips for added sweetness and a delightful contrast in flavor.
- Nutty Crunch: Fold in chopped nuts, such as walnuts or pecans, for a lovely texture and toasted flavor that enhances each bite.
- Zesty Twist: Add orange zest to the batter for a refreshing hint of citrus that brightens up the deep chocolate flavor.
- Creamy Filling: Whip up a simple cream cheese frosting to spread between the layers for a delightful contrast to the chocolate ganache.
These variations offer a world of possibilities! If you’re feeling adventurous, consider trying some desserts like Chocolate Kiss Acorns or a slice of Gingerbread Latte Cake alongside your cake for a delightful dessert spread.
Matilda Chocolate Cake Recipe FAQs
What type of chocolate should I use for the best flavor?
Absolutely! For the richest flavor, I recommend using high-quality dark chocolate with a cocoa content of 60-70%. This will ensure your Matilda Chocolate Cake is deep in chocolatey goodness and wonderfully moist.
How do I store leftover Matilda Chocolate Cake?
To keep your cake fresh, store leftovers in an airtight container at room temperature for up to 3 days. If you want to extend its life, refrigerate it for up to a week. Just make sure it’s well-covered to prevent drying out!
Can I freeze Matilda Chocolate Cake?
Very! To freeze, wrap slices or the whole cake tightly in plastic wrap, then in aluminum foil. This will protect it from freezer burn and help maintain its taste. It can be frozen for up to 3 months. When you’re ready to enjoy, thaw it overnight in the fridge, allowing it to come to room temperature for the best flavor experience!
What should I do if my cake sinks in the middle?
If you find your cakes sinking in the middle, it could be due to several factors. Firstly, ensure that you’re not overmixing after adding the flour, as this can introduce too much air, leading to collapse. Secondly, verify that your oven is properly preheated and at the right temperature; an oven thermometer can help with this. Lastly, be careful not to open the oven door too early while baking, as this can result in a rapid drop in temperature.
How can I make this cake gluten-free?
To make a gluten-free Matilda Chocolate Cake, simply substitute the all-purpose flour with a high-quality gluten-free flour blend, using a 1:1 ratio. Many blends contain xanthan gum, which helps mimic the texture of gluten. Always check the blend’s instructions for the best results!
Are there any ingredient substitutes for allergies?
For those with dairy allergies, you can substitute unsalted butter with vegan butter and buttermilk can be replaced with a mixture of milk and vinegar or yogurt. This will help maintain moisture and flavor while accommodating dietary restrictions. Feel free to ask about other specific allergies, and I’d be happy to assist you!
Decadent Matilda Chocolate Cake for Your Sweetest Moments
Ingredients
Equipment
Method
- Preheat your oven to 350°F (175°C). Prepare two 9-inch round cake pans by lining the bottoms with parchment paper and lightly greasing the sides.
- In a microwave-safe bowl, melt the chopped dark chocolate until just smooth, stirring every 30 seconds. Allow to cool slightly.
- In a large mixing bowl, combine room-temperature unsalted butter, granulated sugar, and light brown sugar. Beat on medium speed for about 3 minutes until fluffy.
- Add the large eggs one at a time, ensuring each is fully incorporated before adding the next. Mix in the pure vanilla extract.
- Gently fold the melted chocolate into the butter mixture until fully combined.
- In a separate bowl, whisk together the all-purpose flour, Dutch-processed cocoa powder, baking soda, baking powder, espresso powder (if using), and salt.
- Alternately add the dry ingredients and buttermilk to the chocolate mixture, starting and ending with the dry ingredients.
- Fold in the semi-sweet chocolate chips.
- Divide the batter between the prepared cake pans and bake for 30-35 minutes, or until a toothpick comes out with moist crumbs.
- Cool the cakes in the pans for about 10 minutes, then transfer to a wire rack to cool completely.
- For the ganache, heat the heavy cream until just simmering, remove from heat, and pour over chopped chocolate. Let sit for 2 minutes.
- Stir in additional butter and a splash of vanilla extract until smooth.
- Once cooled, assemble the cake by placing one layer on a serving platter, spreading ganache on top, adding the second layer, and pouring remaining ganache over the cake.
Leave a Reply