As I opened the fridge on a lazy weekend afternoon, a delightful sudden revelation hit me – desserts don’t always need an oven! Welcome to the indulgent world of the No-Bake Brownie Refrigerator Cake, where fudgy brownie layers meet creamy pudding and fluffy whipped topping. This simple-to-prepare dessert is perfect for anyone looking to impress friends or family without spending hours in the kitchen. And the best part? It’s completely customizable, allowing gluten-free and dairy-free options to cater to everyone’s taste buds. So, whether you’re planning an evening gathering, a potluck, or just craving a sweet treat, this chilled delight promises to be a hit. Ready to dive in and discover how you can create this layered marvel?
Why is Brownie Refrigerator Cake a Must-Try?
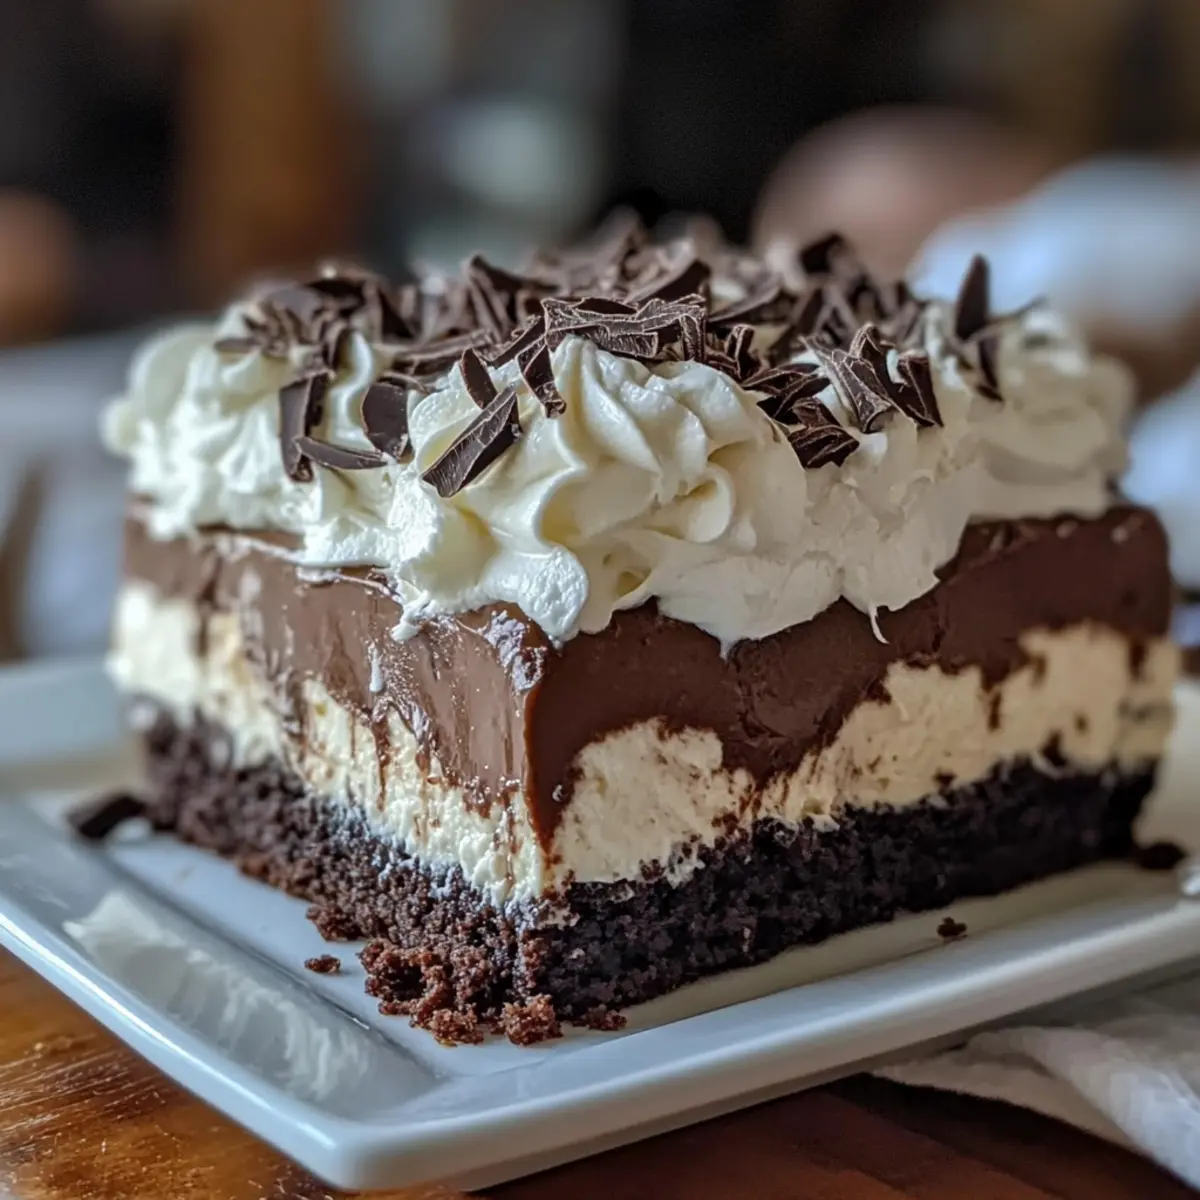
Decadent Delight: This no-bake masterpiece combines fudgy brownies, creamy pudding, and airy whipped topping for a dessert experience like no other.
Customizable: With gluten-free and dairy-free options available, this recipe accommodates various dietary preferences ensuring no one misses out on the indulgence.
Easy Preparation: Minimal effort is required, making it an ideal choice for both novice cooks and busy chefs craving something special.
Make-Ahead Magic: Prepare it in advance to enhance flavors, making it perfect for parties, potlucks, or a sweet surprise on a lazy day.
Impressive Presentation: Layered and chilled, this cake looks stunning on any table, sure to impress your guests with its delightful appearance and taste.
Pair it with a scoop of vanilla ice cream or a drizzle of salted caramel for an extra touch, and don’t forget to explore other dessert ideas like the Gingerbread Latte Cake to keep your dessert rotation exciting!
Brownie Refrigerator Cake Ingredients
• A delightful mix of creamy and fudgy components that’s sure to impress!
For the Brownie Base
- Brownie Mix – The foundation of this cake, providing a fudgy texture. Make sure to let it cool completely before layering!
- Eggs – They give structure to the brownies; adding an extra egg can heighten the fudgy experience.
For the Cream Layer
- Cream Cheese – This adds a rich creaminess to the pudding layer; opt for dairy-free cream cheese for a vegan choice.
For the Pudding Layer
- Chocolate Pudding – This rich filling contrasts beautifully with the brownie base; feel free to substitute with butterscotch or vanilla pudding to customize your Brownie Refrigerator Cake!
For the Topping
- Whipped Topping – Lightens up the dessert and adds a fluffy finish; choose dairy-free options to cater to various dietary needs.
Step‑by‑Step Instructions for Brownie Refrigerator Cake
Step 1: Prepare Brownie Base
Start by baking the brownie mix according to the package instructions, typically at 350°F (175°C) for 20-25 minutes. Once baked, remove the pan from the oven and allow the brownies to cool completely in the pan. This step is essential for achieving the perfect texture, ensuring the brownies are firm enough to support the layers above.
Step 2: Create Cream Cheese Layer
In a medium bowl, blend the cream cheese using a hand mixer until smooth and creamy, which should take about 2-3 minutes. Once the cream cheese is ready, spread it evenly over the cooled brownie base using a spatula. This rich layer will add a delightful contrast to the brownies in your Brownie Refrigerator Cake.
Step 3: Mix Pudding
Prepare the chocolate pudding according to package instructions, typically by whisking the pudding mix with milk for about 2 minutes. Ensure not to over-whisk; you want it thick but smooth. Once ready, gently spread the pudding over the cream cheese layer, making sure to cover it completely for a harmonious blend of flavors in each slice.
Step 4: Add Whipped Topping
Using a spatula, spread the whipped topping evenly over the pudding layer, ensuring a nice, fluffy layer that adds lightness and creaminess. Take care to cover all edges, as this will help seal in the flavors of the Brownie Refrigerator Cake. Aim for a smooth surface for an appealing presentation.
Step 5: Chill
Place the assembled cake in the refrigerator and let it chill for at least 2 hours, or preferably overnight. This chilling time allows the layers to set and the flavors to meld beautifully, resulting in a deliciously decadent texture. Be patient; the longer it sits, the better the experience!
Step 6: Serve
When ready to serve, carefully remove the cake from the refrigerator. Use a sharp knife to slice into squares, wiping the knife clean between cuts for neat edges. The Brownie Refrigerator Cake is beautifully layered, showcasing its creamy pudding and whipped topping, making it a showstopper on any dessert table!
Make Ahead Options
Creating your Brownie Refrigerator Cake in advance is not only a fantastic time-saver but also enhances the flavors as they meld together beautifully! You can prepare the brownie base and let it cool, then layer it with cream cheese and chocolate pudding up to 24 hours prior to serving. Once assembled, simply cover it tightly with plastic wrap and refrigerate for up to 3 days. While chilling, the cake maintains its quality, remaining just as delicious and decadent. When ready to serve, finish by adding the whipped topping, and let it rest for a few minutes at room temperature before slicing. This way, your Brownie Refrigerator Cake is ready to impress with minimal last-minute effort!
How to Store and Freeze Brownie Refrigerator Cake
Fridge: Keep the Brownie Refrigerator Cake covered in an airtight container in the refrigerator for up to 3 days. This will help maintain its freshness and flavor.
Freezer: If you want to store leftovers longer, you can wrap individual slices tightly in plastic wrap and place them in an airtight container. Freeze for up to 2 months.
Thawing: To enjoy frozen slices, thaw them in the refrigerator overnight before serving. This allows the layers to retain their creamy texture.
Reheating: There is no need to reheat; serve cold for a refreshing dessert experience that highlights the rich flavors of the Brownie Refrigerator Cake.
Expert Tips for Brownie Refrigerator Cake
-
Cool Completely: Always allow the brownies to cool completely before adding layers; this ensures they hold their shape and don’t become mushy.
-
Avoid Over-Whisking: When preparing the pudding, be careful not to over-whisk it; a gentle hand ensures the right thickness without becoming runny for your Brownie Refrigerator Cake.
-
Chilling is Crucial: Don’t skip the chilling step; it’s essential for setting the layers and enhancing flavor. A bit of patience makes all the difference!
-
Use a Sharp Knife: For clean, beautiful slices, use a sharp knife and wipe it with a damp cloth between cuts. This keeps each piece looking appealing.
-
Customize Wisely: Feel free to experiment with pudding flavors or toppings; just remember to maintain consistent layer thickness for the best texture in your Brownie Refrigerator Cake.
What to Serve with Brownie Refrigerator Cake?
Savor the sweet richness of this no-bake delight, perfect for elevating any gathering.
- Vanilla Ice Cream: The creaminess balances the rich chocolate flavor, creating a delightful contrast with each bite.
- Fresh Berries: Add a burst of freshness; strawberries or raspberries provide a tartness that beautifully contrasts the sweetness.
- Chocolate Sauce: Drizzle on top for an extra dose of decadence; the silky texture complements the layers magnificently.
- Caramel Drizzle: Sweet and buttery caramel enhances the experience, adding a rich dimension to the dessert.
- Coffee or Espresso: A robust cup brings out the chocolate notes, making each bite feel like an indulgent café treat.
- Mint Leaves: A sprig of mint adds a refreshing touch; the aroma enhances the overall dessert experience.
- Nuts or Crushed Cookies: For a delightful crunch, sprinkle on top; the texture complements the creamy layers.
- Chocolate Milkshake: Pairing this cake with a milkshake takes indulgence to another level, perfect for chocolate lovers.
- Whipped Cream: A light layer of whipped cream on the side offers a fluffy, airy addition to the dish.
- Seasonal Fruits: Seasonal fruits like peaches or mangoes can add a fresh twist and brighten up the dessert table.
Brownie Refrigerator Cake Variations
Feel free to explore different flavors and textures to make this delightful dessert even more your own!
-
Gluten-Free: Swap the regular brownie mix for a gluten-free version to cater to those with dietary restrictions.
-
Dairy-Free: Use dairy-free cream cheese and whipped topping to create a vegan-friendly version of your Brownie Refrigerator Cake, without sacrificing richness.
-
Pudding Varieties: Experiment with flavors like vanilla or caramel pudding for a fun twist, transforming the flavor profile of your dessert beautifully.
-
Fruit Layers: Lighten up the cake by adding fresh fruits like sliced strawberries or raspberries between the layers for a refreshing burst of flavor.
-
Nutty Crunch: Sprinkle some chopped nuts, like pecans or walnuts, over the cream cheese layer for added texture and a delightful crunch in every bite.
-
Seasonal Spices: Add a touch of cinnamon or nutmeg to the brownie batter for a warm spice note that beautifully complements the rich chocolate.
-
Chocolate Chips: Fold in mini chocolate chips into the cream cheese layer for added chocolatey decadence, making each slice even more indulgent.
-
Garnish Ideas: Top with drizzles of caramel or chocolate sauce and fresh mint leaves for an impressive presentation that will wow your guests.
Don’t forget to couple this with a scoop of vanilla ice cream, or perhaps a slice of Gingerbread Latte Cake to keep the sweet tooth entertained! Enjoy experimenting and creating your personalized Brownie Refrigerator Cake!
Brownie Refrigerator Cake Recipe FAQs
How do I choose the right brownie mix?
Absolutely! For the best results, choose a high-quality brownie mix that guarantees a fudgy texture. Make sure to check the expiration date and avoid any boxes with damage. If you’re feeling adventurous, you can even make your own from scratch for a personal touch!
How should I store Brownie Refrigerator Cake?
Very importantly, store your Brownie Refrigerator Cake covered in an airtight container in the refrigerator for up to 3 days. This keeps it fresh and helps the flavors meld. If you’re making it ahead of time, it’s a great make-ahead dessert that only gets better as it sits!
Can I freeze the Brownie Refrigerator Cake?
Certainly! You can wrap individual slices in plastic wrap and place them in an airtight container. Freeze for up to 2 months for best results. When you’re ready to enjoy, thaw the slices in the refrigerator overnight. This helps maintain that creamy texture you’re craving!
What should I do if my pudding layer is too runny?
If you find that your pudding layer turned out runny, it may have been over-whisked or not thickened enough. First, check the pudding mix instructions carefully to avoid over-mixing. If you need to salvage it, you can prepare a new batch following the instructions closely, or mix in a tablespoon of instant pudding mix to thicken the existing layer gradually.
Is this recipe suitable for people with dietary restrictions?
Absolutely! You can make your Brownie Refrigerator Cake gluten-free by opting for a gluten-free brownie mix. For dairy-free options, simply use dairy-free cream cheese and whipped topping. There are also lots of alternatives for pudding flavors, so everyone can join in the indulgence without worry.
How can I customize my Brownie Refrigerator Cake?
The more the merrier! To make it uniquely yours, consider swapping the chocolate pudding for vanilla or butterscotch. You can also create fun layers by incorporating seasonal fruits or toppings like crushed nuts for added texture. Enjoy experimenting!
Indulge in Decadence with Brownie Refrigerator Cake Delight
Ingredients
Equipment
Method
- Bake the brownie mix according to package instructions at 350°F (175°C) for 20-25 minutes. Allow to cool completely in the pan.
- Blend the cream cheese until smooth and creamy, then spread evenly over the cooled brownie base.
- Prepare the chocolate pudding as per package instructions and spread it over the cream cheese layer.
- Spread the whipped topping evenly over the pudding layer, ensuring a smooth surface.
- Chill the assembled cake in the refrigerator for at least 2 hours or overnight.
- Slice the chilled cake into squares using a sharp knife, wiping it clean between cuts for neat edges.
Leave a Reply