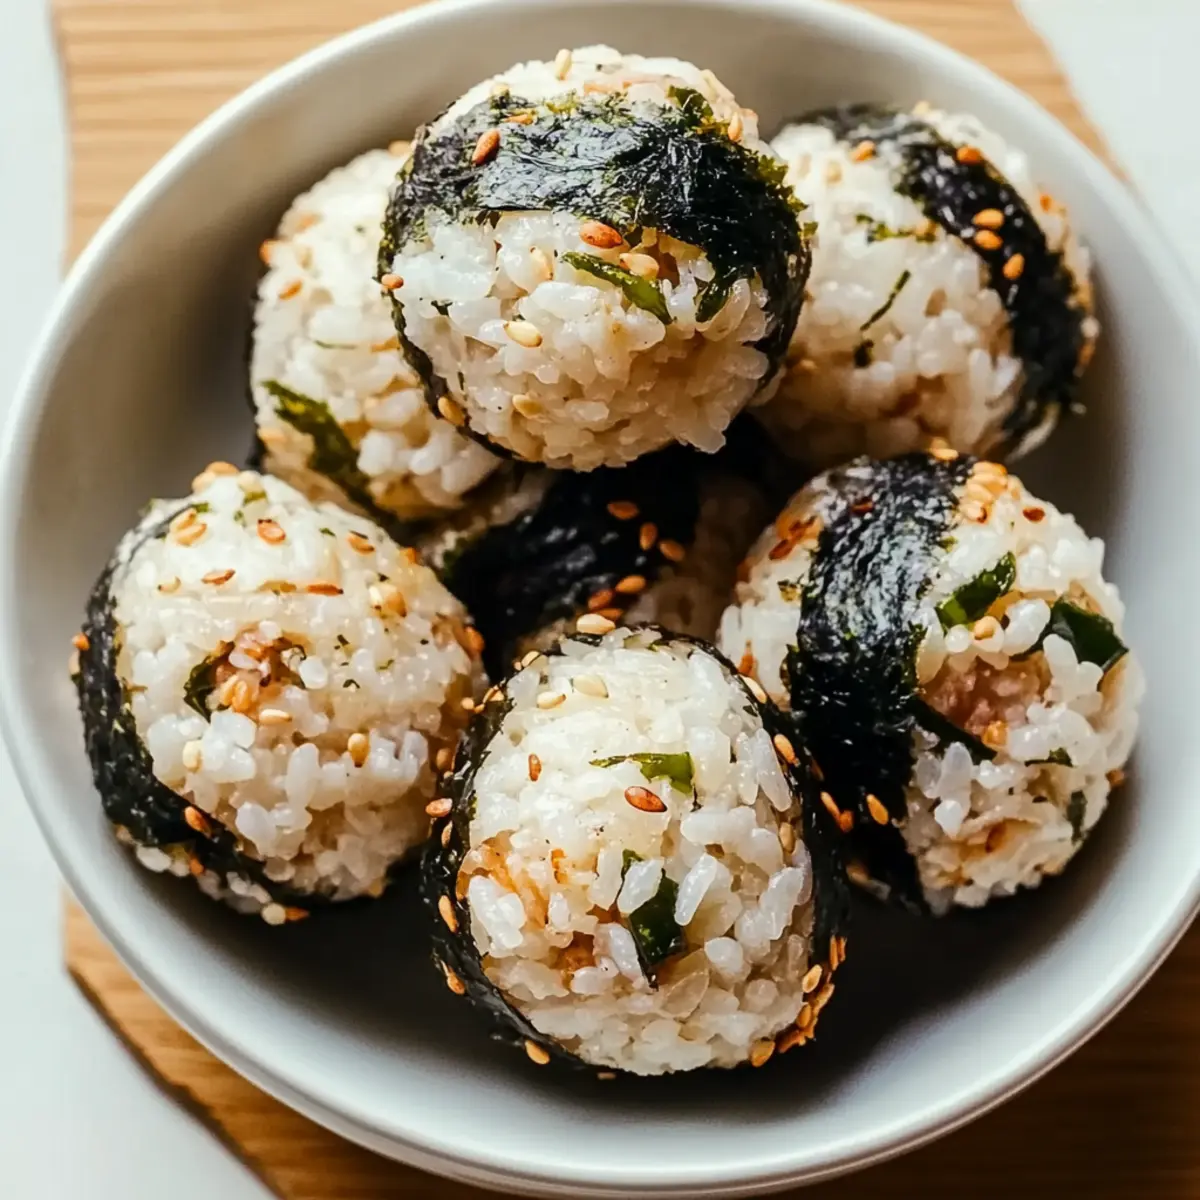
As I stood in my kitchen, the familiar sounds of sizzling and chopping filled the air, but my mind drifted to the struggle of finding the perfect portable lunch. That’s when the idea struck me: Easy Tuna Rice Balls! These delightful bites not only pack a flavorful punch but are also a cinch to prepare. They’re made using pantry staples like canned tuna and leftover rice, making them a great budget-friendly option for hectic weekdays. Plus, if you’re leaning toward a vegetarian twist, swapping tuna for chickpeas or tofu is incredibly simple! Whether you’re looking to impress at a picnic or just seeking a nutritious meal on the run, these rice balls are sure to become a favorite. Curious about how to make them? Let’s dive into this easy recipe!
Why Are These Rice Balls So Loved?
Quick Preparation: The recipe is effortless, perfect for busy schedules or quick meal preps. You can whip them up in under 30 minutes!
Flavor Packed: With savory tuna, creamy mayo, and a hint of sesame oil, every bite bursts with deliciousness.
Versatile Options: Choose tuna or, for a vegan delight, use chickpeas or tofu! It’s great for everyone, no matter their dietary preference.
Budget-Friendly: Utilizing pantry staples like canned tuna makes this meal both satisfying and economical.
Portable Goodness: Ideal for lunches on-the-go, whether you’re heading to work, a picnic, or just need a snack at home! Trust me, once you try these Easy Tuna Rice Balls, you’ll wonder how you ever lived without them!
Easy Tuna Rice Balls Ingredients
For the Rice Balls
- Prepared Sushi Rice – This serves as the base for the rice balls; you can substitute with brown rice or quinoa for added nutrition.
- Canned Tuna – Provides protein and a seafood flavor; feel free to replace with mashed chickpeas or crumbled tofu for a vegetarian/vegan option.
- Mayonnaise – Adds creaminess to the mix; consider using vegan mayonnaise or mashed avocado for a plant-based alternative. Adjust quantity based on your creaminess preference.
- Sesame Oil – Imparts a rich flavor; it’s optional but enhances the overall taste of the rice balls.
- Seaweed (Nori) – Adds an umami touch reminiscent of sushi; this is optional and can be omitted for those with allergies or specific dietary preferences.
For Serving Suggestions
- Soy Sauce – A classic pairing that provides a salty contrast; perfect for dipping!
- Spicy Mayo – Add some zip to your tuna rice balls by serving them with a spicy mayo dip for extra flavor.
These Easy Tuna Rice Balls are not just mouthwatering; they’re the perfect solution for quick, delicious lunches to-go!
Step‑by‑Step Instructions for Easy Tuna Rice Balls
Step 1: Prepare the Rice Mixture
Begin by cooking sushi rice according to package instructions, allowing it to cool completely. In a large mixing bowl, combine the cooled rice, canned tuna, mayonnaise, sesame oil, and finely chopped seaweed if using. Stir gently with a spatula for about 2 minutes until the mixture is well combined and creamy in texture, ensuring that the rice grains stick together nicely.
Step 2: Adjust Consistency
Take a moment to assess the texture of your tuna rice mixture. If it seems too dry or crumbly, gradually add more mayonnaise, mixing in 1 tablespoon at a time. Keep mixing until you achieve a moist yet firm consistency that holds together easily. The mixture should be slightly sticky and ready for shaping into rice balls.
Step 3: Shape the Rice Balls
Next, flatten the rice mixture into an even layer in the bowl, then use a knife to divide it into 8 triangular sections as if slicing a pizza. With clean hands or gloves, take one portion at a time, compressing it between your palms to form a tightly packed ball. This process should take about 15 seconds per ball; continue until all portions are shaped.
Step 4: Serve or Store
Your Easy Tuna Rice Balls are ready to be enjoyed! For the best flavor and texture, serve immediately with soy sauce or spicy mayo on the side. If not serving right away, place the rice balls in an airtight container. They can be stored in the refrigerator for up to 2 days, making them a perfect make-ahead meal for busy days ahead.
What to Serve with Easy Tuna Rice Balls?
Elevate your meal experience with thoughtful pairings that enhance the delightful flavors of these rice balls!
- Soy Sauce: A must-have dipping companion, the saltiness of soy sauce complements the tuna, enhancing its umami notes beautifully.
- Spicy Mayo: Add a flavorful kick with a spicy mayo dip; its creaminess balances the savory rice balls perfectly.
- Fresh Cucumber Salad: Light and refreshing, a cucumber salad adds a crunchy texture that contrasts the soft rice balls, making each bite delightful.
- Edamame Pods: These protein-packed pods offer a nutty flavor and a fun, interactive snack that’s perfect for enjoying alongside your rice balls.
- Pickled Ginger: The tanginess of pickled ginger cuts through the richness of the tuna, providing a delightful palate cleanser between bites.
- Fruit Skewers: For a sweet touch, serve alongside colorful fruit skewers; the juicy bursts from fruits like pineapple or melon elevate the whole meal.
- Iced Green Tea: A refreshing drink, iced green tea offers a subtle flavor that can cleanse the palate and enhance your dining experience.
Indulging in these pairings will not only make your Easy Tuna Rice Balls shine but create a truly harmonious meal that everyone will love!
How to Store and Freeze Easy Tuna Rice Balls
Fridge: Store your Easy Tuna Rice Balls in an airtight container in the refrigerator for up to 2 days. This helps keep them fresh and ready for whenever hunger strikes!
Freezer: For longer storage, freeze the rice balls. Wrap each tightly in plastic wrap and place in a freezer-safe bag for up to 1 month. Thaw in the refrigerator before serving.
Reheating: To enjoy leftovers, reheat in a microwave for about 30 seconds or until warmed through. Be careful not to overheat, as this can make the rice balls dry.
Serving Tip: Serve chilled or warmed, pairing them with your favorite dips like soy sauce or spicy mayo for an exciting flavor boost!
Expert Tips for Easy Tuna Rice Balls
-
Cool the Rice: Allow the sushi rice to cool completely before mixing. This helps maintain the right texture and prevents the mixture from becoming too mushy.
-
Pack Firmly: Pack each rice ball tightly to ensure they hold their shape. A gentle squeeze is key for perfect firmness without being too dense.
-
Adjust Creaminess: If the mixture feels dry, add mayonnaise gradually. Go slow; too much can overwhelm the flavor of the Easy Tuna Rice Balls.
-
Experiment with Flavors: Don’t hesitate to add herbs or spices, like green onions or cilantro, for an extra flavor kick in your tuna mix or vegan variations!
-
Use Quality Ingredients: Opt for good-quality canned tuna and mayonnaise. The better the ingredients, the more you’ll enjoy your Easy Tuna Rice Balls!
Easy Tuna Rice Balls Variations
Customize your Easy Tuna Rice Balls with these delightful twists and substitutions that cater to your taste buds!
-
Vegetarian Delight: Substitute canned tuna with mashed chickpeas or crumbled tofu, seasoned with soy sauce and a sprinkle of nori for that umami goodness. This variation is not only vegan-friendly but also incredibly satisfying!
-
Nutty Flavor Boost: Stir in a tablespoon of toasted sesame seeds to the mixture for a delightful crunch and richer flavor profile. These little bits of goodness provide a wonderful texture that you’ll love!
-
Quinoa Swap: Experiment by using cooked quinoa instead of sushi rice for a nutritious twist. The nutty flavor of quinoa adds another layer of deliciousness and gives your rice balls extra protein.
-
Spicy Kick: Elevate your rice balls with a dash of sriracha mixed in the mayo or serve with a spicy mayo dip! This spicy addition brings a vibrant heat that pairs beautifully with the creaminess of your filling.
-
Fresh Crunch: Add finely chopped veggies like carrots, cucumbers, or bell peppers for an added crunch and vibrant color. The fresh veggies brighten the flavor, making every bite a refreshing experience.
-
Zesty Citrus: Incorporate a squeeze of lemon or lime juice into the mixture for a bright, zesty finish. The citrus not only enhances the flavors but also balances the creamy components beautifully.
-
Herbed Variation: Mix in fresh herbs like chopped cilantro, basil, or green onions for a fragrant twist. These herbs will elevate your rice balls to a whole new gourmet level!
-
Seafood Medley: Try mixing different canned seafood, like crab or smoked salmon, for an exciting fusion of flavors. This change can turn your simple rice balls into a more decadent treat that’s perfect for gatherings!
Feeling adventurous? Don’t forget to check out our Pumpkin Cheesecake Balls or Turkey Cupcakes for more fun and delicious meal ideas!
Make Ahead Options
These Easy Tuna Rice Balls are a fantastic choice for meal prep! You can prepare the rice mixture (without shaping into balls) up to 24 hours in advance. Simply combine the cooled sushi rice, canned tuna, mayonnaise, sesame oil, and seaweed in a bowl, then cover and refrigerate. This will enhance the flavors while ensuring a creamy texture. When you’re ready to serve, just shape the mixture into balls, which takes just a few minutes. To maintain their quality, store the rice balls in an airtight container in the refrigerator for up to 2 days. With these make-ahead tips, you’ll have delicious, portable lunches ready at a moment’s notice!
Easy Tuna Rice Balls Recipe FAQs
What type of rice is best for Easy Tuna Rice Balls?
Absolutely! Prepared sushi rice is ideal as it provides the right sticky texture, helping the rice balls hold together. If you want to make it healthier, you can substitute it with brown rice or quinoa. Just make sure to cook and cool the rice completely before mixing!
How should I store Easy Tuna Rice Balls?
To maintain freshness, store your Easy Tuna Rice Balls in an airtight container in the refrigerator for up to 2 days. If you’re planning to make them in advance, this is a great solution for quick lunches! Just remember to let them cool completely before placing them in the fridge to avoid excess moisture.
Can I freeze Easy Tuna Rice Balls?
Absolutely! To freeze, wrap each rice ball tightly in plastic wrap and then place them into a freezer-safe bag. They can be stored for up to 1 month. When you’re ready to enjoy, simply thaw them in the refrigerator overnight before serving. This way, they maintain that delightful texture and flavor!
What can I do if my rice mixture is too dry?
Very good question! If your rice mixture seems dry, gradually add more mayonnaise—1 tablespoon at a time—mixing thoroughly until the mixture reaches a creamy, moist consistency. It’s essential to keep the flavors balanced, so add it slowly to avoid overpowering the dish.
Are there any dietary considerations for Easy Tuna Rice Balls?
Great thought! If you’re cooking for someone with dietary restrictions, substitute the canned tuna with mashed chickpeas or crumbled tofu for a vegan option. Additionally, check that your mayonnaise is suitable for any allergies if it’s not vegan. The seaweed can also be omitted for those with allergies or preferences.
Can I customize the ingredients in the Easy Tuna Rice Balls?
Certainly! I often add finely chopped vegetables like carrots or cucumbers for an extra crunch and nutrition boost. You can also experiment with herbs and spices, such as green onions or cilantro, to personalize the flavor to your liking!
Easy Tuna Rice Balls for Quick, Delicious Lunches to Go
Ingredients
Equipment
Method
- Prepare the sushi rice according to package instructions and allow it to cool completely.
- In a large mixing bowl, combine the cooled rice, canned tuna, mayonnaise, sesame oil, and seaweed if using. Stir gently for about 2 minutes until well combined.
- Assess the texture of the mixture. If too dry, gradually add more mayonnaise until a moist yet firm consistency is achieved.
- Flatten the rice mixture and divide it into 8 portions. Shape each portion into a tightly packed ball.
- Serve immediately with soy sauce or spicy mayo, or store in an airtight container in the fridge.
Leave a Reply