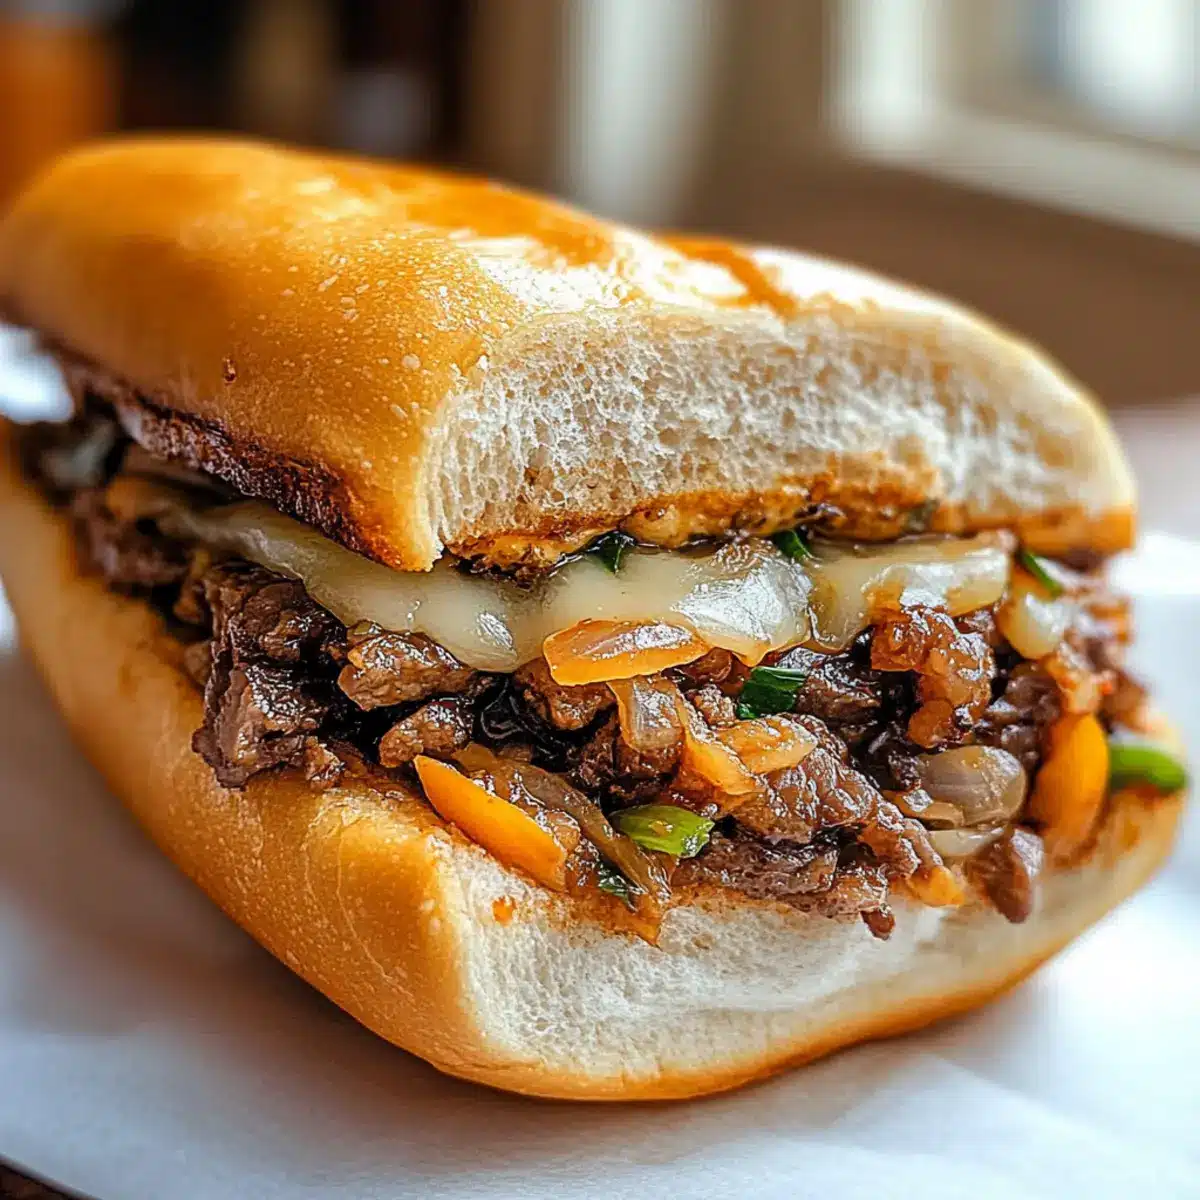
The moment you take that first bite of a Korean-Inspired Kimchi Bulgogi Cheesesteak, you’re hit with a delightful blend of flavors that’s simply unforgettable! This fusion recipe marries the savory, marinated beef of classic Korean BBQ with the hearty comfort of a traditional cheesesteak, creating a dish that’s perfect for weeknight dinners or game day gatherings. Not only is it customizable to fit your tastes, but it’s also incredibly easy to prepare—making it a fantastic choice for meal prep. Imagine the joy on your friends’ faces as they savor this mouthwatering twist on an American favorite. Ready to elevate your sandwich game? Let’s dive into this delicious fusion that promises to become a staple in your kitchen!
Why You’ll Crave This Cheesesteak?
Irresistible: The combination of tender beef marinated in savory flavors paired with spicy kimchi creates a taste sensation you won’t be able to resist.
Customizable: Easily tweak ingredients with your favorite vegetables or dietary preferences—using chicken or tofu for a protein swap is a breeze!
Quick to Prepare: Ready in just about 30 minutes, this dish is perfect for those busy weeknights or spontaneous gatherings.
Crowd-Pleasing: Impress your family and friends with this unique take on a classic; it’s sure to be a hit at any occasion!
Meal Prep Friendly: With simple storage tips, you can enjoy leftovers for lunch, making this a fantastic option for your weekly meal prep routine. Just reheat and relish!
Kimchi Bulgogi Cheesesteak Ingredients
For the Beef Marinade
• Beef Sirloin – Thinly sliced against the grain ensures tenderness and rich flavor.
• Soy Sauce – Adds umami; substitute with tamari for a gluten-free option.
• Sesame Oil – Imparts a nutty taste, or substitute with olive oil for a lighter flavor.
• Minced Garlic – Fresh garlic enhances the dish best; garlic powder works in a pinch.
• Sugar – Balances the savory with a touch of sweetness; coconut sugar or honey are great alternatives.
For the Veggies
• Onion – Sautéed for depth; yellow or white onions work well for this recipe.
• Bell Peppers – Adds a crunchy texture; any color works, or feel free to omit.
• Kimchi – Delivers a spicy, tangy kick; can be store-bought or homemade for added flavor.
For the Assembly
• Hoagie Rolls – The perfect vessel for this delightful filling; gluten-free rolls can be used for dietary needs.
• Cheese (e.g., Provolone, American) – Melts perfectly to enhance the cheesesteak experience; experiment with cheddar or mozzarella for variations.
With these ingredients, you’re well on your way to creating a delicious Kimchi Bulgogi Cheesesteak that’s sure to impress!
Step‑by‑Step Instructions for Kimchi Bulgogi Cheesesteak
Step 1: Prepare Ingredients
Start by thinly slicing the beef sirloin against the grain for optimal tenderness. Chop the onion and bell peppers into bite-sized pieces for a flavorful crunch. This preparation only takes about 10 minutes, but it sets the stage for a delicious Kimchi Bulgogi Cheesesteak.
Step 2: Marinate Beef
In a mixing bowl, combine soy sauce, sesame oil, minced garlic, and sugar to create a savory marinade. Add the sliced beef, ensuring each piece is well-coated. Let it marinate for at least 15 minutes at room temperature. This step enhances the flavor and ensures your beef is tender and delicious.
Step 3: Sauté Vegetables
Heat a tablespoon of oil in a skillet over medium-high heat. Once hot, add the chopped onion and bell peppers, sautéing for about 5 minutes until they are tender and caramelized. Stir occasionally to ensure even cooking, and watch for that golden color that indicates they are ready to join your Kimchi Bulgogi Cheesesteak.
Step 4: Cook Beef
Push the sautéed veggies to the side of the skillet, creating space for the marinated beef. Add the beef strips in a single layer and cook for about 5 minutes, stirring occasionally until browned and cooked through. The sizzling sound and rich aroma will let you know your beef is reaching perfection.
Step 5: Add Kimchi
Stir in the chopped kimchi and cook for an additional 2 minutes. This quick addition melds the spicy, tangy flavors with the beef, enhancing the overall taste of your Kimchi Bulgogi Cheesesteak. The mixture should be hot and fragrant, signaling it’s nearly ready for assembly.
Step 6: Assemble Cheesesteaks
Take your toasted hoagie rolls and generously spoon the beef and vegetable mixture into each roll. Top with slices of cheese, ensuring every cheesesteak has that gooey goodness. Place them under the broiler for about 2 minutes, or until the cheese is melted and bubbly.
What to Serve with Korean-Inspired Kimchi Bulgogi Cheesesteak?
Looking to complete your meal? Pair these indulgent cheesesteaks with delightful sides that elevate your dining experience.
-
Sweet Potato Fries: Crispy on the outside and soft inside, these naturally sweet fries complement the savory flavors beautifully, adding a satisfying crunch.
-
Cucumber Salad: A refreshing mix of cucumbers and tangy dressing provides a crisp contrast, balancing the rich and spicy elements of the cheesesteak.
-
Pickled Vegetables: Serve with an array of tangy pickles for a burst of flavor that cuts through the richness, enhancing every delicious bite.
-
Kimchi or Extra Kimchi: Serve additional kimchi on the side to intensify the delightful spicy kick while adding vibrant color and texture to your plate.
-
Coleslaw: Creamy slaw adds a refreshing contrast with its crunch, perfectly offsetting the warm cheesesteak and allowing clear flavors to shine.
-
Korean Beer or Soju: A chilled glass of Korean beer or a splash of soju elevates your dining experience, enhancing the flavors with every sip—cheers!
-
Cheesecake or Mochi for Dessert: End your meal on a sweet note; a light cheesecake or chewy mochi offers a delectable end to your fusion feast, keeping everyone happily satisfied!
How to Store and Freeze Kimchi Bulgogi Cheesesteak
Fridge: Store leftovers in an airtight container for up to 3 days to keep the flavors fresh and vibrant. Best enjoyed warmed but not cold!
Freezer: For longer storage, freeze the assembled cheesesteaks (without the cheese) in a freezer-safe bag. They can be kept for up to 3 months; just thaw and reheat.
Reheating: To reheat, place the cheesesteak in the oven at 350°F for about 10 minutes until heated through. This method helps maintain the texture of the hoagie roll while melting the cheese beautifully.
Assembly Tip: For optimal freshness, it’s best to freeze just the beef and vegetable mixture. Assemble the sandwiches fresh when you’re ready to enjoy!
Expert Tips for Kimchi Bulgogi Cheesesteak
-
Marinate Longer: Allow the beef to marinate for up to 30 minutes to deepen the flavor penetration, making your Kimchi Bulgogi Cheesesteak even tastier.
-
Don’t Overcook Veggies: Aim for tender yet slightly crisp vegetables; overcooking can lead to mushiness and lose that delicious crunch essential in this fusion dish.
-
Customize Your Toppings: Feel free to add jalapeños for extra heat or top with creamy avocado to balance the spice and enhance flavor.
-
Proper Broiling: Keep a close eye while broiling the sandwiches; cheese can melt quickly, and you don’t want it burnt—just golden and bubbly for that ideal finish!
-
Store Leftovers Wisely: Refrigerate leftover cheesesteaks in an airtight container. Reheat in the oven at 350°F to maintain crispiness, preventing soggy rolls.
Make Ahead Options
These Korean-Inspired Kimchi Bulgogi Cheesesteaks are perfect for meal prep, saving you valuable time during busy weeknights! You can marinate the beef up to 24 hours in advance to allow it to soak in those delightful flavors. Additionally, sauté the vegetables and store them separately in the refrigerator for up to 3 days. When you’re ready to serve, simply reheat the beef and veggies in a skillet until hot, assemble the cheesesteaks with kimchi and cheese, then broil until the cheese is bubbly. This way, you can enjoy a weeknight dinner that’s just as delicious, with minimal effort!
Kimchi Bulgogi Cheesesteak Variations
Feel free to mix and match these ideas to make your Kimchi Bulgogi Cheesesteak truly your own and savor every delightful bite!
-
Chicken Option: Swap the beef for thinly sliced chicken breast; marinate similarly for a lighter twist. It’s a fantastic way to enjoy the same flavor with less red meat.
-
Meatless Marvel: Use tofu or seitan to make a vegetarian version that still packs a punch. Just marinate and sauté like the original—it tastes divine!
-
Spicy Kick: Add sliced jalapeños or gochujang for an extra layer of heat. The spiciness complements the dish beautifully and adds an exciting zing to each bite.
-
Veggie Boost: Toss in some mushrooms, zucchini, or spinach when sautéing; they add great texture and a nutritional boost. Experience the vibrant colors and flavors come alive!
-
Cheesy Delight: Experiment with cheeses like pepper jack for a spicy kick or smoked gouda for a unique, creamy richness. Each cheese brings a different experience to the cheesesteak.
-
Bun Alternatives: Use lettuce wraps instead of hoagie rolls for a low-carb option; it’s refreshing and fun while still delivering tasty fillings. Each bite feels light yet satisfying.
-
Flavorful Additions: Top with avocado for creaminess or pickled vegetables for an additional tang; both bring delightful contrasts to your Kimchi Bulgogi Cheesesteak.
For even more inspiration, consider pairing your creation with Crispy Tempura Vegetables for a delightful crunch on the side, or lead a flavor journey through Asian Slaw that adds a zesty, refreshing element to the meal. Enjoy creating your masterpiece!
Kimchi Bulgogi Cheesesteak Recipe FAQs
What kind of meat works best for Kimchi Bulgogi Cheesesteak?
Absolutely! Thinly sliced beef sirloin is ideal due to its tenderness and flavor. However, you can also use chicken or tofu for a delicious alternative if you prefer or have dietary restrictions.
How should I store leftover Kimchi Bulgogi Cheesesteak?
Store your leftovers in an airtight container in the fridge for up to 3 days. To maintain their deliciousness, reheat in the oven at 350°F for about 10 minutes until they are warmed through—this keeps the rolls from getting soggy.
Can I freeze Kimchi Bulgogi Cheesesteaks?
Very! For long-term storage, freeze the assembled cheesesteaks (omit the cheese) in a freezer-safe bag for up to 3 months. When you’re ready to enjoy, thaw them in the fridge overnight and reheat in the oven for the best texture.
What can I substitute for kimchi if I can’t find it?
If you don’t have kimchi on hand, try using store-bought spicy pickles or even a mix of sauerkraut with chili flakes for a tangy kick. You might miss the authentic flavor, but there’s nothing wrong with some creative adjustments!
Is there a gluten-free option for the hoagie rolls?
Yes, absolutely! Many stores offer gluten-free hoagie rolls. Using these, you can still savor the deliciousness of a Kimchi Bulgogi Cheesesteak without compromising your dietary needs.
How can I customize my Kimchi Bulgogi Cheesesteak?
Oh, the more, the merrier! Add extras like jalapeños for a spicy kick or avocado for creaminess. You can also switch up the cheese use—pepper jack adds heat, while gouda brings creaminess. The possibilities are endless, and it’s all about what makes your taste buds dance!
Kimchi Bulgogi Cheesesteak: A Bold Flavor Adventure at Home
Ingredients
Equipment
Method
- Thinly slice the beef sirloin against the grain and chop the onion and bell peppers into bite-sized pieces.
- In a mixing bowl, combine soy sauce, sesame oil, minced garlic, and sugar to create a marinade. Add the sliced beef and let it marinate for at least 15 minutes.
- Heat a tablespoon of oil in a skillet over medium-high heat. Sauté the chopped onion and bell peppers for about 5 minutes until tender.
- Push the sautéed veggies to the side and add the marinated beef. Cook for about 5 minutes until browned.
- Stir in the chopped kimchi and cook for an additional 2 minutes.
- Spoon the beef and vegetable mixture into toasted hoagie rolls and top with cheese. Broil for about 2 minutes until cheese is melted and bubbly.
Leave a Reply