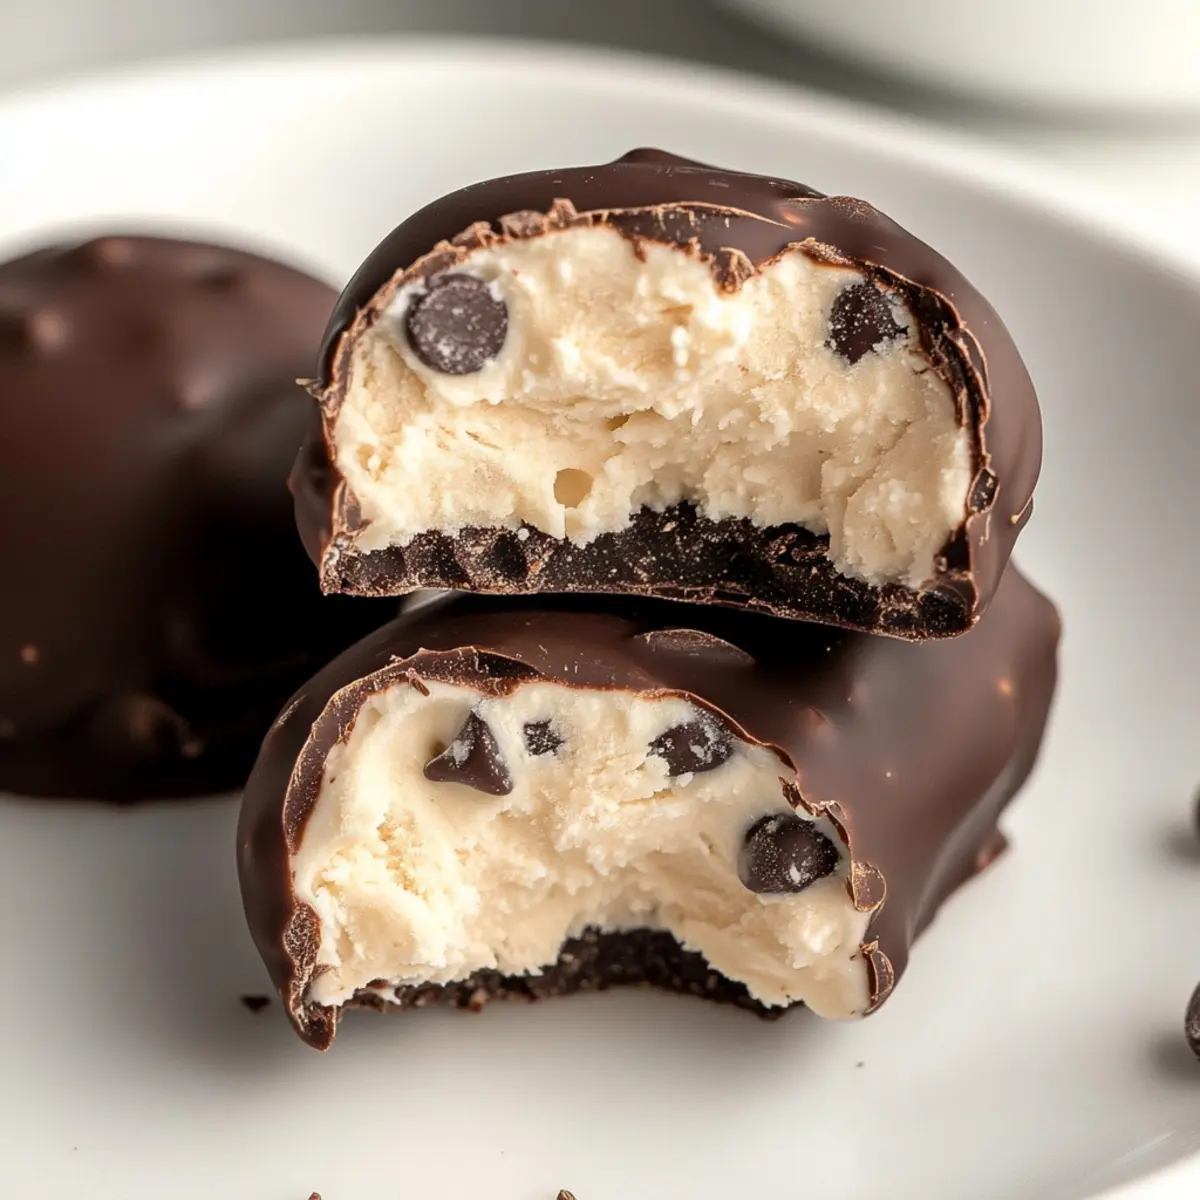
As I rummaged through my pantry, the memory of creamy, dreamy cookie dough treats flooded back to me. This inspired me to create a healthier twist—meet the irresistible Cookie Dough Frozen Yogurt Bites! These delightful bites are not just an easy, no-bake snack to whip up; they’re also gluten-free, dairy-free, vegan, and refined sugar-free! With the luscious combination of coconut yogurt and rich chocolate chips, you can indulge without the guilt. Plus, they’re perfect for meal prepping and make great frozen treats for unexpected cravings. Ready to satisfy your sweet tooth in a way that you and your family will love? Let’s dive into this deliciously simple recipe that’s bound to become a new favorite in your kitchen!
Why make Cookie Dough Frozen Yogurt Bites?
Guilt-Free Indulgence: Enjoy a sweet treat that’s both satisfying and wholesome, with no refined sugars.
Versatile Ingredients: Easily swap nut butters or yogurts to customize for dietary needs, making it suitable for everyone.
No-Bake Convenience: Whip these up in minutes and freeze for a quick snack anytime!
Crowd-Pleasing Flavor: The creamy coconut yogurt and rich chocolate create a deliciously nostalgic cookie dough flavor everyone will adore.
Perfect for Meal Prep: Make a batch ahead of time, and you’ll always have a tasty treat handy—just like my Gooey Butter Cookies or Chocolate Thumbprint Cookies!
These Cookie Dough Frozen Yogurt Bites truly deliver on flavor while keeping things light and nutritious.
Cookie Dough Frozen Yogurt Bites Ingredients
For the Yogurt Mixture
• Coconut Yogurt – A creamy base that’s rich in probiotics; feel free to replace it with any plain non-dairy yogurt you have on hand.
• Cashew Butter – This adds a delightful nutty flavor and creaminess; try swapping it for almond butter or sunflower seed butter if you need a nut-free option.
• Maple Syrup – A naturally sweet low-glycemic sweetener; if you’re not vegan, honey works as a fantastic substitute.
• Mini Chocolate Chips – Perfect for that cookie dough experience; just be sure to choose dairy-free chocolate for a vegan-friendly version.
For the Coating
• Chocolate Chips – These create the indulgent outer shell that makes these bites irresistible.
• Coconut Oil – Helps to achieve a smooth, easy-to-dip chocolate coating; while you can omit it, doing so may change the texture slightly.
Enjoy making these delicious Cookie Dough Frozen Yogurt Bites that promise happiness in every bite!
Step‑by‑Step Instructions for Cookie Dough Frozen Yogurt Bites
Step 1: Mix Base Ingredients
In a medium bowl, combine 2 cups of coconut yogurt, ½ cup of cashew butter, 2 tablespoons of maple syrup, and 1 teaspoon of vanilla extract. Stir vigorously until the mixture is smooth and creamy, ensuring there are no clumps. Gently fold in ½ cup of mini chocolate chips, distributing them evenly within the yogurt mixture for that delightful cookie dough flavor.
Step 2: Shape Bites
Line a baking sheet with parchment paper to prevent sticking. Using a medium-large cookie scoop, portion out dollops of the cookie dough mixture onto the prepared sheet, leaving space between each one for expansion. Aim to have about 12-15 dollops, shaping them into bite-sized mounds that resemble cookie dough balls, ready to chill.
Step 3: Freeze
Carefully place the baking sheet in the freezer to allow the cookie dough bites to solidify. Freeze for at least 1 hour or until they are firm and hold their shape when gently pressed. This step is crucial for the perfect texture of your Cookie Dough Frozen Yogurt Bites, giving them the right firmness for dipping.
Step 4: Prepare Coating
While the bites are freezing, melt 1 cup of chocolate chips with 2 tablespoons of coconut oil in a microwave-safe bowl. Heat in 30-second intervals, stirring between each, until completely smooth and glossy, taking care not to overheat. This silky chocolate coating will encase your frozen yogurt bites beautifully.
Step 5: Coat Bites
Once the bites are fully frozen, remove them from the freezer. Dip each frozen yogurt bite into the melted chocolate mixture, ensuring it is fully coated. Use a fork to lift each bite out of the chocolate, allowing the excess to drip off before transferring them back to the parchment-lined baking sheet.
Step 6: Final Freeze
Return the coated bites to the freezer for another 30 minutes until the chocolate hardens completely. This final freeze ensures a satisfying crunch of chocolate when you take a bite. Once they’re set, your Cookie Dough Frozen Yogurt Bites will be ready to enjoy or store for later.
What to Serve with Cookie Dough Frozen Yogurt Bites
Indulging in these creamy, dreamy frozen treats calls for delightful companions to elevate the experience!
- Fresh Fruit Salad: A medley of vibrant fruits adds a refreshing contrast, balancing the richness of the bites with bright, juicy flavors.
- Crunchy Granola: Sprinkle some crunchy granola on top for texture—its nutty notes will beautifully complement the sweetness of the yogurt bites.
- Nutty Trail Mix: This combination of nuts and dried fruit serves as a satisfying crunch that enhances the overall texture while staying wholesome.
- Fruity Smoothies: Enjoying a berry or banana smoothie alongside will create a luscious, creamy treat that pairs wonderfully with the bites.
- Chilled Herbal Teas: A light mint or chamomile tea can provide a relaxing vibe, perfect for sipping while snacking on the bites.
- Dairy-Free Chocolate Milk: Add a rich, chocolatey drink option that echoes the flavors in your bites—great for cooling down on warm days!
Elevating your snack time just became easier with these delicious pairings, making every bite truly memorable!
Expert Tips for Cookie Dough Frozen Yogurt Bites
- Perfectly Frozen Yogurt: Ensure your coconut yogurt is completely frozen before dipping; this helps maintain the shape and texture of the bites.
- Use Silicone Molds: For easier removal, consider using silicone molds instead of a baking sheet; they pop out effortlessly!
- Keep Chocolate Smooth: Melt chocolate chips and coconut oil slowly, and keep it warm while coating the bites to prevent thickening.
- Choose the Right Sweetener: If you’re not vegan, feel free to use honey instead of maple syrup, but remember to adjust the sweetness to your taste!
- Avoid Overheating: When melting chocolate, heat it in short intervals to avoid burning; this will ensure a glossy and perfect coating for your Cookie Dough Frozen Yogurt Bites.
Make Ahead Options
These Cookie Dough Frozen Yogurt Bites are a dream for meal prep enthusiasts! You can prepare the yogurt mixture and shape the bites up to 24 hours in advance; simply cover the baking sheet with plastic wrap and refrigerate until you’re ready to coat them. For an even easier option, freeze the bites after shaping them and keep them frozen for up to 3 months. When you’re ready to indulge, just melt the chocolate coating, dip the frozen bites, and refreeze for about 30 minutes until the chocolate is firm. By preparing in advance, you save time and ensure you always have a delicious, guilt-free treat waiting for you!
How to Store and Freeze Cookie Dough Frozen Yogurt Bites
Fridge: Store your Cookie Dough Frozen Yogurt Bites in an airtight container for up to 3 days. This will keep them soft and ready to enjoy!
Freezer: For long-term storage, place the bites in a freezer-safe container with parchment paper between layers. They can stay fresh for up to 3 months.
Reheating: These bites are best enjoyed straight from the freezer. Let them sit at room temperature for a minute or two if they feel too hard to bite into.
Serving Tips: When ready to enjoy, simply pop a frozen bite in your mouth, and savor the creamy goodness wrapped in chocolate!
Cookie Dough Frozen Yogurt Bites Variations
Feel free to personalize your Cookie Dough Frozen Yogurt Bites, adding your unique twist with these delightful options!
- Nut-Free: Swap cashew butter for sunflower seed butter to make these bites nut-free without sacrificing flavor or creaminess.
- Flavored Yogurt: Experiment with different non-dairy yogurts like vanilla or even berry-flavored to add a fruity dimension to your bites.
- Spiced Up: Add a pinch of cinnamon or nutmeg to the yogurt mixture for a warm, spiced flavor that evokes cozy memories.
- Fruit Fusion: Mix in diced dried fruit or berries for a burst of sweetness and added texture—think chocolate-covered strawberries in bite form!
- Crunchy Twist: For those who love a little crunch, sprinkle chopped nuts or granola on top of the chocolate before it sets; it’s a delightful surprise in each bite!
- Fudgy Dots: Fold in cacao nibs or dark chocolate chips for an extra chocolatey kick that indulges true chocolate lovers!
- Decadent Coating: For a rich twist, try coating your bites in white chocolate instead of dark, or even drizzle melted caramel over the chocolate for a decadent finish.
- Chili Kick: Feeling adventurous? Add a pinch of cayenne pepper to the melted chocolate coating for a tempting sweet and spicy contrast that will surprise your taste buds!
These variations will keep your Cookie Dough Frozen Yogurt Bites fun and exciting, making them a hit for any gathering. Pair them alongside treats like my Gooey Butter Cookies or melt-in-your-mouth Chocolate Thumbprint Cookies for a truly delightful dessert spread!
Cookie Dough Frozen Yogurt Bites Recipe FAQs
How do I choose the right yogurt for the Cookie Dough Frozen Yogurt Bites?
Absolutely! The best choice is plain coconut yogurt, as it offers a rich texture and probiotics. If coconut yogurt isn’t available, you can substitute it with any plain non-dairy yogurt, such as almond or soy yogurt. Just ensure it’s unsweetened to keep the flavor balanced.
How should I store my Cookie Dough Frozen Yogurt Bites?
I recommend storing your Cookie Dough Frozen Yogurt Bites in an airtight container in the freezer. They can last for up to 3 months, but they’re usually gone much quicker! Just make sure to place parchment paper between layers to avoid them sticking together.
Can I freeze the Cookie Dough Frozen Yogurt Bites?
Yes, indeed! These bites are perfect for freezing. After you coat them in chocolate and let them harden, simply transfer them to a freezer-safe container. They can remain fresh for up to 3 months. When you’re ready to indulge, just grab one straight from the freezer!
What should I do if my chocolate coating thickens or doesn’t stick?
Don’t worry! If you find the chocolate coating thickening as you dip, try this: keep the chocolate over low heat while working, adding a touch more coconut oil to help it stay smooth. If the coating doesn’t adhere well, it’s because the yogurt bites weren’t fully frozen. Make sure to freeze them for at least an hour before dipping.
Are these Cookie Dough Frozen Yogurt Bites suitable for those with allergies?
Very! These bites are gluten-free, dairy-free, and vegan, making them a fantastic option for many dietary needs. If you need a nut-free version, simply substitute cashew butter with sunflower seed butter. Always check ingredient labels for potential allergens, especially for chocolate chips.
What can I substitute for maple syrup in this recipe?
If you’re not vegan or prefer a different sweetener, honey works beautifully as a substitute for maple syrup. However, adjust the quantity according to your preference since honey can be sweeter. Just remember, going with maple syrup keeps these bites vegan-friendly!
Irresistible Cookie Dough Frozen Yogurt Bites You’ll Love
Ingredients
Equipment
Method
- In a medium bowl, combine 2 cups of coconut yogurt, ½ cup of cashew butter, 2 tablespoons of maple syrup, and 1 teaspoon of vanilla extract. Stir vigorously until the mixture is smooth and creamy, ensuring there are no clumps. Gently fold in ½ cup of mini chocolate chips.
- Line a baking sheet with parchment paper. Portion out dollops of the mixture onto the sheet, shaping them into bite-sized mounds.
- Place the baking sheet in the freezer for at least 1 hour or until firm. This step is crucial for the perfect texture.
- Melt 1 cup of chocolate chips with 2 tablespoons of coconut oil until smooth and glossy, taking care not to overheat.
- Dip each frozen yogurt bite into the melted chocolate until fully coated. Allow excess chocolate to drip off.
- Return the coated bites to the freezer for another 30 minutes until the chocolate hardens completely.
Leave a Reply