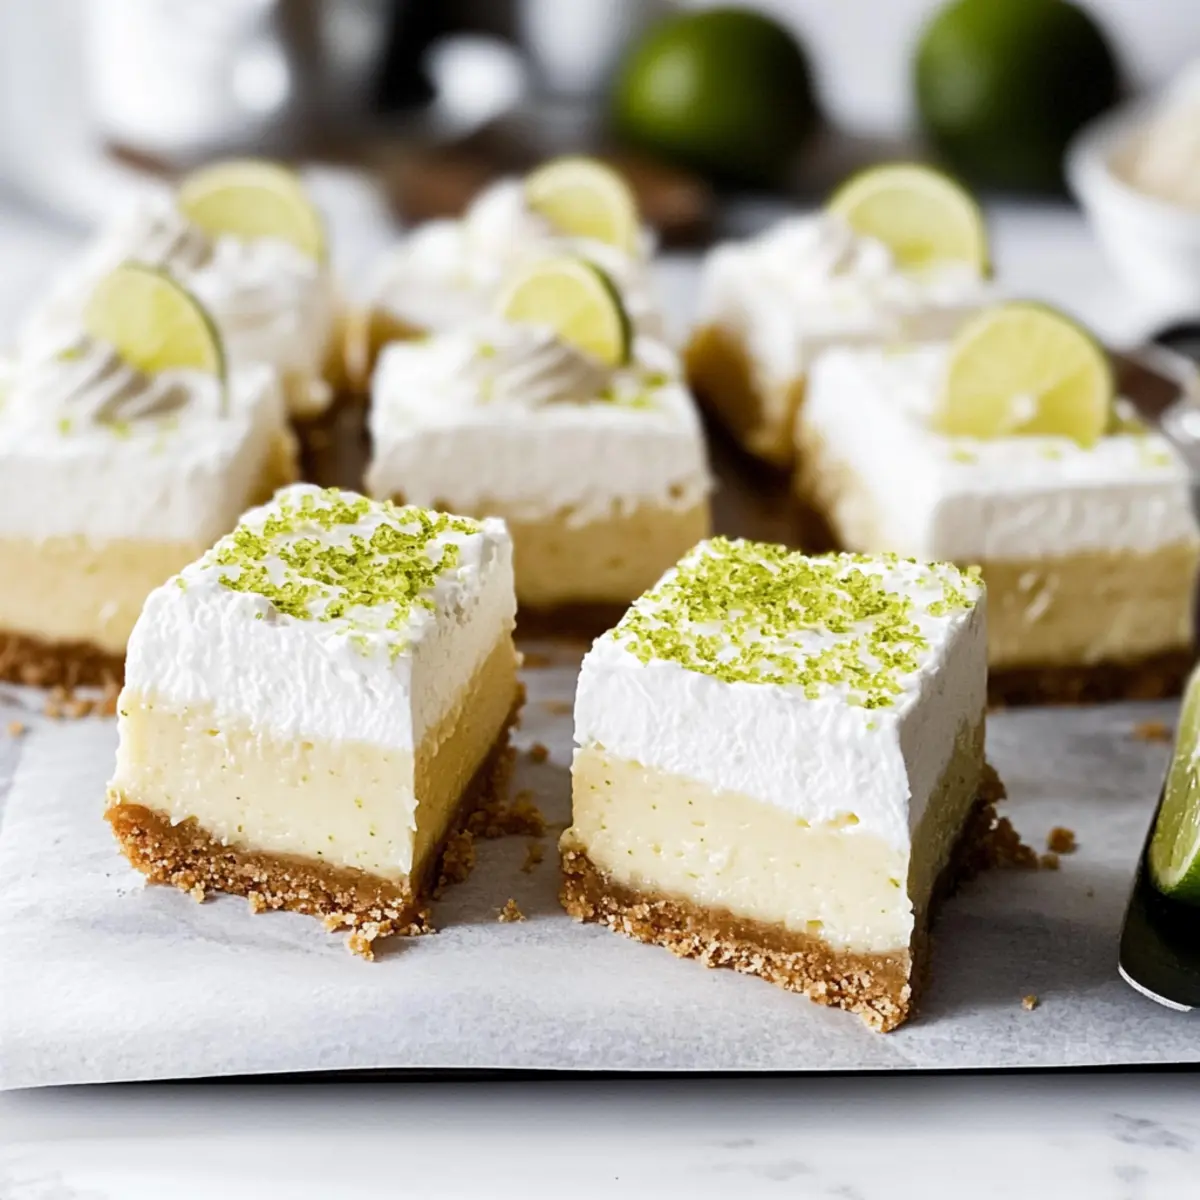
As I squeezed fresh limes for today’s recipe, the vibrant citrus scent whirled around the kitchen, instantly transporting me to sun-kissed shores. These Key Lime Pie Bars are my go-to summer dessert, effortlessly marrying sweetness with that refreshing tartness we crave on hot days. With a quick, no-bake preparation, they’re perfect for those moments when you want something delicious without spending hours in the kitchen. The buttery vanilla wafer crust supports a creamy filling that rivals the traditional pie but is so much easier to slice and serve at gatherings. Whether you’re lounging by the pool or hosting a backyard barbecue, these bars are bound to steal the show. Ready to whip up a batch and impress your friends? Let’s dive in!
Why Are These Key Lime Pie Bars Special?
Simplicity: With a straightforward no-bake process, these bars come together in no time, minimizing your time in the kitchen.
Bright, Tangy Flavor: The combination of fresh lime and sweetened condensed milk creates an irresistible taste, striking the perfect balance between sweet and tart.
Creamy Delight: The luxuriously smooth filling rests on a buttery crust, offering a delightful texture that will leave your taste buds wanting more.
Crowd-Pleasing Appeal: Perfect for summer gatherings or simply as an afternoon treat, these Key Lime Pie Bars are sure to impress friends and family alike.
Versatile Options: Whether you pair them with a dollop of whipped cream or sprinkle fresh lime zest on top, the presentation can be tailored to fit any occasion. Dive deeper into more dessert ideas like Caramel Apple Pie for your next gathering!
Key Lime Pie Bars Ingredients
-
For the Crust
• Vanilla Wafer Cookies – Adds sweetness and structure to the crust; substitute with Graham crackers for a classic option.
• Brown Sugar – Enhances sweetness and depth; can replace with granulated sugar if needed.
• Unsalted Butter – Binds the crust together and adds richness; margarine or a dairy-free alternative works well too. -
For the Filling
• Egg Yolks – Creates a rich, creamy texture; avoid using whole eggs as it will alter the consistency.
• Lime Zest – Provides aromatic citrus notes that elevate the flavor; essential ingredient that cannot be substituted.
• Sweetened Condensed Milk – Adds creaminess and a touch of sweetness; dairy-free alternatives are available for a plant-based version.
• Lime Juice – The star of the show that gives the bars their signature tang; freshly squeezed is best for optimal flavor. -
For the Topping
• Heavy Whipping Cream – Lightens up the dessert with a fluffy topping; can substitute with coconut cream for a non-dairy alternative.
These Key Lime Pie Bars are a delightful summer treat that’s sure to refresh and impress!
Step‑by‑Step Instructions for Key Lime Pie Bars
Step 1: Prepare the Crust
Begin by preheating your oven to 350°F (175°C). In a food processor, crush 1 ½ cups of vanilla wafer cookies until they resemble fine crumbs. Combine the crumbs with ¼ cup of brown sugar and ½ cup of melted unsalted butter. Mix well until the texture resembles wet sand. Press this mixture firmly into the bottom of an 8×8 inch baking pan.
Step 2: Bake Crust
Place the pan in the preheated oven and bake the crust for 13–15 minutes or until it’s golden and fragrant. Once done, remove the crust from the oven and allow it to cool on a wire rack for about 30 minutes, ensuring it’s fully set before adding the filling.
Step 3: Make Filling
While the crust is cooling, place 4 large egg yolks in a mixing bowl and beat them gently. Next, add 2 teaspoons of freshly grated lime zest, 1 can (14 ounces) of sweetened condensed milk, and ½ cup of freshly squeezed lime juice. Mix these ingredients together until smooth and creamy, creating a luscious filling for your Key Lime Pie Bars.
Step 4: Bake Filling
Pour the lime filling over your cooled crust, spreading it evenly with a spatula. Bake the assembled Key Lime Pie Bars in the oven for 15–17 minutes until the edges are set but the center still jiggles slightly. This slight jiggle is crucial for maintaining the creamy texture.
Step 5: Cool & Chill
After baking, remove the pan from the oven and let it cool on a wire rack for another 30 minutes. Once cooled, cover the pan with plastic wrap and refrigerate the bars for at least 3 hours to allow them to fully chill and set. Overnight chilling is recommended for optimal taste.
Step 6: Top & Serve
When ready to serve, prepare whipped cream by beating 1 cup of heavy whipping cream until soft peaks form. Spread or pipe the whipped cream over the chilled Key Lime Pie Bars. Cut into squares while the bars are cold for neat slices, and enjoy this refreshing summer treat with family and friends!
What to Serve with Easy Key Lime Pie Bars
These delightful bars are the perfect sweet and tart finale for any summer gathering.
-
Fresh Fruit Salad: A mix of seasonal fruits brightens the table, enhancing the tartness of the bars with juicy sweetness.
-
Coconut Whipped Cream: Adds a tropical flair, complementing the key lime flavor while providing a light, creamy texture.
-
Mint-Infused Iced Tea: The refreshing mint notes in the iced tea are a perfect match to the zesty lime bars, creating a balanced pairing.
-
Key Lime Sorbet: For an extra citrus kick, serve alongside a scoop of key lime sorbet to intensify the tropical experience.
-
Grilled Pineapple: Caramelized grill marks impart a smoky sweetness that contrasts beautifully with the tangy bars, encapsulating summer’s essence.
-
Chilled Rosé Wine: A glass of chilled rosé brings a fruity palate that pairs wonderfully without overpowering the vibrant flavors of the key lime pie bars.
-
Lime Zest Garnish: Sprinkling a bit of fresh lime zest on top adds not just beautiful color but also enhances the zesty aroma, making the presentation pop.
Make Ahead Options
These Key Lime Pie Bars are perfect for meal prep and make-ahead enthusiasts! You can prepare the crust and filling up to 24 hours in advance; just be sure to store the crust in an airtight container and keep the filling chilled in the refrigerator to maintain its creamy texture. When you’re ready to bake, pour the filling over the crust and proceed with baking as directed. After cooling, refrigerate the assembled bars for at least 3 hours or preferably overnight for the best flavor. This allows for a convenient and refreshing dessert option that’s just as delicious when served later, saving you precious time on busy weeknights!
Storage Tips for Key Lime Pie Bars
Fridge: Store your Key Lime Pie Bars tightly covered in the refrigerator for up to 4 days to maintain freshness and prevent them from drying out.
Freezer: For longer storage, freeze the bars without the whipped cream topping for up to 2 months. Thaw in the refrigerator before serving to keep the texture intact.
Reheating: While these bars are best enjoyed chilled, if you prefer them at room temperature, simply allow them to sit out for about 15-20 minutes before slicing and serving.
Packaging: Use an airtight container to keep your Key Lime Pie Bars fresh and delicious, avoiding any absorption of unwanted odors from the fridge.
Key Lime Pie Bars Variations
Feel free to let your creativity shine as you customize these delightful bars to suit your taste!
-
Classic Lime Upgrade: Substitute regular limes with key limes for a more intense flavor that’ll elevate your experience.
-
Graham Cracker Crust: Swap the vanilla wafer cookies for Graham crackers for a nostalgic taste of traditional key lime pie.
-
Coconut Cream Substitute: Use coconut cream in place of heavy whipping cream for a tropical twist that adds richness to your topping.
-
Add Zest: For an extra burst of flavor, incorporate more lime zest in the filling; it’ll brighten up each bite with vibrant citrusy notes.
-
Mint Infusion: Mix in a teaspoon of fresh mint leaves into the whipped cream for a refreshing twist that pairs beautifully with lime.
-
Sugar Alternatives: Use coconut sugar instead of brown sugar for a deeper, caramel-like sweetness that adds an interesting layer to the crust.
-
Chilled Presentation: Serve your bars with a dusting of powdered sugar and fresh berries on the side for a charming touch that will impress guests.
-
Berry Bliss: Top the bars with fresh raspberries or blueberries for a burst of color and flavor, enhancing the overall experience.
These variations will keep your Key Lime Pie Bars ever-refreshing and exciting! Consider exploring other tantalizing desserts like Apple Cheesecake Bars or Vanilla Custard Pie for more delightful sweets to share!
Expert Tips for Key Lime Pie Bars
-
Fresh Ingredients Matter: Always use freshly squeezed lime juice and lime zest for the best flavor. Bottled versions lack the vibrant quality we want in our Key Lime Pie Bars.
-
Avoid Overbaking: The filling should jiggle slightly when you take it out of the oven. Overbaking will lead to a rubbery texture, so keep a close eye on it!
-
Cool Completely: Let the filling cool completely before chilling. This helps achieve the perfect texture without unwanted steam or sogginess.
-
Cut Neatly: For the cleanest slices, cut the bars while they’re very cold, preferably using a knife rinsed in hot water between cuts.
-
Topping Tip: If you’re planning to store leftovers, add the whipped cream just before serving to keep it light and fluffy. Enjoy your Key Lime Pie Bars at their best!
Key Lime Pie Bars Recipe FAQs
What type of limes should I use for the best flavor?
Absolutely! For the most authentic taste, I recommend using fresh key limes when available. Their distinct tartness adds that signature zing traditional to Key Lime Pie Bars. If key limes aren’t accessible, regular limes can be substituted, but the flavor may be slightly milder.
How should I store leftover Key Lime Pie Bars?
You can store your Key Lime Pie Bars tightly covered in the refrigerator for up to 4 days. This not only preserves their freshness but also keeps them from drying out. Remember to use an airtight container to avoid any unwanted odors from lingering in your fridge.
Can I freeze Key Lime Pie Bars?
Yes! If you want to extend their shelf life, you can freeze the Key Lime Pie Bars without the whipped cream topping for up to 2 months. To freeze, wrap the bars tightly in plastic wrap and then place them in an airtight container or a heavy-duty freezer bag. Thaw them in the refrigerator before serving for the best texture.
What should I do if the filling is not setting properly?
If your filling isn’t setting as expected, ensure it’s baked until it jiggles slightly in the center. Allow it to cool fully at room temperature before chilling in the fridge for at least 3 hours. If it’s not firm after refrigeration, it might need more baking time next time; just keep an eye to avoid overbaking!
Can I use a different type of cookie for the crust?
Very! If you want to change up the crust, try using Graham crackers for a classic choice or even coconut cookies for a tropical twist. Just make sure they have a similar texture so the crust holds together properly.
Are these Key Lime Pie Bars suitable for people with dietary restrictions?
If you have dietary considerations, you can indeed adapt these Key Lime Pie Bars! Use dairy-free versions of sweetened condensed milk and heavy whipping cream for a plant-based alternative. Just be mindful that each substitution can slightly affect the flavor and texture, so I recommend experimenting to find the right balance that works for you.
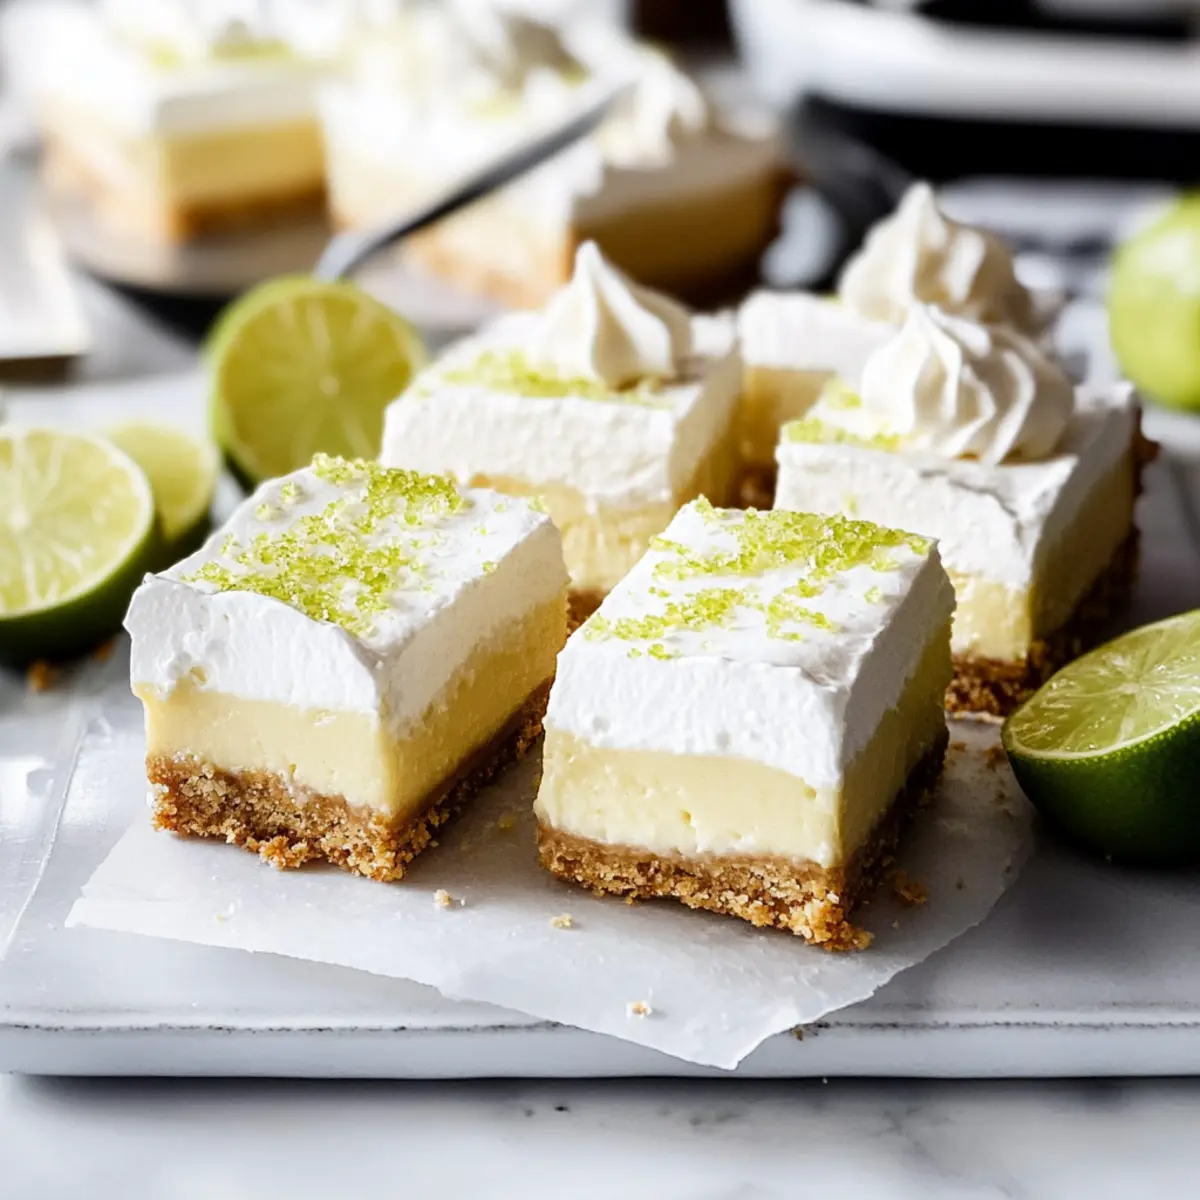
Creamy Key Lime Pie Bars: Your New Favorite Summer Treat
Ingredients
Equipment
Method
- Preheat your oven to 350°F (175°C). Crush vanilla wafer cookies until fine crumbs, then combine with brown sugar and melted butter. Press into an 8x8 inch baking pan.
- Bake the crust for 13–15 minutes until golden. Let cool for 30 minutes.
- In a mixing bowl, beat egg yolks, then add lime zest, sweetened condensed milk, and lime juice. Mix until smooth.
- Pour filling over cooled crust and bake for 15–17 minutes until edges set and center jiggles slightly.
- Cool for 30 minutes, then refrigerate for at least 3 hours.
- Beat heavy cream until soft peaks form. Spread over chilled bars, cut into squares and serve.
Leave a Reply