As the days grow warmer, the promise of spring brings an exciting rush of color and creativity, especially in the kitchen. These Mini Easter Cheesecake Jars are not only a no-bake delight but also a whimsical way to celebrate the season. With their buttery cookie crust and light, fluffy cheesecake filling, these jars are perfect for those who love to entertain without the fuss of baking. They’re make-ahead friendly, allowing you to enjoy the festivities while your dessert is chilling away, and their customizable toppings make them a hit with kids and adults alike. So, why not add a splash of joy to your spring gatherings? Get ready to indulge in these delightful treats that are as fun to assemble as they are to eat! How will you personalize your jars?
Why You’ll Love Mini Easter Cheesecake Jars
Joyful assembly: These jars invite creativity, allowing you to customize your toppings to make every dessert uniquely yours.
No-bake convenience: Forget the oven! Just mix, layer, and chill for a delightful treat that’s quick and easy.
Kid-friendly fun: Engaging younger bakers is a breeze with this recipe—let them help decorate with colorful candies!
Impressive presentation: These adorable jars are not only tasty but also charmingly presented, making them a showstopper at any gathering.
Make-ahead magic: Prep the day before and relax at your event—these gems are perfect for busy hosts!
Incorporate these delightful elements in your baking, and while you’re at it, explore Sugar Cookie Cheesecake for another delicious dessert option.
Mini Easter Cheesecake Jars Ingredients
For the Crust
• Graham Cracker Crumbs – A fantastic base for your crust; if you prefer, digestive biscuits work just as well.
• Unsalted Butter (melted) – Binds the crust together; coconut oil can be swapped for a dairy-free alternative.
• Sugar – Sweetens the crust to perfection; try coconut sugar for a healthier twist.
• Salt – Enhances the flavor; no substitutes needed here.
For the Filling
• Cream Cheese (softened) – Adds that rich, creamy texture; ensuring it’s only softened (not melted) is crucial.
• Powdered Sugar – Sweetens the cheesecake filling while keeping it smooth; reduce to 1/3 cup for a less sweet option.
• Vanilla Extract – Brings depth of flavor; almond extract can give it a different twist if you’re adventurous.
• Lemon Juice – Brightens the overall taste; lime juice can also be swapped for a fun citrus note.
• Heavy Whipping Cream (cold) – Creates that light, airy texture in the filling; remember to whip to medium-stiff peaks!
For Decoration
• Gel Food Coloring (optional) – Elevates visual appeal with pretty pastel hues; stick with subtle colors for spring flair.
• Mini Chocolate Eggs or Jelly Beans – Fun toppings that make the jars festive; any small candy can substitute based on your preference.
• Pastel Sprinkles – Adds a splash of playfulness; optional, or use edible glitter for a sparkling touch.
• Shredded Coconut (optional) – Perfect for creating “grass” decoration, which can even be dyed green; consider finely chopped nuts for a crunchy texture.
These Mini Easter Cheesecake Jars are not only fun to prepare but also a delightful treat that everyone will love!
Step‑by‑Step Instructions for Mini Easter Cheesecake Jars
Step 1: Make the Crust
In a mixing bowl, combine graham cracker crumbs, melted unsalted butter, sugar, and a pinch of salt. Mix until it resembles wet sand, ensuring everything is evenly coated. Using a small spoon, press 2-3 tablespoons of this mixture firmly into the bottom of each jar, creating a sturdy base for your Mini Easter Cheesecake Jars.
Step 2: Prepare the Filling
In a separate cold bowl, whip the heavy cream to medium-stiff peaks using an electric mixer, which should take about 3-4 minutes. Once whipped, transfer it to the fridge to keep it cool. In another bowl, beat the softened cream cheese, powdered sugar, vanilla extract, and lemon juice together until you have a smooth and fluffy mixture, about 2-3 minutes.
Step 3: Combine Filling
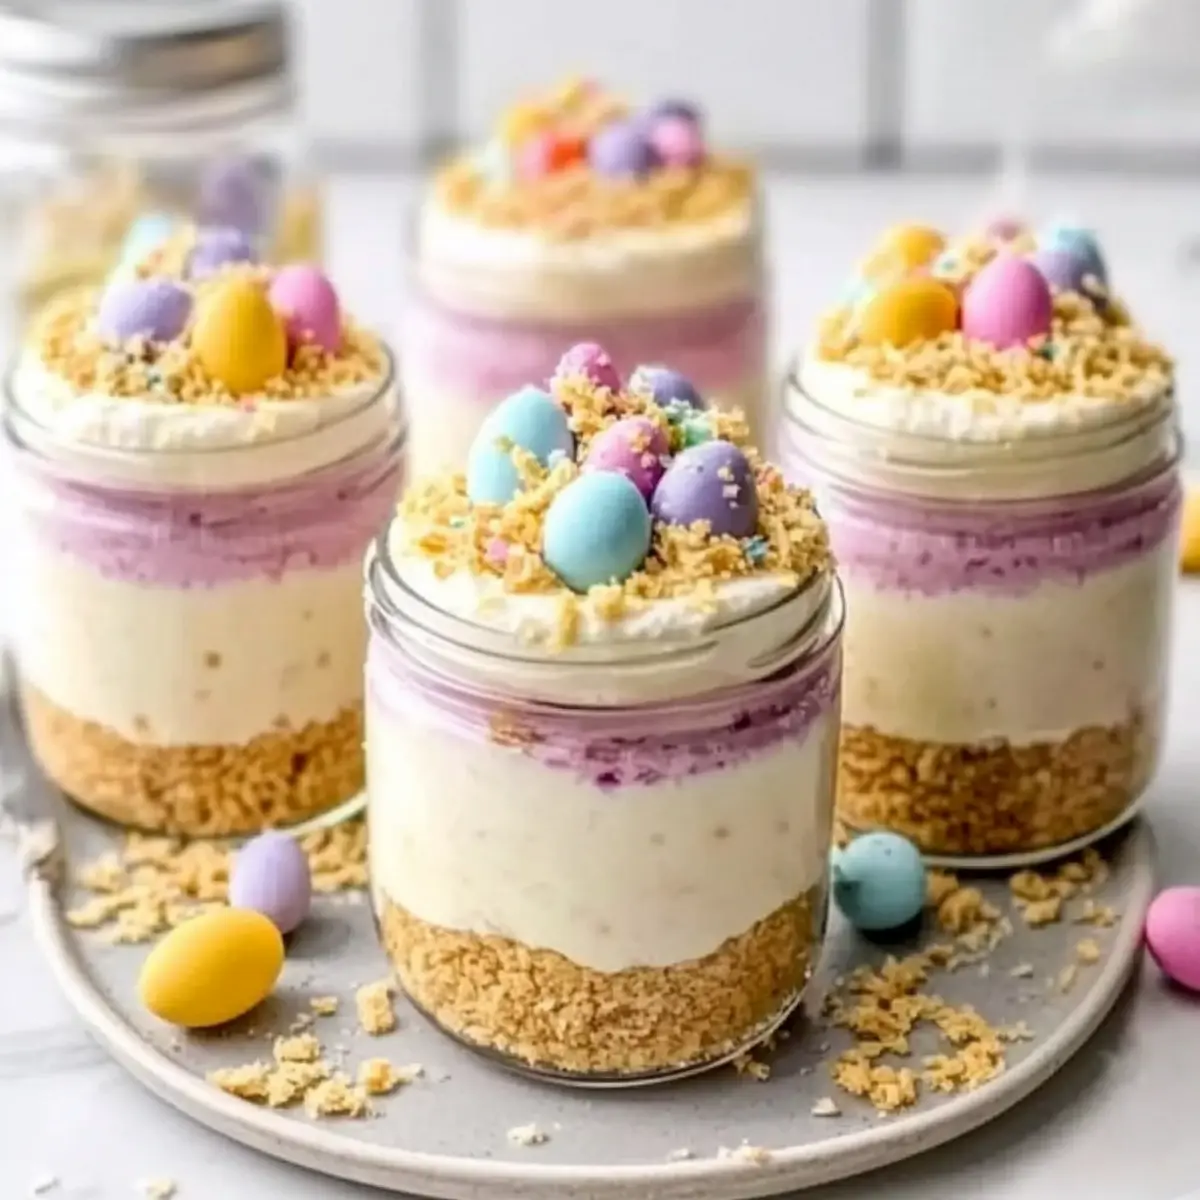
Gently fold the whipped cream into the cream cheese mixture using a spatula, being careful not to deflate the airy texture. Continue folding until fully integrated and the filling strikes a harmonious balance of creamy and light. If desired, add a few drops of gel food coloring at this stage to add a pastel tint to the cheesecake filling, making your Mini Easter Cheesecake Jars visually stunning.
Step 4: Assemble the Jars
Layer the creamy filling over the prepared crusts in each jar, using a spoon or a piping bag to fill them neatly. Aim for about two-thirds full, leaving some room at the top for decorative toppings. This layer of fluffy cheesecake will complement the crunchy base wonderfully and create a delightful surprise with every spoonful.
Step 5: Chill
Cover the jars with plastic wrap or lids and refrigerate them for at least 2 hours to allow the filling to set—this is crucial for the best texture. You can also make the Mini Easter Cheesecake Jars a day ahead and let them chill overnight, ensuring they are perfectly firm by the time your gathering begins.
Step 6: Decorate
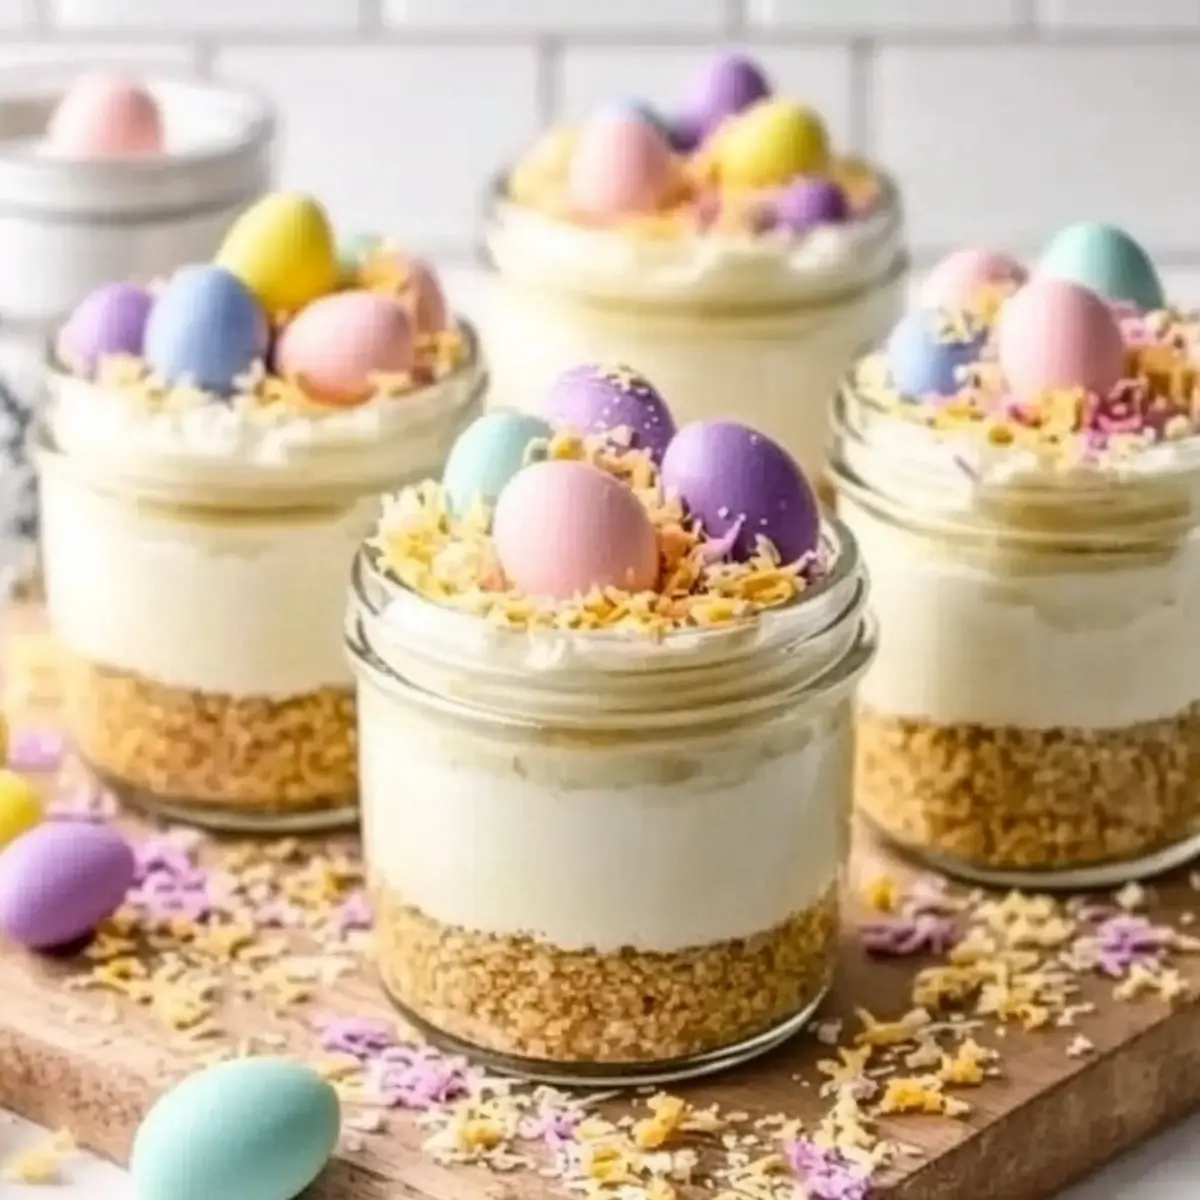
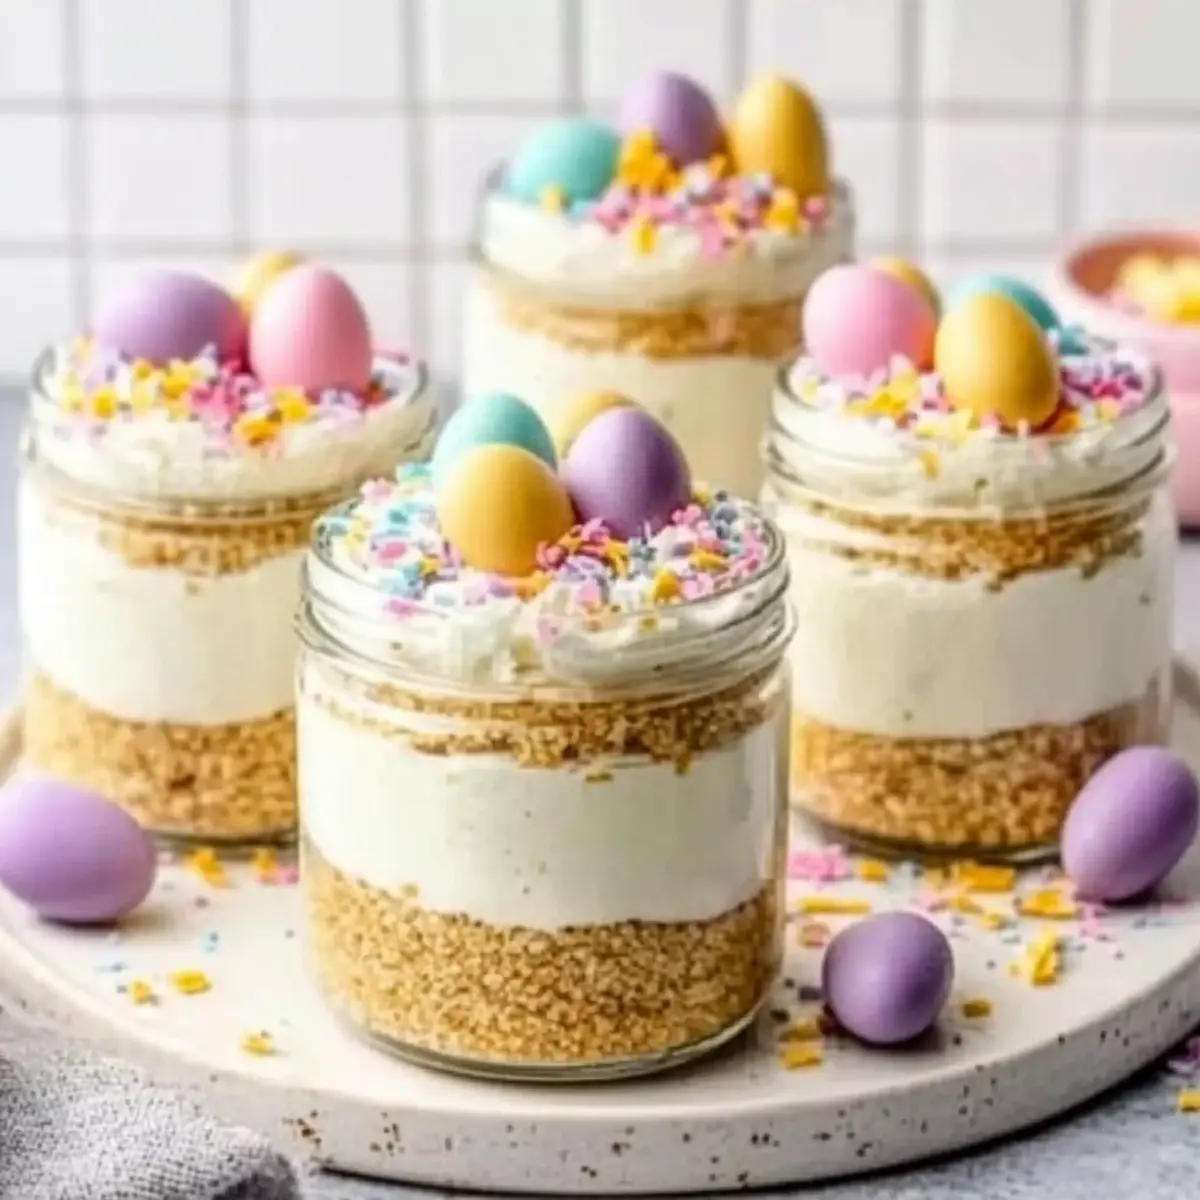
Just before serving, add your chosen decorative ingredients such as shredded coconut “grass,” pastel sprinkles, and mini chocolate eggs or jelly beans to each jar. Arrange them playfully atop the cheesecake layer, providing a festive and cheerful look that encapsulates the spirit of Easter and makes your Mini Easter Cheesecake Jars a true centerpiece.
Step 7: Serve
Gather your family and friends, and present the jars beautifully on a dessert table. Serve the Mini Easter Cheesecake Jars cold, providing small spoons for easy enjoyment. Watch as they delight in the creamy filling, crunchy crust, and enchanting decorations, making every bite a joyful celebration of spring.
Storage Tips for Mini Easter Cheesecake Jars
Fridge: Keep the jars covered in the refrigerator for up to 3 days. This ensures the cheesecake remains fresh and creamy for your enjoyment.
Freezer: For longer storage, freeze the jars (without toppings) for up to 1 month. When you’re ready to indulge, simply thaw them in the refrigerator overnight.
Reheating: Mini Easter Cheesecake Jars are best served cold, so there’s no need to reheat. Enjoy them straight from the fridge for the perfect spring treat!
Decoration: Add decorative toppings like mini chocolate eggs or sprinkles just before serving to keep them vibrant and fresh, enhancing the festive appeal.
What to Serve with Mini Easter Cheesecake Jars
Experience the joy of crafting a vibrant and delicious spring meal that complements your delightful dessert.
- Fresh Fruit Salad: A medley of seasonal fruits adds brightness and freshness, enhancing the sweet cheesecake flavors with natural tartness.
- Spring Greens Salad: A light salad with mixed greens, cherry tomatoes, and a zesty vinaigrette balances the richness of the cheesecake, providing a refreshing contrast.
- Honey-Glazed Carrots: Sweet and tender, these carrots bring a gentle sweetness that resonates beautifully with the creamy cheesecake, making for a harmonious plate.
- Savory Quiche: A slice of quiche filled with colorful vegetables and cheese creates a delightful savory element, setting the stage for a well-rounded meal.
- Mini Sandwich Platter: Create a variety of mini sandwiches with fresh ingredients. Their savory bites offer a perfect counterpoint to the sweetness of the jars.
- Lemonade or Iced Tea: Bright, refreshing beverages like homemade lemonade or iced tea will cleanse the palate between bites and enhance the cheerful spring vibe.
- Chocolate-Dipped Strawberries: These sweet treats can be a lovely dessert pairing; their smooth chocolate contrasts playfully with the creamy texture of the cheesecake jars.
- Chocolate Mousse: For true chocoholics, a light and airy chocolate mousse can be a luxurious addition, capturing the essence of spring with every rich bite.
Make Ahead Options
These Mini Easter Cheesecake Jars are perfect for busy home cooks looking to save time during spring celebrations! You can prepare the crust and filling up to 24 hours in advance. Simply make the crust and layer it into the jars, then whip up the cheesecake filling and spoon it on top. Cover the jars tightly and refrigerate them to maintain freshness and prevent browning. To keep the decorations looking vibrant, add candy decorations just before serving. This way, when your gathering arrives, you can relax and present these delightful jars with ease, ensuring they are just as delicious as if made fresh on the day!
Mini Easter Cheesecake Jars Variations & Substitutions
Feel free to get creative and make these delightful Mini Easter Cheesecake Jars truly your own!
-
Dairy-Free: Substitute cream cheese with a dairy-free cream cheese, and use coconut milk for the whipping cream for a creamy texture.
With this swap, you can enjoy the same luscious taste while catering to dairy-free friends and family. -
Sugar-Free: Opt for a sugar substitute, like monk fruit sweetener, instead of powdered sugar for a guilt-free treat.
This way, you maintain sweetness without the extra calories, making dessert more accessible to everyone! -
Fruit-Infused: Add a layer of fruit compote, like strawberry or raspberry, between crust and filling for a fruity surprise.
Not only does this add a vibrant color, but it also brings a fresh twist to your cheesecake jars. -
Chocolate Delight: Replace graham cracker crumbs with chocolate cookie crumbs for an extra chocolaty crust.
This indulgent twist is perfect for chocolate lovers and complements the creamy filling beautifully! -
Flavor Variations: Swap lemon juice for orange juice or use lime zest for a zesty kick in your filling.
These substitutions offer refreshing new tastes, making it a fun surprise for all taste buds. -
Spicy Kick: Adding a dash of cayenne pepper or cinnamon in the filling creates a surprising flavor depth.
This subtle heat brings a unique twist to the classic cheesecake, making it intriguing and memorable. -
Nutty Crunch: Incorporate finely chopped nuts into the crust for added texture and flavor, or sprinkle on top.
This gives that delightful crunch, enhancing the overall mouthfeel while adding a nutritious element.
For more delicious dessert ideas, I recommend checking out my Sugar Cookie Cheesecake or the delightful Brown Butter Cheesecake. Each offers unique flavors and fun twists to explore!
Expert Tips for Mini Easter Cheesecake Jars
-
Perfect Cream Cheese: Ensure your cream cheese is just softened and not melted for a smooth filling. Over-softening can lead to a runny texture.
-
Whipping Wisely: Whip the heavy cream to medium-stiff peaks for airy filling. If over-whipped, it can become grainy and lose its lightness.
-
Gentle Folding: Carefully fold the whipped cream into the cream cheese mixture. Overmixing will deflate the whipped cream and affect the filling’s airiness.
-
Timing for Toppings: Decorate the jars right before serving to maintain freshness and vibrancy in the colors of the toppings, especially the gel food coloring.
-
Chilling Time: Refrigerate your jars for at least 2 hours, but overnight is best for achieving that perfect cheesecake texture. This ensures the Mini Easter Cheesecake Jars are cohesive and satisfying to enjoy!
Mini Easter Cheesecake Jars Recipe FAQs
What kind of graham cracker crumbs should I use for the crust?
You can use standard graham cracker crumbs for a classic taste, but if you’re looking for a twist, digestive biscuits work wonderfully too! Just crush them finely to ensure a great texture in your crust.
How long can I store the Mini Easter Cheesecake Jars in the fridge?
These delightful jars can be kept covered in the refrigerator for up to 3 days. Make sure they are airtight to maintain their creamy texture!
Can I freeze Mini Easter Cheesecake Jars?
Absolutely! For longer storage, you can freeze the jars without the decorative toppings for up to 1 month. To do this, ensure they are well-covered, then thaw them in the refrigerator overnight before serving.
What should I do if my whipped cream isn’t reaching medium-stiff peaks?
If your whipped cream isn’t thickening, make sure your bowl and beaters are cold. Chill them beforehand for 10-15 minutes. Whipping it too long can also lead to a grainy consistency, so keep an eye on it and stop when it holds its shape without being overly stiff.
Can I make these jars dairy-free?
Yes, you can easily adapt this recipe for a dairy-free version! Substitute the cream cheese with a dairy-free cream cheese alternative and use coconut oil instead of butter for the crust. Always check labels to ensure they fit your dietary needs.

Delightful Mini Easter Cheesecake Jars for Spring Celebrations
Ingredients
Equipment
Method
- In a mixing bowl, combine graham cracker crumbs, melted butter, sugar, and salt. Press the mixture into the bottoms of the jars to form the crust.
- In a separate bowl, whip the heavy cream to medium-stiff peaks. In another bowl, beat the cream cheese, powdered sugar, vanilla, and lemon juice until smooth.
- Gently fold the whipped cream into the cream cheese mixture until combined. Optionally, add gel food coloring.
- Layer the cheesecake filling over the crusts in each jar, filling to about 2/3 full.
- Cover and refrigerate for at least 2 hours, or overnight for best results.
- Before serving, add decorative toppings such as coconut, sprinkles, and chocolate eggs.
- Serve cold, providing small spoons for enjoyment.
Leave a Reply