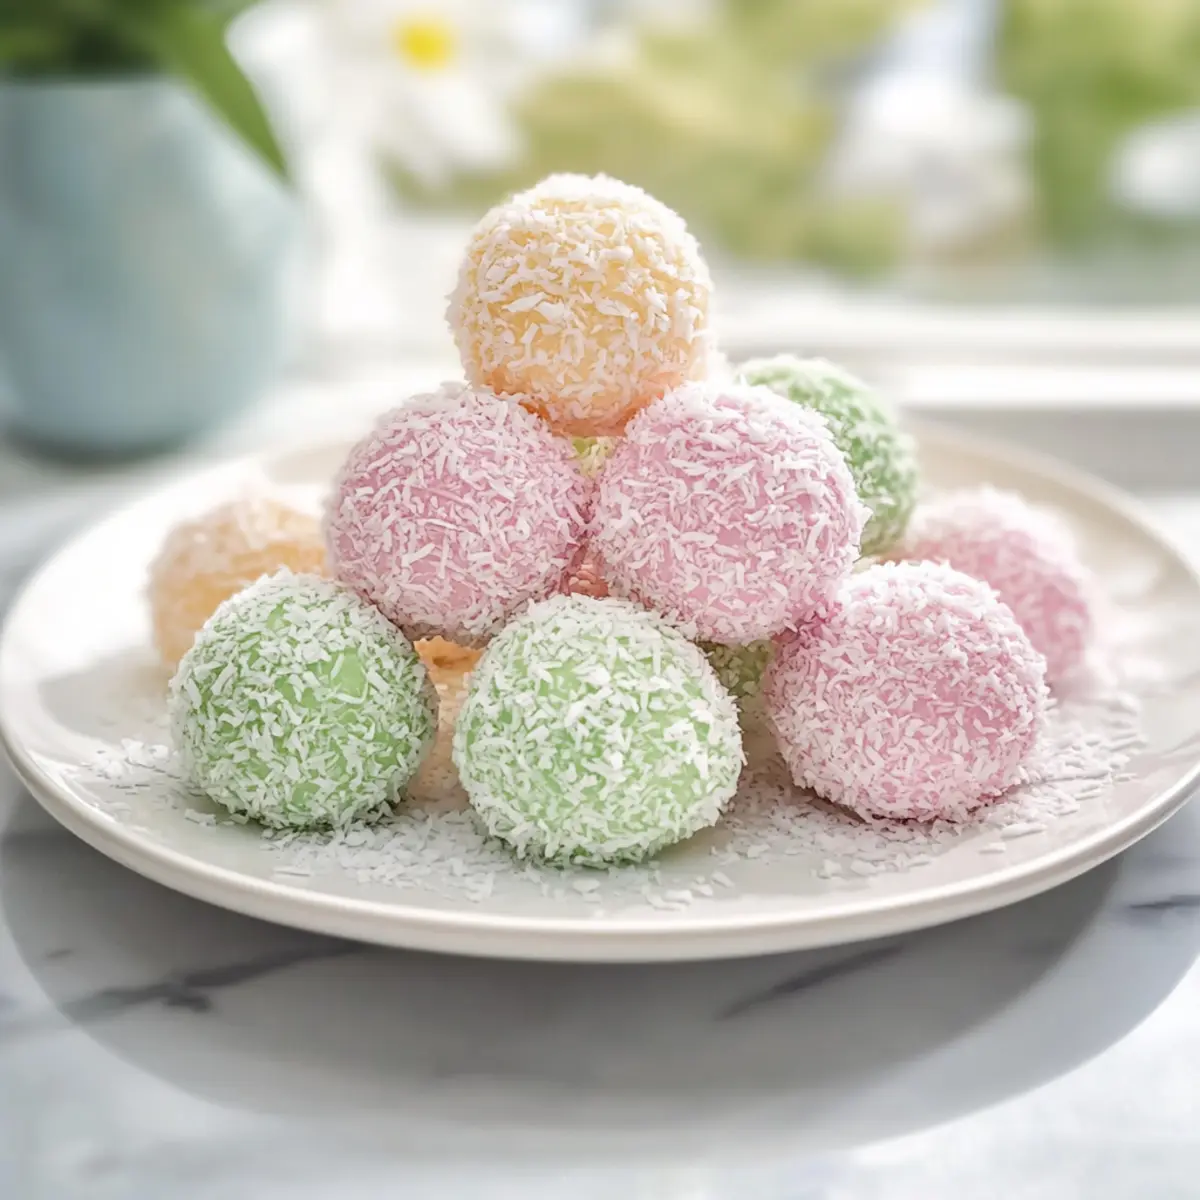
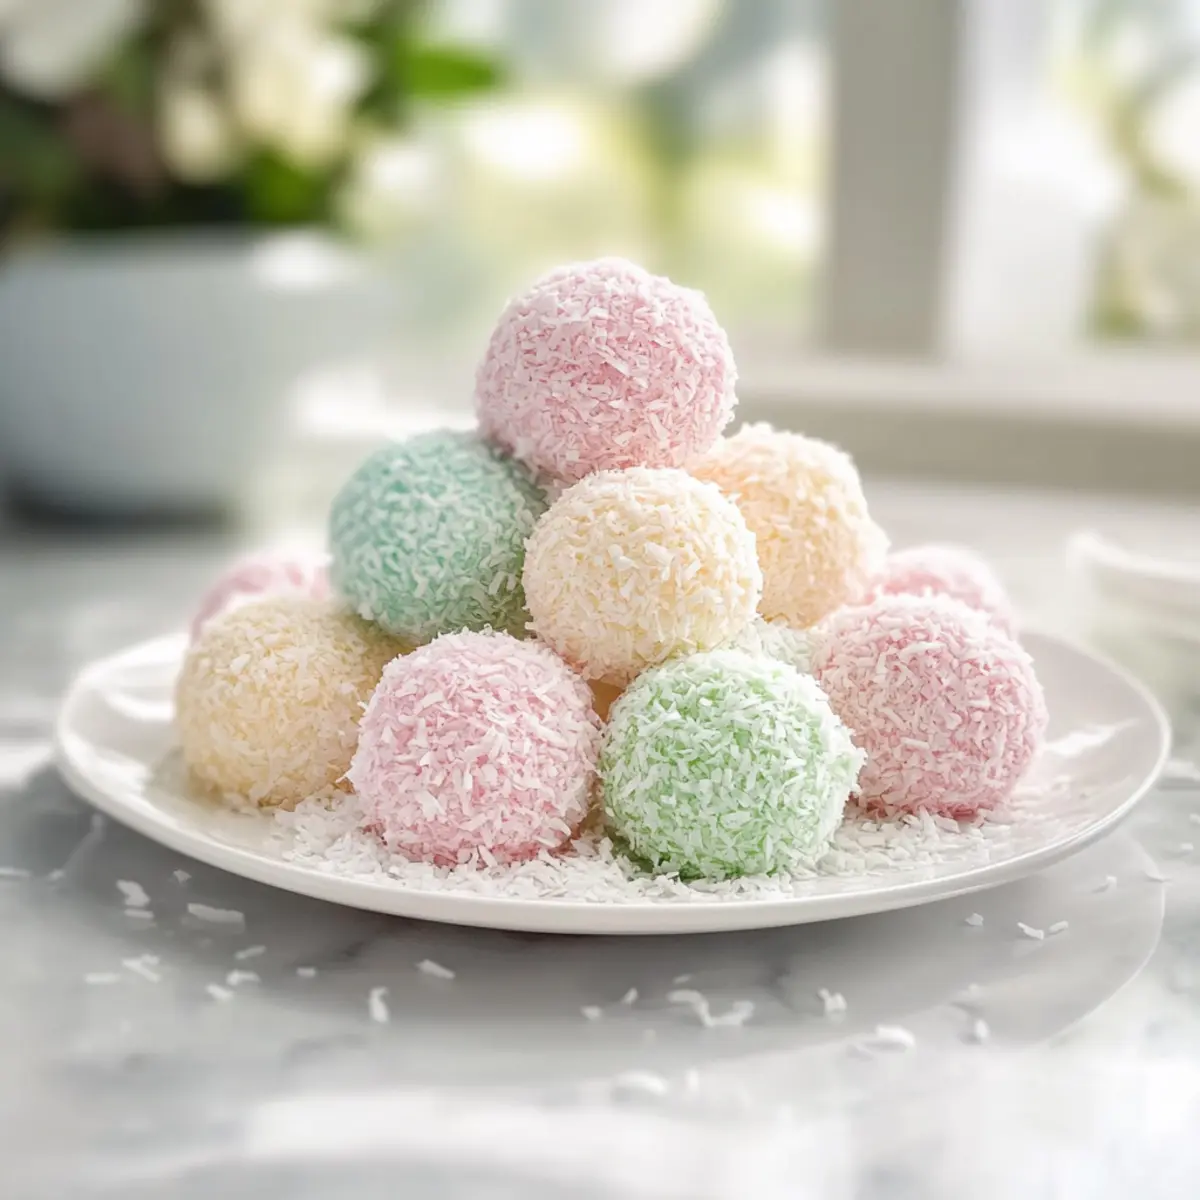
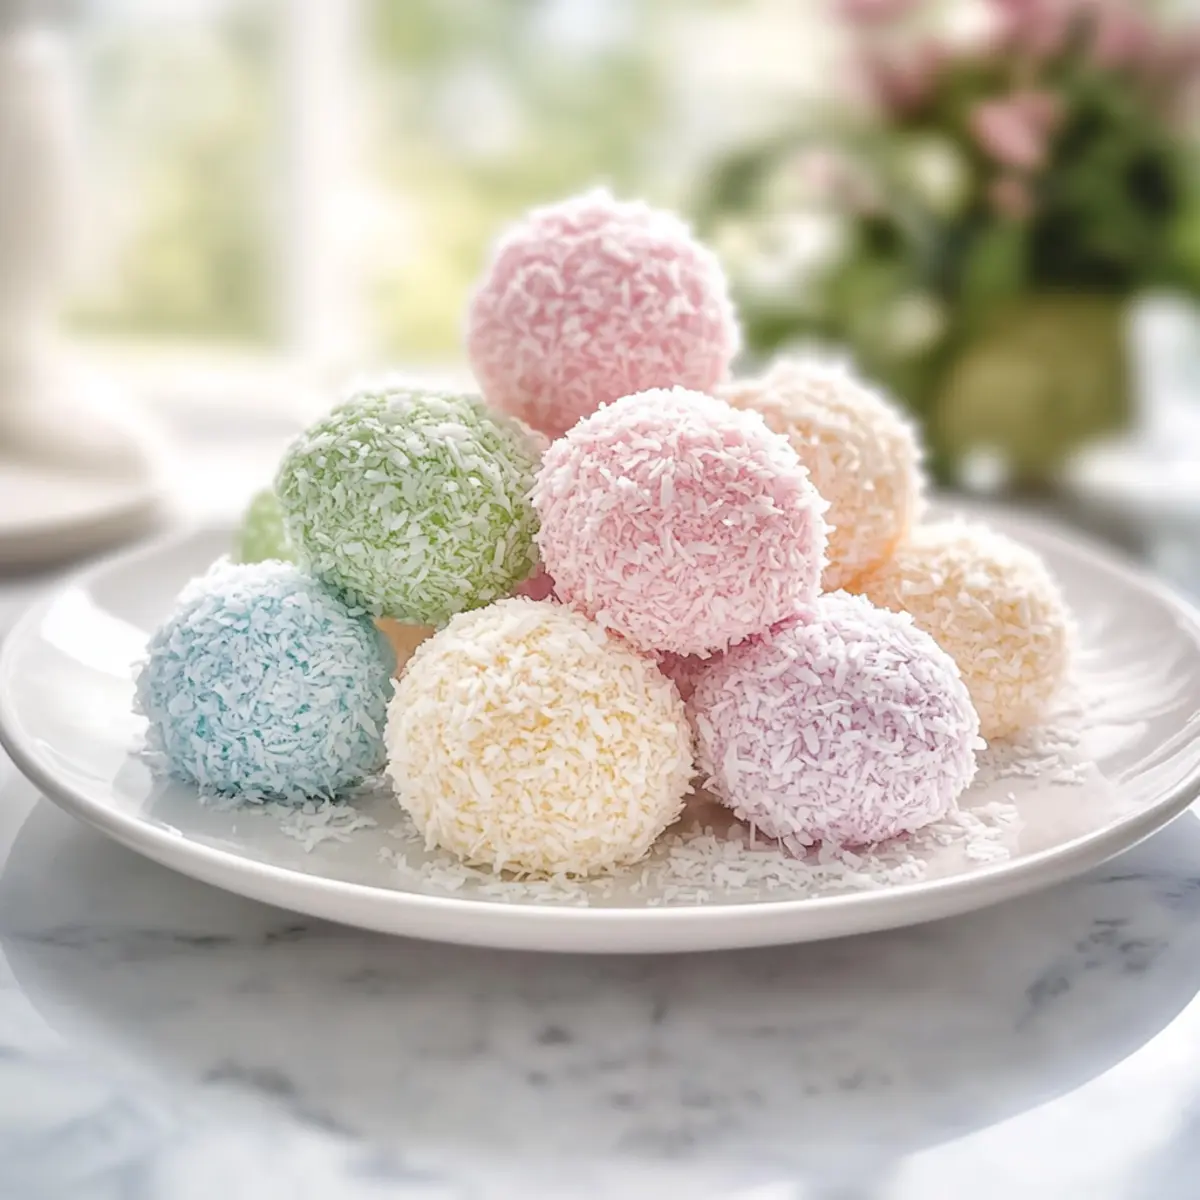
Springtime whispers of joy and renewal, and I can’t think of a sweeter way to celebrate than with No-Bake Easter Bunny Coconut Tails! These delightful treats capture the essence of the season with their fluffy texture and pastel coatings, making them an eye-catching addition to any festive gathering. Not only are they incredibly simple to whip up with pantry staples, but these coconut delights are also perfect for busy home chefs eager to impress without spending hours in the kitchen. Picture this: a treat that’s not just a dessert but an adorable decoration that brings cheer to your Easter table! Curious about how to create these whimsical bites that everyone will love? Let’s dive into the deliciousness together!
Why Make Easter Bunny Coconut Tails?
Irresistible Treat: These Easter Bunny Coconut Tails are not only visually stunning but also offer a soft, chewy texture that everyone will adore. No-Bake Ease: With simple pantry staples, they require minimal effort and time, allowing busy home cooks to shine without hassle. Versatile Delight: Customize your coconut coatings or even switch up the shapes, making them perfect for any gathering. Festive Appeal: Their pastel colors and cute bunny-tail appearance bring a joyful spring charm to your table. For a whimsical twist, consider pairing them with other delightful treats like Baked Cod Coconut, adding more festive flair to your celebrations.
Easter Bunny Coconut Tails Ingredients
For the Coconut Mixture
- Medium Shredded Coconut – Provides the chewy base of the treats; can be substituted with sweetened shredded coconut for a sweeter flavor.
- Sweetened Condensed Milk – Binds the ingredients together and adds sweetness; no direct substitution recommended but can reduce added sugar for a lighter taste.
- Butter (melted and cooled) – Adds richness and flavor; use unsalted butter for the best results, or margarine may work as a substitute.
- Vanilla Extract – Enhances flavor depth; almond extract can be used for a different flavor profile.
- Confectioner’s Sugar – Balances texture and sweetness; adjust the quantity based on your sweetness preference.
For the Coating
- Fine Shredded Coconut – Used for coating; creates a pastel look. Alternate with colored coconut made from natural food colorings for a healthier option.
These Easter Bunny Coconut Tails are a breeze to put together, making your spring celebrations sweeter and brighter!
Step‑by‑Step Instructions for Easter Bunny Coconut Tails
Step 1: Prepare the Mixture
In a large mixing bowl, whisk together the sweetened condensed milk, cooled melted butter, and vanilla extract until the mixture is smooth and glossy. This should take about 2 minutes of vigorous stirring. Ensure all ingredients are well incorporated, as this creamy base will bind your Easter Bunny Coconut Tails together beautifully.
Step 2: Combine Dry Ingredients
Add the medium shredded coconut and confectioner’s sugar to the bowl. Mix thoroughly for about 3-4 minutes until the mixture is thick and evenly combined. It will start to feel firm and sticky, which is just right. Once combined, cover the bowl and chill the mixture in the refrigerator for 15 minutes to firm it up further, making shaping easier.
Step 3: Tint the Coating
While the mixture chills, divide the fine shredded coconut into separate bowls. Add a few drops of liquid food coloring to each bowl and mix until the coconut is tinted evenly. Use your hands to break up clumps and ensure the color is distributed well. This vibrant coconut will provide that delightful pastel look for your Easter Bunny Coconut Tails.
Step 4: Shape the Treats
Once the chilled mixture is firm, scoop out 1½ teaspoons of the mixture and roll it into smooth balls using your hands. You should be able to form about 20 balls. The mixture should be easy to roll; if it feels too sticky, you can add a bit more medium shredded coconut to help.
Step 5: Coat the Balls
Take each rolled ball and gently roll it in the tinted fine shredded coconut until fully coated. Ensure each ball is evenly covered to achieve that perfect pastel appearance. Place the coated balls on a tray lined with parchment paper, keeping them spaced apart to prevent sticking.
Step 6: Chill and Set
Transfer the tray with the coated Easter Bunny Coconut Tails to the refrigerator and let them chill for 1 hour. This will allow them to firm up nicely. Once set, store the treats in an airtight container in the fridge until you’re ready to serve. They can sit at room temperature for a few minutes before serving for the best texture.
Make Ahead Options
These delightful Easter Bunny Coconut Tails are ideal for meal prep, allowing busy home cooks to enjoy a stress-free celebration! You can prepare the coconut mixture up to 24 hours in advance by following the initial steps and chilling it in the refrigerator. Once you shape the balls and coat them, they can be stored in an airtight container and kept in the fridge for up to 3 days. To maintain their perfect texture, ensure they are well-coated to prevent drying out. When it’s time to serve, let them sit at room temperature for a few minutes for the best flavor and softness. This way, you’ll have a charming spring treat ready to impress your guests with minimal effort!
How to Store and Freeze Easter Bunny Coconut Tails
Fridge: Store in an airtight container in the refrigerator for up to 1 week. This keeps your Easter Bunny Coconut Tails fresh while preserving their delightful texture.
Freezer: For longer storage, freeze the treats for up to 3 months. Layer them between parchment paper in an airtight container to prevent sticking and clumping.
Thawing: When you’re ready to enjoy, simply remove them from the freezer and thaw in the fridge for several hours or at room temperature for about 30 minutes.
Serving Tip: Allow the treats to sit at room temperature briefly before serving, enhancing their softness and bringing out the lovely flavors in each bite.
Easter Bunny Coconut Tails Variations
Customize your Easter Bunny Coconut Tails to match your mood or dietary needs, and let your creativity shine!
- Dairy-Free: Substitute butter with coconut oil for a rich, dairy-free alternative without compromising flavor.
- Chocolate Lovers: Mix in mini chocolate chips for an extra sweet surprise, adding delightful pockets of chocolate in every bite.
- Nutty Twist: Incorporate crushed almonds or walnuts into the coconut mixture to introduce a delightful crunch and nutty flavor.
- Flavor Boost: For a burst of flavor, add citrus zest like lemon or orange, enhancing the freshness of the coconut.
- Different Shapes: Get creative by shaping the mixture into bunny ears or small egg forms to switch up presentation, making them even more festive.
- Heated Kick: Add a pinch of cayenne pepper to the coconut mixture for a sweet and spicy adventure that will surprise your taste buds!
- Alternative Toppings: Instead of tinted coconut, try rolling them in crushed pistachios or cacao nibs for a unique coating that adds both color and texture.
Explore these fun twists to delight your guests, and for a complete festive treat table, consider pairing these with some Baked Cod Coconut to balance the sweetness with a savory option. Enjoy the playful process of creating your own variations and make this Easter memorable!
Expert Tips for Easter Bunny Coconut Tails
- Combine Well: Ensure the coconut mixture is thoroughly combined to prevent any breaks when shaping, as this helps create sturdy Easter Bunny Coconut Tails.
- Chill for Firmness: Don’t skip the chilling step! It makes rolling easier and ensures they hold their shape beautifully once coated.
- Tinting Technique: Use gel food coloring for vibrant and even hues; it won’t clump like liquid alternatives and adds a festive touch.
- Avoid Stickiness: If the mixture feels too sticky, simply add a bit more medium shredded coconut to achieve the right consistency for rolling.
- Coating Options: Feel free to get creative with coatings! Try using melted chocolate or toasted coconut for a unique twist on these delightful treats.
What to Serve with Easter Bunny Coconut Tails?
Springtime celebrations deserve the perfect complements to your delightful treats, making every bite even more memorable.
- Fresh Fruit Salad: Bright and juicy, a refreshing blend of seasonal fruits adds a burst of flavor and color to your dessert spread.
- Whipped Cream: Light and airy, a dollop of homemade whipped cream enhances the sweetness of the coconut tails beautifully. It’s a simple addition that feels luxurious.
- Chocolate Dipped Strawberries: The rich chocolate offers a delightful contrast to the sweet coconut, creating a balance of flavors that everyone craves.
- Carrot Cake Cupcakes: These moist, spiced cupcakes offer a classic Easter flavor while adding a festive touch to your dessert table. They pair perfectly with the coconut tails!
- Sparkling Lemonade: A fizzy and slightly tart drink can refresh the palate, making your sweet treats feel even more special. This drink sings of spring!
- Mini Easter Egg Cookies: Classic cookies shaped like Easter eggs provide a whimsical touch while enhancing the festivities of your gathering. A sweet addition to round out the table.
- Coconut Macaroons: For the true coconut lover, these chewy bites echo the flavors of your coconut tails but bring a different texture to the mix.
- Decaf Iced Coffee: For guests who enjoy a gentle caffeine kick, this chilled beverage pairs perfectly with sweet treats, rounding out the meal while keeping it light.
- Pineapple Upside Down Cake: This retro classic adds a tropical flair, showcasing warm flavors that beautifully contrast the cool coconut treats.
- Peach Sorbet: Light and fruity, a scoop of this sorbet can cleanse the palate and provide a refreshing finish to your Easter meal.

Easter Bunny Coconut Tails Recipe FAQs
What type of coconut should I use for Easter Bunny Coconut Tails?
Absolutely! You’ll want to use medium shredded coconut for the base of your treats, as it provides the chewy texture. You can substitute this with sweetened shredded coconut if you’re looking for a bit more sweetness in your bites. For the coating, fine shredded coconut works best, giving that lovely pastel appearance.
How should I store my Easter Bunny Coconut Tails?
To keep your treats fresh, store them in an airtight container in the refrigerator for up to 1 week. This will help preserve their delightful texture and taste. If you want to store them longer, freeze them for up to 3 months. Be sure to layer them between parchment paper to prevent sticking!
Can I freeze Easter Bunny Coconut Tails? If so, how?
Yes, you can! Freezing is a great option for these coconut tails. To freeze them, first, place them on a baking sheet lined with parchment paper and freeze until firm. Then, transfer them to an airtight container, layering between parchment paper to avoid clumping. They’ll keep for up to 3 months. When you’re ready to enjoy them, just thaw them in the fridge for several hours or at room temperature for around 30 minutes before serving.
What if my mixture feels too sticky to roll?
Very! If you find your mixture is too sticky while trying to roll it into balls, don’t worry! Simply add a bit more medium shredded coconut to the mixture until it reaches a consistency that’s easy to work with. This will help you shape the balls without them falling apart.
Are there any dietary considerations for Easter Bunny Coconut Tails?
Definitely! As with any recipe, it’s wise to consider dietary restrictions. These treats contain dairy from butter and sweetened condensed milk, so they won’t be suitable for those with lactose intolerance or dairy allergies. You can experiment with dairy-free options like coconut cream for a non-dairy version. Additionally, if you’re making them for young children or pets, always check for any nut allergies, especially if you decide to use almond extract.
Can I customize the colors of the coating?
The more the merrier! You can easily customize the colors of the fine shredded coconut by adding different shades of liquid or gel food coloring. Gel food coloring works especially well, providing vibrant and even coatings without clumping. Just remember to mix thoroughly to achieve that perfect pastel look for your Easter Bunny Coconut Tails!
Easter Bunny Coconut Tails: Delightful No-Bake Spring Treats
Ingredients
Equipment
Method
- In a large mixing bowl, whisk together the sweetened condensed milk, cooled melted butter, and vanilla extract until smooth and glossy for about 2 minutes.
- Add the medium shredded coconut and confectioner’s sugar to the bowl, mixing thoroughly for 3-4 minutes until thick and sticky. Chill the mixture in the refrigerator for 15 minutes.
- Divide the fine shredded coconut into separate bowls and add a few drops of food coloring, mixing until evenly tinted.
- Scoop out 1½ teaspoons of the chilled mixture and roll it into smooth balls, forming about 20 balls.
- Gently roll each ball in the tinted fine shredded coconut until fully coated, then place on a tray lined with parchment paper.
- Refrigerate the coated Easter Bunny Coconut Tails for 1 hour to firm up before serving.
Leave a Reply