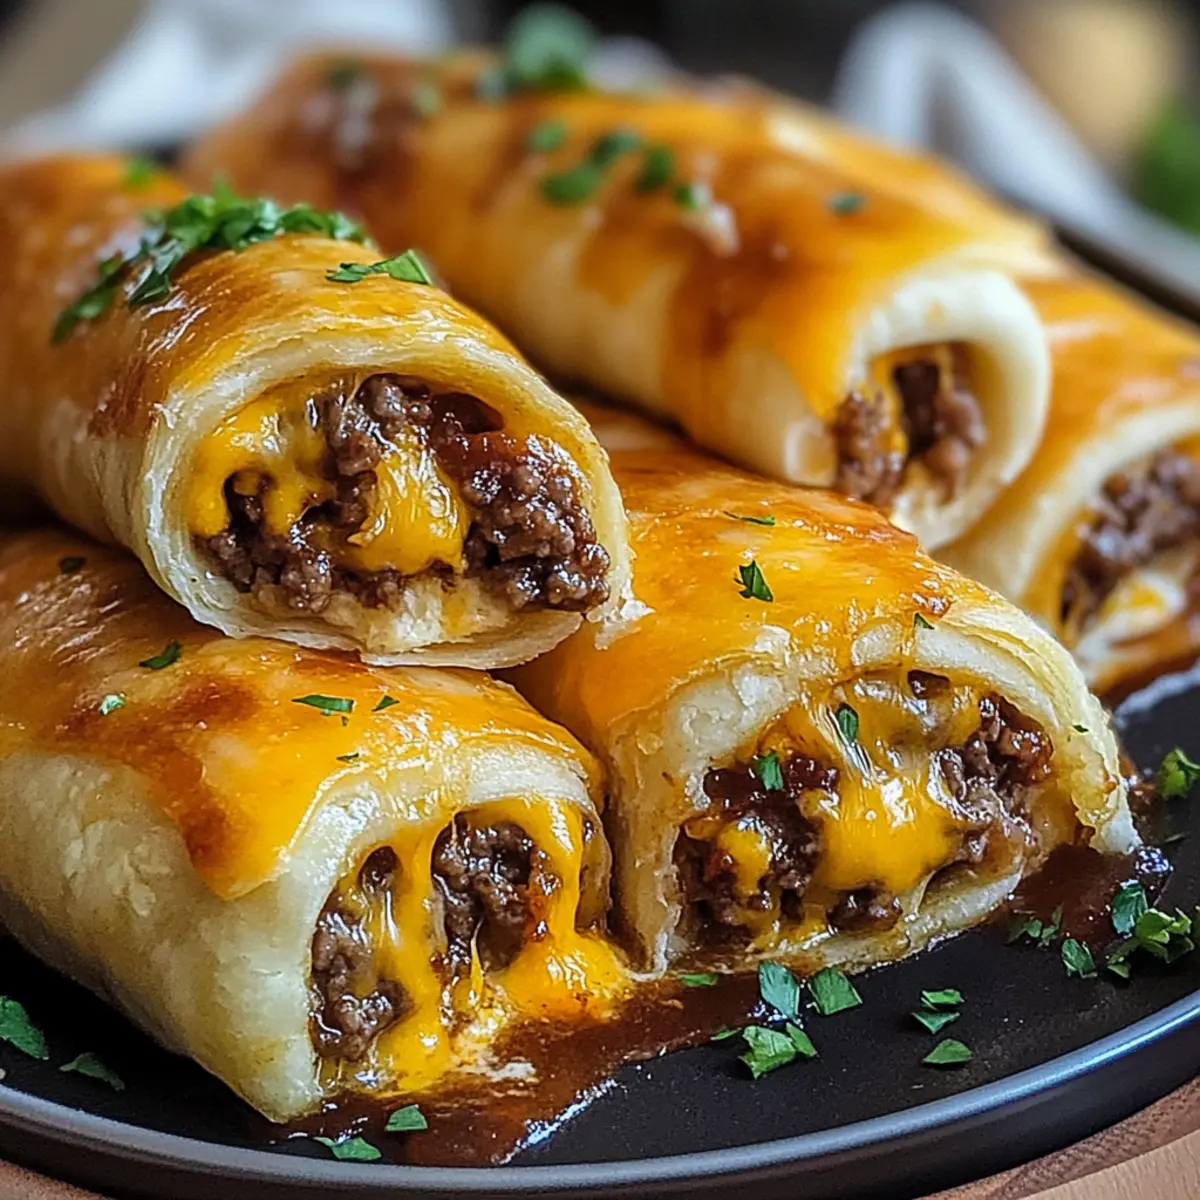
As the aroma of garlic butter fills the kitchen, a delightful memory pulls me back to childhood gatherings where the food was as comforting as the company. This recipe for Garlic Butter Cheeseburger Roll Ups transforms simple ingredients into delicious morsels, where ground beef, melty cheese, and crispy pastry come together in perfect harmony. Not only are they easy to whip up in under 30 minutes, making them a lifesaver on busy evenings, but they also allow for endless customization—think crispy jalapeños, smoky bacon, or even sautéed mushrooms! Whether you’re hosting friends for game day or craving a cozy night in, these roll ups are your new secret weapon in the world of comfort food. How do you envision personalizing yours?
How will you customize your roll ups?
Endless personalization: With their adaptable nature, these roll ups allow you to unleash your creativity. Quick to prepare: Perfect for those hectic weeknights, ready in just 30 minutes! Crowd-pleaser: Serve them at your next gathering, and watch everyone dive in for seconds. Delicious flavor fusion: The combination of garlic butter, cheese, and beef creates an unforgettable taste experience. For a little twist, consider making Egg Roll Bowl for a fresh take or explore the delightful flavors in Patterned Pumpkin Roll. Freezable delight: Make a big batch and store them for a future snack attack!
Hamburger Roll Ups Ingredients
For the Filling
- Ground Beef (1 lb) – The star of the show that adds richness and heartiness to your roll ups.
- Small Onion (1, finely chopped) – Brings sweetness and depth; you can swap with shallots for a milder touch.
- Garlic Powder (1 tsp) – Offers a savory kick; fresh garlic can also bring a vibrant flavor boost.
- Salt and Black Pepper – Essential seasonings to elevate the taste; feel free to adjust to your preference.
- Shredded Cheddar Cheese (1 cup) – Melts beautifully for that classic cheeseburger essence; try mozzarella for a milder taste or pepper jack for a spicy twist.
- Yellow Mustard & Ketchup (1 tbsp each, optional) – Adds that familiar burger flavor; omit for a simpler taste.
For the Dough
- Refrigerated Crescent Roll Dough (1 can, 8-count) – This flaky dough makes assembly a breeze; substitute with puff pastry for a gourmet touch.
For the Garlic Butter Topping
- Unsalted Butter (2 tbsp, melted) – Forms the base of your garlic butter; olive oil can be a lighter alternative.
- Minced Garlic (1 tsp) – Intensifies the garlic flavor in the topping; adjust according to your taste.
- Fresh Parsley (optional) – Adds a pop of color and freshness to your finished dish; consider other herbs like thyme or chives for variety.
The Hamburger Roll Ups are a delightful twist on comfort food, perfect for sharing or a cozy night in!
Step‑by‑Step Instructions for Hamburger Roll Ups
Step 1: Preheat the Oven
Begin by preheating your oven to 375°F (190°C). Line a baking sheet with parchment paper, ensuring it’s ready to catch all those delicious golden delights. This setup will not only help in easy clean-up but also prevent the Hamburger Roll Ups from sticking to the pan.
Step 2: Cook the Beef Mixture
In a medium skillet over medium heat, cook 1 pound of ground beef with a finely chopped onion until the beef is browned and the onion is translucent, about 6-8 minutes. Drain the excess grease to keep your roll ups light and fluffy. Let this mixture cool slightly to avoid soggy dough when assembling.
Step 3: Season the Beef
Once the beef mixture has cooled, stir in 1 teaspoon of garlic powder, along with salt and black pepper to taste. If you’re feeling adventurous, add 1 tablespoon each of yellow mustard and ketchup for a burger-like flavor. Mix well until all ingredients are evenly distributed, and set aside.
Step 4: Prepare the Crescent Dough
Unroll the refrigerated crescent roll dough and separate it into triangles. Lay the triangles out on a clean surface, making sure they are ready for stuffing. Using crescent dough helps create a flaky exterior for your Hamburger Roll Ups, making them simply irresistible.
Step 5: Fill and Roll the Dough
Take a spoonful of your beef mixture and place it on the wide end of each dough triangle. Sprinkle some shredded cheddar cheese on top of the beef filling. Roll the crescent dough toward the tip, enclosing the filling. Ensure the seam is tucked well to prevent any leaks during baking.
Step 6: Arrange on Baking Sheet
Transfer the rolled-up dough to the prepared baking sheet, placing them seam-side down. Leave some space between each roll up to allow for even baking. This step will help achieve that lovely golden brown color we all love in our Hamburger Roll Ups.
Step 7: Brush with Garlic Butter
In a small bowl, combine 2 tablespoons of melted unsalted butter with 1 teaspoon of minced garlic. Brush this garlic butter mixture generously over each roll up to enhance flavor and achieve a beautiful glaze. This adds an irresistible aroma as they bake—your kitchen will start to smell divine!
Step 8: Bake Until Golden
Place the baking sheet in the preheated oven and bake for 12-15 minutes. Watch for the roll ups to turn a lovely golden brown—this color indicates they’re perfectly baked. For an extra burst of flavor, consider brushing on more garlic butter once they’re out of the oven.
Step 9: Serve and Enjoy
Once baked, remove your Hamburger Roll Ups from the oven and let them cool for a few minutes before serving. Pair with your favorite dipping sauces, such as ranch or spicy ketchup, and enjoy these delightful bites—whether for game day or a cozy family dinner!
Storage Tips for Hamburger Roll Ups
Fridge: Store leftover Hamburger Roll Ups in an airtight container in the fridge for up to 3 days; this helps maintain their flaky texture.
Freezer: For longer storage, freeze baked roll ups individually wrapped in plastic wrap or foil for up to 2 months. Thaw overnight in the fridge before reheating.
Reheating: Reheat in a preheated oven at 350°F (175°C) for 10-15 minutes to restore their crispiness. Avoid microwaving, as this may make them soggy.
Hamburger Roll Ups Customization Ideas
Feel free to get creative with these delicious roll ups and make them truly your own!
-
Bacon Cheeseburger Roll Ups: Add cooked, chopped bacon to the beef mixture for a smoky, savory boost. The addition of crispy bacon brings an irresistible crunch and delicious flavor that elevates the comfort food experience.
-
Jalapeño Popper Roll Ups: Incorporate cream cheese and sliced jalapeños into the filling for a spicy kick. This variation adds a creamy texture along with a delightful heat that will have spicy food lovers coming back for more.
-
Mushroom Swiss Roll Ups: Swap out the cheddar for Swiss cheese and mix in sautéed mushrooms for an earthy flavor twist. The rich, nutty notes of Swiss cheese paired with mushrooms make for a gourmet experience in every bite.
-
Pizza Burger Roll Ups: Combine diced pepperoni and marinara sauce with the beef for a pizza-inspired treat. This playful twist satisfies both burger and pizza cravings, making it a perfect choice for kids and adults alike!
-
Low-Carb/Keto Option: Use almond flour-based dough or lettuce wraps instead for a low-carb version. This makes the roll ups lighter while maintaining a satisfying flavor, perfect for those following a keto lifestyle.
-
Vegan Roll Ups: Substitute plant-based ground meat and vegan cheese for an entirely meat-free option. You can still enjoy the comforting essence of these tasty roll ups while keeping it cruelty-free.
Experiment with these variations to experience a new flavor sensation with each batch. If you’re looking for more inspiration, consider making the Egg Roll Bowl for a fresh twist or explore the enticing flavors in the Patterned Pumpkin Roll. Every roll up offers an opportunity to create something uniquely delicious!
Expert Tips for Hamburger Roll Ups
-
Cool the Filling: Allow the beef mixture to cool slightly before filling the dough to prevent soggy pastries and ensure a crispy finish.
-
Don’t Overfill: Limit the filling to about 2 tablespoons per roll. Overstuffing can lead to messy leaks during baking.
-
Seal the Dough: Pinch the seams of the dough firmly to prevent any filling from escaping while they bake. This keeps your Hamburger Roll Ups intact and delicious.
-
Use Parchment Paper: Lining your baking sheet with parchment paper helps avoid sticking and ensures easy cleanup after baking.
-
Preheat Thoroughly: Make sure your oven is fully preheated to 375°F for even baking. This ensures the roll ups achieve that golden-brown finish everyone loves.
Make Ahead Options
These Garlic Butter Cheeseburger Roll Ups are perfect for meal prep enthusiasts! You can assemble the roll ups up to 24 hours in advance by preparing them fully, then covering them with plastic wrap and storing them in the refrigerator. This allows the flavors to meld, ensuring they’re just as delicious when baked. For longer-term storage, freeze the assembled roll ups for up to 2 months—just bake them directly from frozen, adding a few extra minutes to the cooking time. When you’re ready to enjoy, simply bake as instructed and savor these warm, comforting bites with minimal effort, making busy weeknights feel like a cozy gathering!
What to Serve with Garlic Butter Cheeseburger Roll Ups
Creating a memorable meal is easy when you have delicious accompaniments to elevate those scrumptious bites!
-
Crispy French Fries: The perfect companion, golden-brown fries add a satisfying crunch that will delight your taste buds with every bite.
-
Classic Coleslaw: A tangy, creamy coleslaw provides a refreshing contrast, balancing the rich flavors of the roll ups with its crisp vegetables and zesty dressing.
-
Spicy Ketchup Dip: Amp up your enjoyment with a zesty ketchup mixed with a dash of hot sauce for a kick that complements the savory cheeseburger flavor.
-
Garlic Butter Green Beans: These sautéed green beans tossed in extra garlic butter bring a burst of freshness and vibrant color on your plate, enhancing your overall meal experience.
-
Homemade Ranch Dressing: Serve with a cool ranch dip for a creamy, herb-infused flavor that beautifully complements the savory roll ups.
-
Sweet Potato Wedges: Oven-baked sweet potato wedges add a naturally sweet and earthy flavor profile, making each bite complementary to the hearty roll ups.
-
Crisp Garden Salad: A light garden salad with mixed greens, cherry tomatoes, and a balsamic vinaigrette provides a refreshing crunch that pairs wonderfully with the indulgent roll ups.
-
Iced Lemonade: Quench your thirst with a glass of homemade iced lemonade, offering a zesty contrast to the savory flavors of your meal.
-
Chocolate Chip Cookies: Finish your meal on a sweet note with warm chocolate chip cookies, a nostalgic treat that everyone loves and perfectly rounds out your comfort food feast.
Hamburger Roll Ups Recipe FAQs
How do I select ripe ingredients for the filling?
Absolutely! For the best flavor, choose ground beef that is bright red with no brown or gray spots. Onions should be firm and free of soft spots, while fresh garlic should be plump and have no dark spots. If you’re adding any herbs, look for vibrant, fresh parsley for garnish.
What is the best way to store leftover Hamburger Roll Ups?
Very! Leftover Hamburger Roll Ups can be kept in an airtight container in the fridge for up to 3 days. Ensure they’re fully cooled before sealing to maintain their flaky texture. If you’re planning to enjoy them later, freezing them is a great option!
Can I freeze Hamburger Roll Ups for later?
Of course! Freeze baked roll ups individually wrapped in plastic wrap or foil for up to 2 months. When you’re ready to enjoy them, thaw overnight in the fridge, then reheat in a preheated oven at 350°F (175°C) for about 10-15 minutes until they’re crispy again.
What should I do if my dough is too sticky or hard to work with?
If you find your dough is sticky, try dusting your work surface and hands with a little flour—it makes handling it a breeze! For hard dough, ensure your crescent roll dough is stored properly in the fridge before use and hasn’t been left out too long, which could affect its consistency.
Are there any dietary considerations to keep in mind?
Absolutely! If you’re catering to specific allergies, consider using ground turkey or a plant-based substitute to accommodate those avoiding red meat. If you’re serving kids or anyone with a dairy intolerance, opt for dairy-free cheese and ensure no beef or broth is included in your cooking.
Can I make these roll ups in advance?
Yes, you can prepare the filling and assemble the Hamburger Roll Ups up to 24 hours in advance. Keep them covered in the fridge, then bake right before serving for a warm, delightful snack. This is a perfect time-saver for gatherings or busy weeknights!
Savory Hamburger Roll Ups: A Cozy Comfort Food Delight
Ingredients
Equipment
Method
- Preheat your oven to 375°F (190°C). Line a baking sheet with parchment paper.
- In a medium skillet over medium heat, cook the ground beef with onion until browned, about 6-8 minutes. Drain excess grease and let cool.
- Once cooled, stir in garlic powder, salt, black pepper, mustard, and ketchup. Mix well and set aside.
- Unroll the crescent dough into triangles, ready for stuffing.
- Take a spoonful of beef mixture and place on the wide end of each triangle. Sprinkle cheese on top and roll towards the tip.
- Transfer to the baking sheet, seam-side down, leaving space between each Roll Up.
- In a small bowl, combine melted butter and minced garlic. Brush over each Roll Up.
- Bake for 12-15 minutes, watching for a golden brown color.
- Remove from the oven and let cool for a few minutes before serving. Enjoy with dipping sauces.
Leave a Reply