Amidst the whirlwind of daily life, finding time to prepare a wholesome meal can feel like a small victory. That’s precisely why I adore these gluten-free rice tortillas. Not only are they soft and versatile, but they can transform any meal into a delicious experience, whether you’re wrapping up savory tacos or crafting sweet dessert creations. With this quick and simple recipe, you’ll only need a handful of basic ingredients to whip up these delightful wraps, all while staying true to your gluten-free and vegan lifestyle. Plus, the option to use either cooked rice or rice flour means there’s a version for everyone, making it a convenient choice for busy weeknights. Are you ready to elevate your next meal? Let’s dive in!
Why are Rice Tortillas a Game Changer?
Versatile: These rice tortillas adapt effortlessly to your favorite fillings, making them perfect for everything from tacos to fresh wraps.
Quick & Easy: With a simple preparation process, they can be on your table in no time—ideal for busy weeknights.
Gluten-Free Goodness: Enjoy a delicious option that aligns with gluten-free and vegan diets without sacrificing flavor.
Customizable: Explore different varieties using either cooked rice or rice flour, allowing you to switch things up every time you cook.
Crowd-Pleaser: They’re sure to impress family and friends, letting everyone create their customized wraps. Logistics aside, who wouldn’t love a delightful alternative to traditional tortillas? Get creative and serve with your favorite sauces or dips for an enhanced experience!
Rice Tortilla Ingredients
For the Tortilla
• Sushi Rice (or short-grain rice) – Provides the essential sticky texture for crafting perfect rice tortillas; avoid using jasmine or long-grain rice.
• Water – Hydrates the rice for cooking and aids in mixing; use equal parts water and rice flour if you choose the rice flour variation.
• Salt – Enhances the overall flavor of the tortillas; feel free to adjust according to your taste preference.
• Oil – Aids in greasing your hands and the cooking surface to prevent sticking during preparation.
For Serving
• Fillings of Choice – From savory meats to sweet fruits, the possibilities are endless with rice tortillas; sure to impress your taste buds!
• Dips and Sauces – Pair them with your favorite salsas, guacamoles, or sauces for an additional flavor boost.
Get ready to indulge in these gluten-free rice tortillas that are sure to boost your recipe repertoire!
Step‑by‑Step Instructions for Rice Tortillas
Step 1: Cook the Rice
Start by rinsing the sushi rice under cold water until the water runs clear, which removes excess starch. In a medium saucepan, combine the rinsed rice, a pinch of salt, and enough water to cover the rice. Bring to a boil over high heat, then reduce to a simmer, cover, and cook for 15-16 minutes. After cooking, let the rice sit covered for 10-15 minutes to ensure it’s tender and fluffy.
Step 2: Mash the Rice
Once the rice is cooked, transfer it to a mixing bowl while it’s still warm. Using a potato masher or a food processor, mash the rice until it reaches a smooth and cohesive consistency. If the mixture feels too wet, gradually blend in a small amount of rice flour to achieve a formable dough. This step is crucial for ensuring your rice tortillas have the right texture.
Step 3: Shape the Tortillas
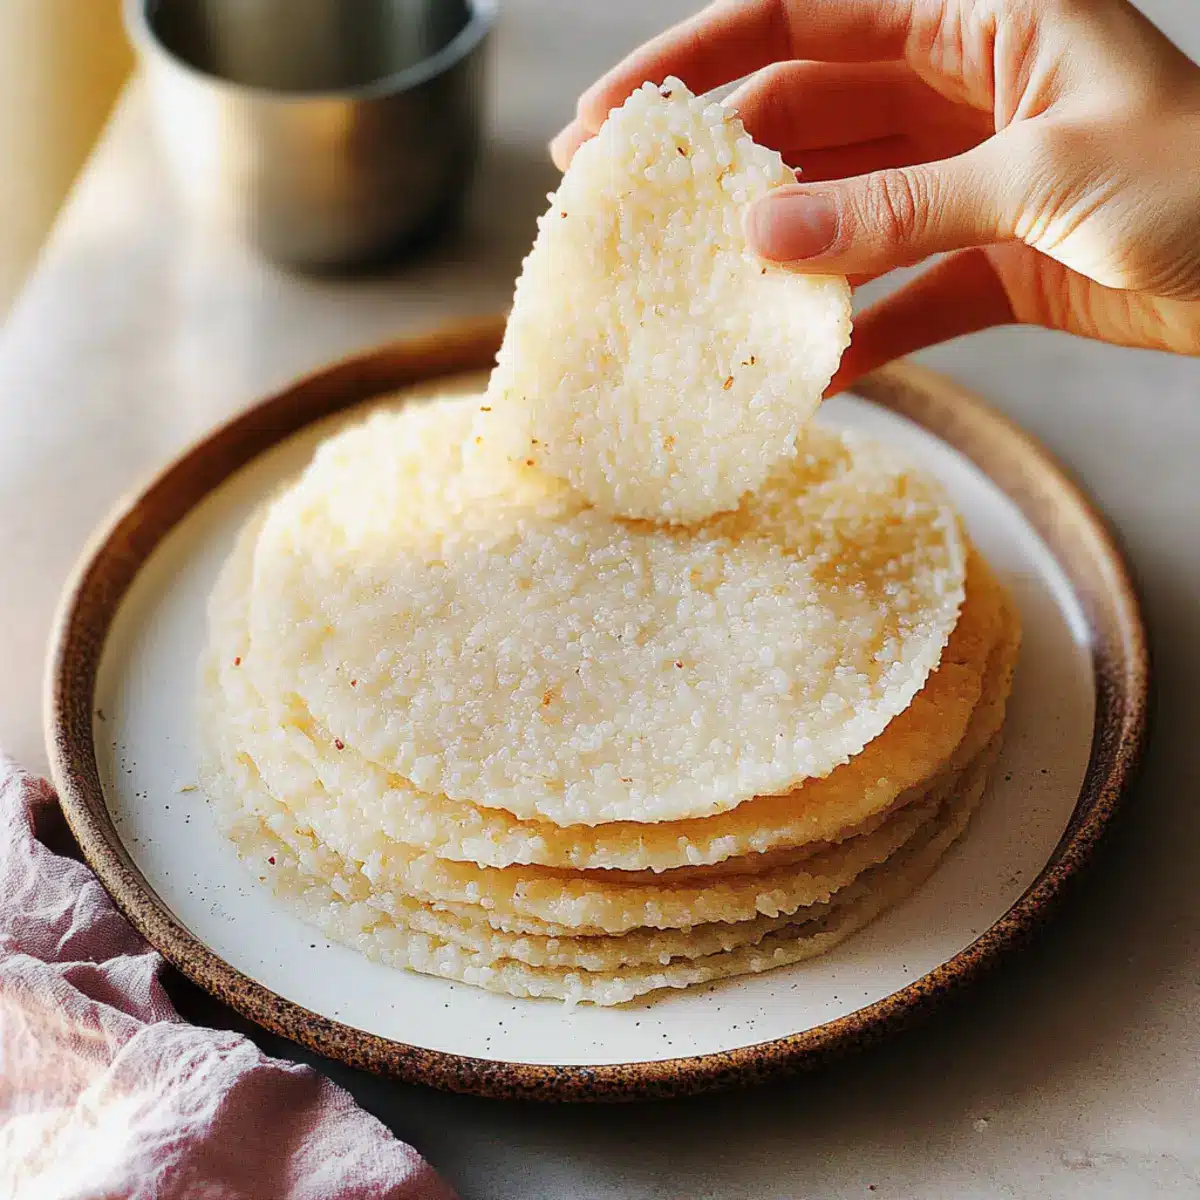
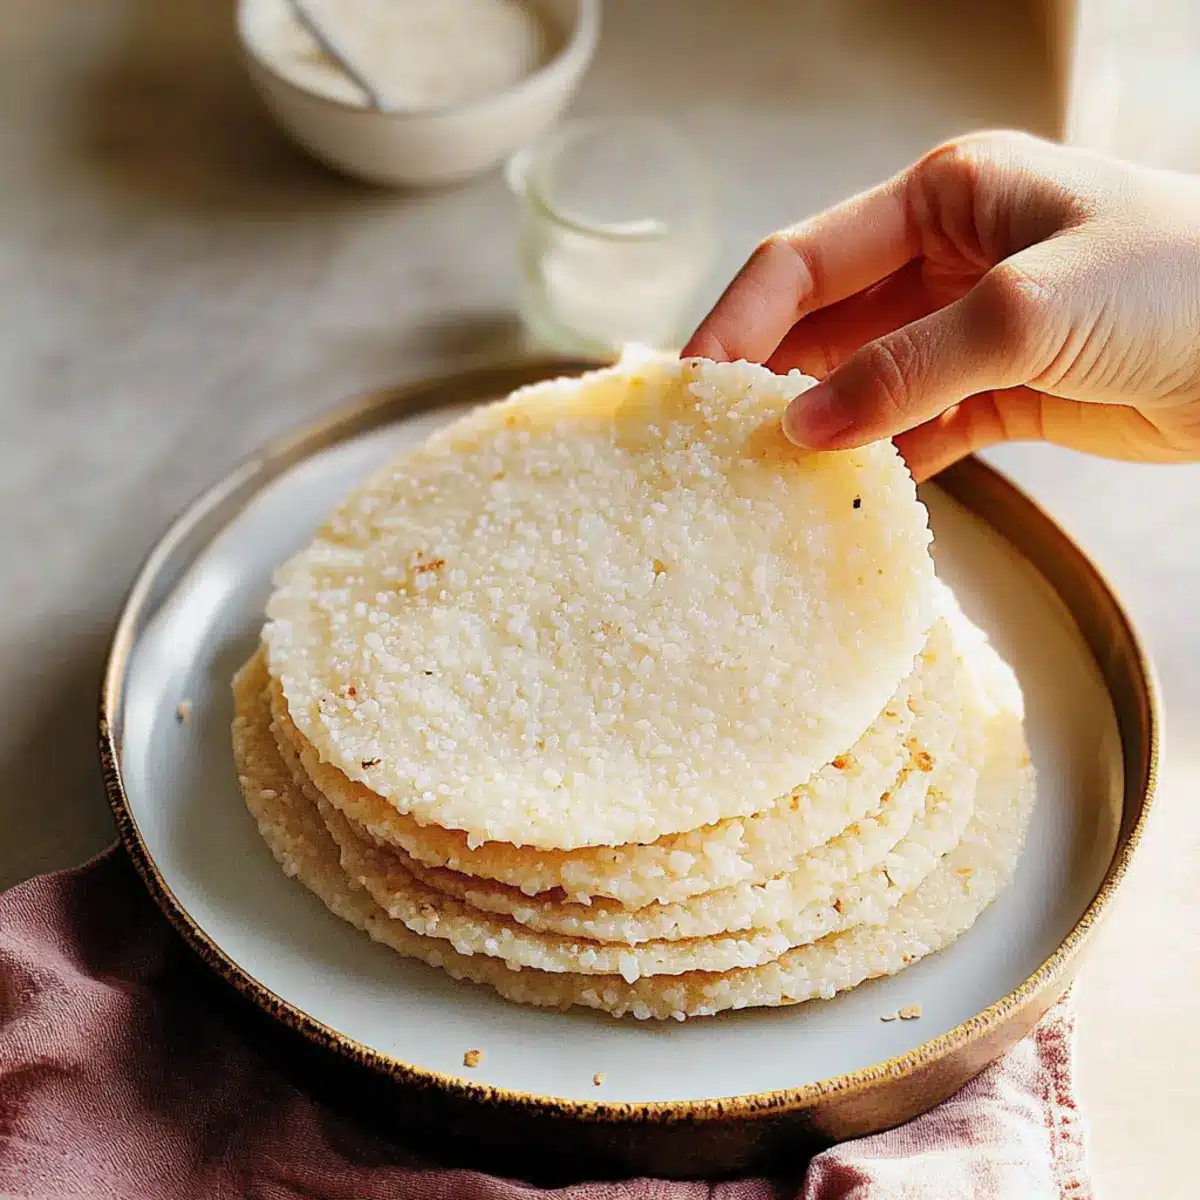
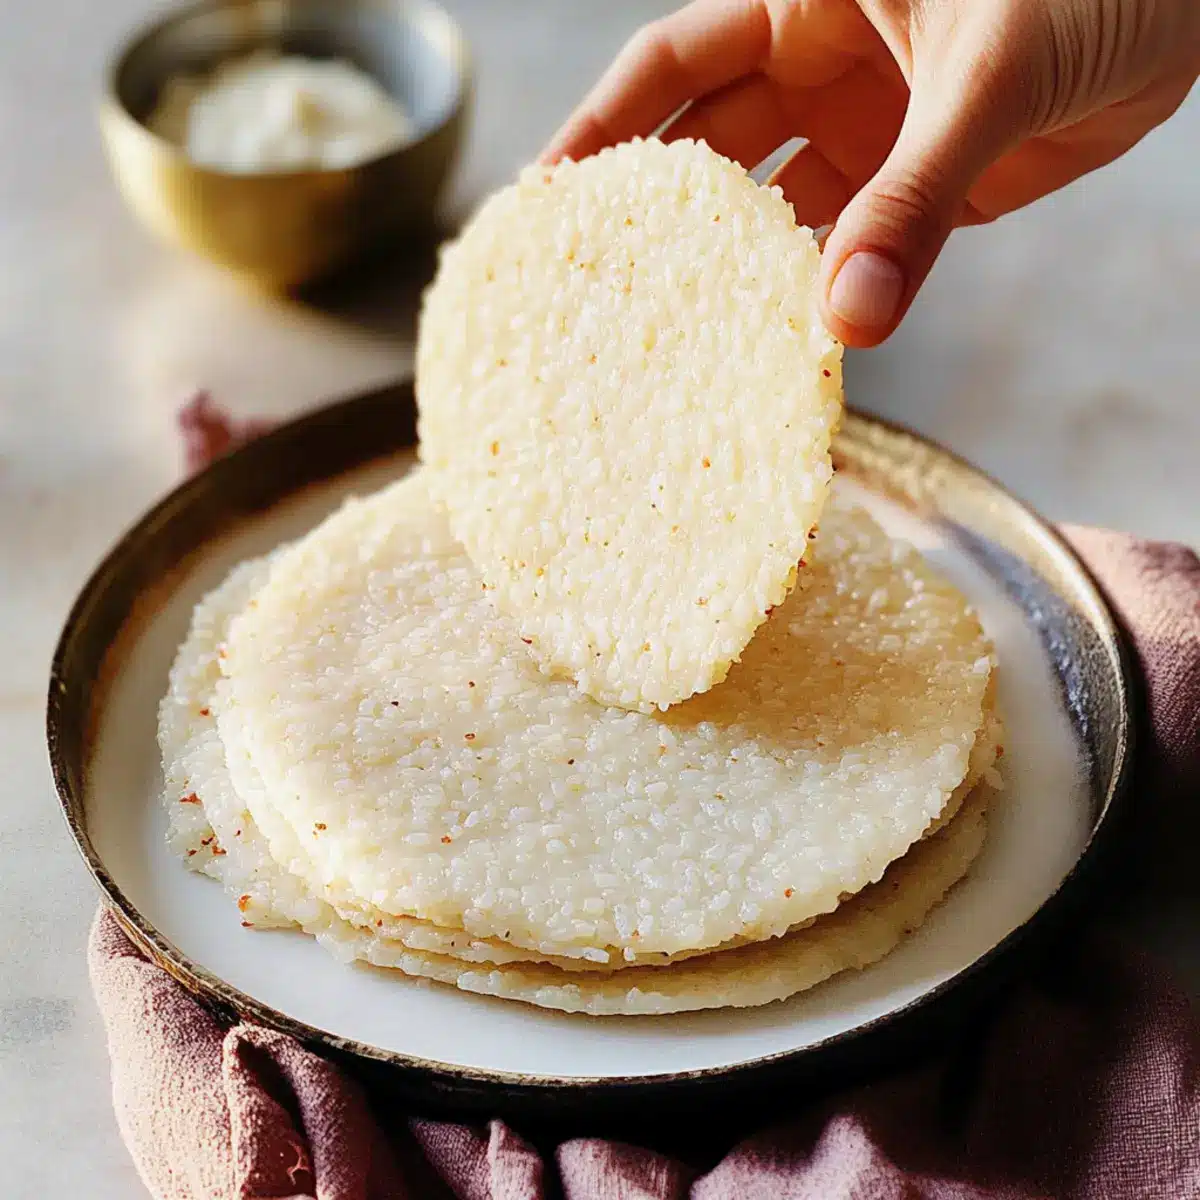
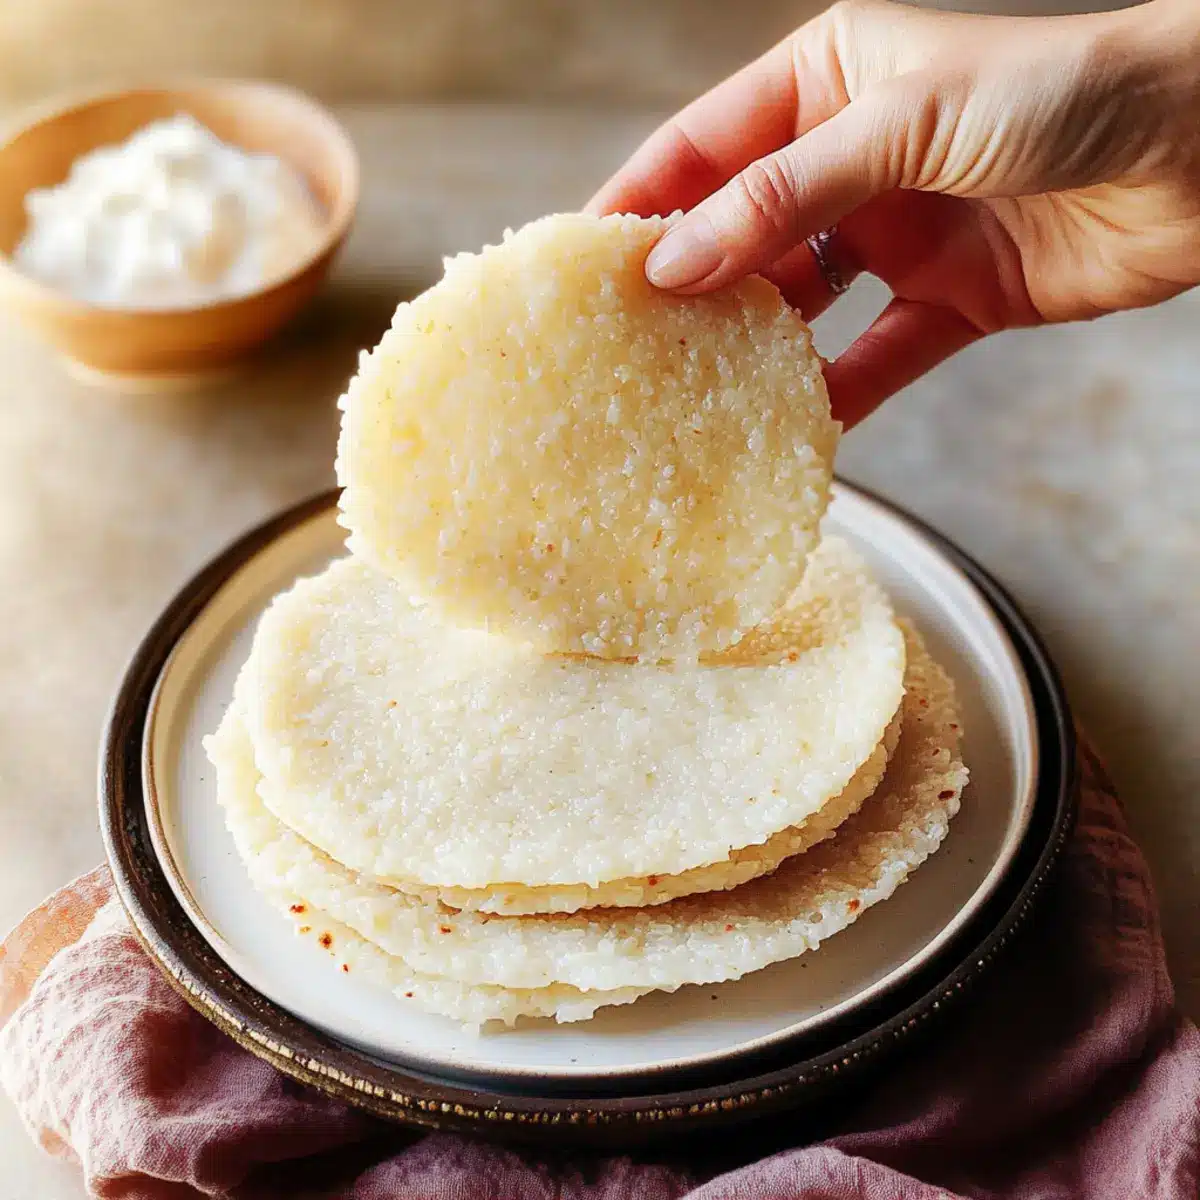
Lightly oil your hands to prevent sticking, and take small portions of the rice mixture (aim for about 60-65 grams each) to form into balls. Flatten each ball between two sheets of parchment or wax paper using a skillet or a cutting board to create tortillas that are about 1/8-inch thick. This method helps to shape perfectly consistent rice tortillas for even cooking.
Step 4: Cook the Tortillas
Preheat a non-stick skillet on medium-high heat. Carefully place one tortilla in the skillet and cook for 1-2 minutes until the underside is lightly browned and the tortilla becomes pliable. Flip the tortilla and repeat on the other side. Keep newly cooked tortillas warm by covering them with a kitchen towel while you cook the remaining tortillas, ensuring they all remain soft and ready for filling.
Step 5: Serve and Enjoy
These rice tortillas are now ready to elevate your meals! Fill them with your favorite ingredients, whether savory or sweet, to create delicious wraps for any occasion. Make sure to experiment with different fillings and dips to explore the full versatility of your homemade Rice Tortillas.
Expert Tips for Rice Tortillas
• Perfect Rice Texture: Ensure the sushi rice is not overcooked or mushy; it should have a slight bite for the tortillas to hold together well.
• Adjust consistency: If the rice mixture is too wet when mashing, gradually add rice flour until you reach a smooth, pliable dough.
• Cook Evenly: For best results, adjust the skillet’s heat to medium-high. Watch closely during cooking to prevent burning; tortillas should be lightly browned.
• Use Parchment Paper: Place tortillas between parchment paper when shaping to avoid sticking and maintain a nice, even shape.
• Experiment with Flavors: Don’t hesitate to add spices or herbs to the rice mixture for customized tasty Rice Tortillas that cater to your palate!
Rice Tortillas: Fun Variations & Substitutions
Feel free to explore these exciting variations that will bring your rice tortillas to life, ensuring each bite is a delightful surprise!
- Rice Flour: Swap cooked rice for rice flour for a quick option; mix it with equal parts water before molding.
- Herb-Infused: Add fresh herbs like cilantro or parsley to the dough for a fragrant twist that brightens up each tortilla.
- Spicy Kick: Incorporate finely chopped jalapeños or red pepper flakes directly into the rice for a zesty kick in every bite!
- Savoury Seasonings: Blend garlic powder or onion powder into the rice mixture for an extra layer of flavor; it’s a simple tweak that elevates the taste.
- Sweet Delight: Try adding a bit of sugar or cinnamon to the mix for a sweeter version, perfect for dessert wraps filled with fruits.
- Vegetable Boost: Incorporate finely grated zucchini or carrots to the dough for added nutrition and a hint of sweetness in your tortillas.
- Dairy-Free Creaminess: Fold in a couple of tablespoons of vegan cream cheese into the dough for a rich, creamy texture that surprises the palate.
- Open-faced Options: Use larger tortillas as a base for pizza; top them with marinara sauce, vegan cheese, and your favorite toppings for a quick and unique meal.
As you consider these variations, don’t hesitate to check out some of my other favorite vegan recipes or explore the world of gluten-free cooking to expand your culinary adventures!
What to Serve with Gluten-Free Rice Tortillas?
Enhance your culinary journey with delightful pairings that complement the softness and versatility of your rice tortillas.
- Savory Tacos: Fill your tortillas with seasoned beans, grilled veggies, or sautéed meats for an unforgettable taco night experience.
- Fresh Salsa: A vibrant tomato salsa adds a zesty pop to your wraps, balancing flavors with a refreshing crunch.
- Guacamole: Creamy avocado guacamole brings richness that pairs beautifully with the light texture of rice tortillas.
- Crispy Slaw: A crunchy slaw of cabbage and carrots provides a delightful contrast, adding texture and freshness to each bite.
- Spicy Lentil Filling: Hearty lentils seasoned with spices offer protein and flavor, making them satisfying options for a filling meal.
- Sweet Dessert Tacos: Try fillings like cinnamon apples or chocolate spreads for a sweet twist—perfect for dessert lovers of all ages.
- Refreshing Coconut Cream: Serve with a dollop of coconut cream, adding a sweet, velvety finish to any dish.
- Chilled Drinks: Pair your tortillas with a refreshing iced tea or lemonade, bringing a delightful, citrus note to your meal.
- Flavored Rice: For an extra layer of flavor, serve alongside seasoned rice blended with herbs or spices that will complement the tortillas.
Make Ahead Options
These gluten-free rice tortillas are a busy cook’s dream! You can prepare the rice dough up to 24 hours in advance, storing it in an airtight container in the refrigerator. To maintain their quality, shape the tortillas and place parchment paper between each one to prevent sticking. When you’re ready to serve, simply heat a skillet and cook them for 1-2 minutes per side until warmed through and pliable. Alternatively, you can cook the tortillas in advance and refrigerate them for 3-5 days. Just reheat them in the skillet or microwave, and enjoy the same deliciousness as freshly made rice tortillas, saving you time without sacrificing flavor!
How to Store and Freeze Rice Tortillas
Fridge: Store cooled rice tortillas in an airtight container, separated by parchment paper, for up to 3-5 days to maintain softness and prevent sticking.
Freezer: Layer rice tortillas with parchment paper and place them in a ziplock bag to freeze for up to 2-3 months. This keeps them fresh for future meals.
Reheating: To enjoy your frozen rice tortillas, reheating in a skillet on medium heat for a couple of minutes or microwaving for about 30 seconds works best, ensuring they become warm and pliable.
Making Ahead: Preparing rice tortillas in advance is a great time-saver, allowing you to enjoy gluten-free wraps ready to be filled whenever the craving strikes!
Rice Tortillas Recipe FAQs
How do I select the right rice for tortillas?
Absolutely! For the best results, choose sushi rice or any short-grain rice. These varieties provide the necessary sticky texture for proper tortilla formation. Avoid long-grain or jasmine rice, as they won’t hold together well when making your rice tortillas. If buying in bulk, look for shiny, plump grains that don’t have dark spots.
What is the best way to store leftover rice tortillas?
Very! To maintain their softness, store cooled rice tortillas in an airtight container separated by parchment paper. They can last up to 3-5 days in the fridge. The parchment paper helps prevent them from sticking together, ensuring they’re easy to separate when you’re ready to enjoy them again!
Can I freeze my rice tortillas, and how should I do it?
Definitely! To freeze your rice tortillas, first let them cool completely. Then, layer them with parchment paper to prevent sticking. Place the layers in a ziplock bag and remove as much air as possible before sealing. They can be stored in the freezer for up to 2-3 months. When you’re ready to use them, simply reheat in a skillet or microwave for about 30 seconds until warm and pliable.
What should I do if my rice tortilla mixture is too wet?
No worries! If you’ve mashed the cooked rice and find the mixture is too wet to hold together, just add a small amount of rice flour gradually until you achieve a smooth, workable consistency. Take your time and mix it in carefully; this ensures the tortillas will form without falling apart.
Are rice tortillas safe for people with allergies?
Absolutely! These rice tortillas are gluten-free, vegan, and dairy-free, making them a safe choice for those with gluten sensitivities and anyone avoiding animal products. However, always double-check the packaging of your ingredients to avoid any cross-contamination or added allergens. If you’re cooking for others, it’s good practice to ask about any specific dietary restrictions they may have.
Soft and Delicious Rice Tortillas for Every Meal
Ingredients
Equipment
Method
- Rinse the sushi rice under cold water until the water runs clear. Combine the rinsed rice, a pinch of salt, and enough water to cover the rice in a medium saucepan. Bring to a boil, reduce to a simmer, cover, and cook for 15-16 minutes. Let the rice sit covered for 10-15 minutes.
- Transfer the cooked rice to a mixing bowl while it's still warm. Mash the rice until it reaches a smooth and cohesive consistency. Gradually blend in rice flour if the mixture feels too wet.
- Lightly oil your hands and take small portions of the rice mixture to form into balls. Flatten each ball between two sheets of parchment or wax paper to create tortillas about 1/8-inch thick.
- Preheat a non-stick skillet on medium-high heat. Cook each tortilla for 1-2 minutes on each side until lightly browned and pliable. Keep cooked tortillas warm under a kitchen towel.
- Fill the tortillas with your favorite ingredients and enjoy! Experiment with different fillings and dips.
Leave a Reply