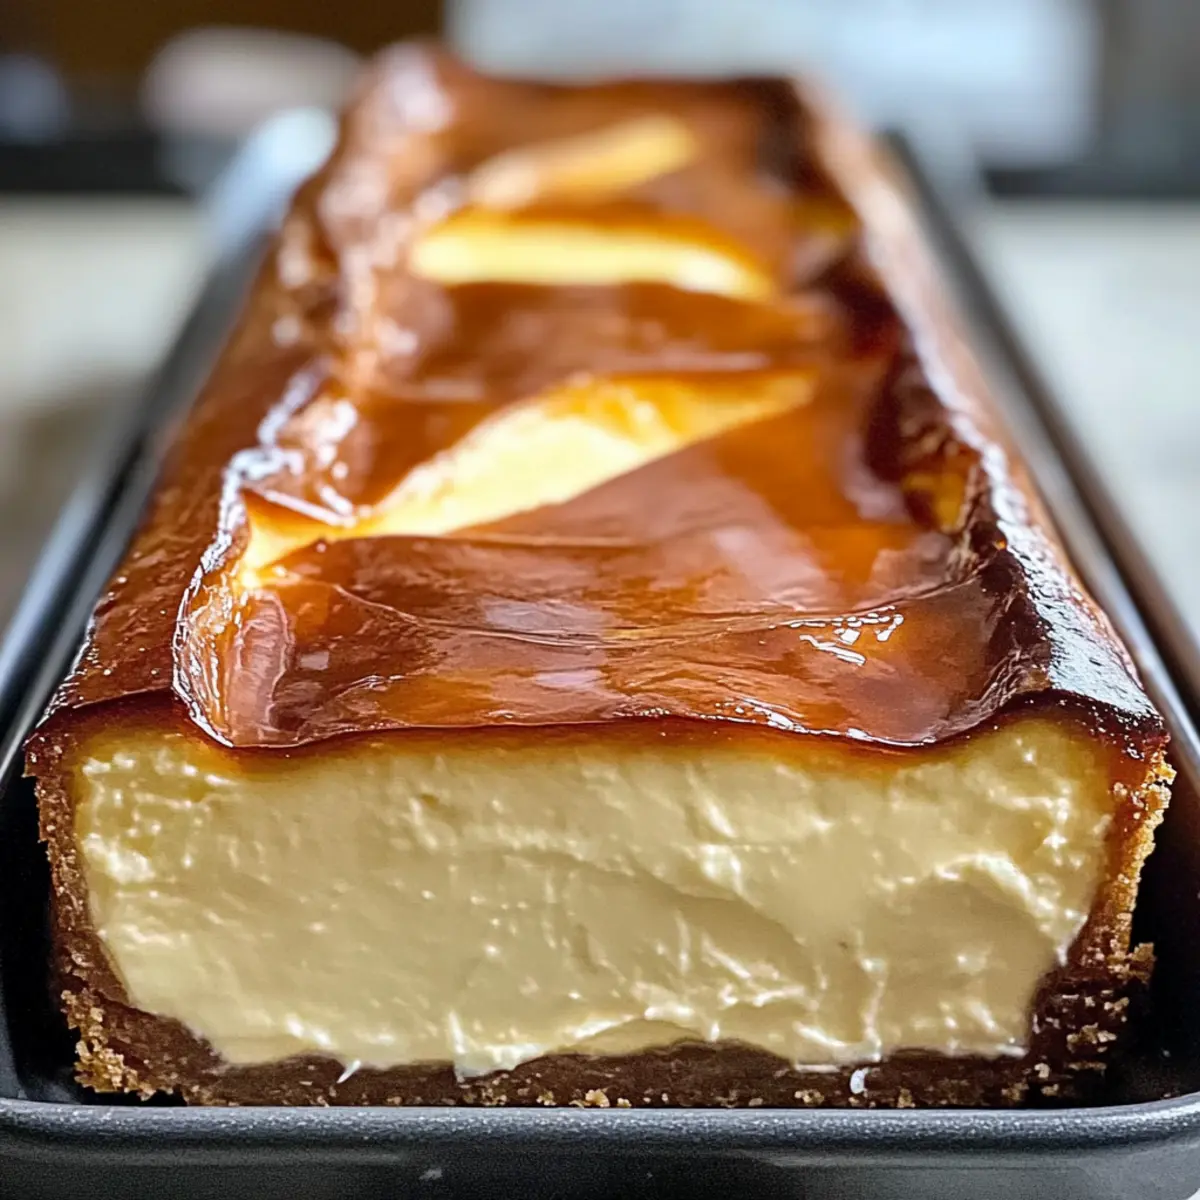
You wouldn’t believe how a simple mix of cream cheese, sugar, and eggs can transform into a creamy wonder that feels like a warm embrace. Welcome to my rendition of the Burnt Basque Cheesecake, perfectly crafted in a loaf pan for ease and portion control. This easy cheesecake recipe is a delightful twist on the classic, offering the same lush filling and signature caramelized top without overwhelming leftovers. Whether it’s a busy weeknight or a family gathering, this small-batch dessert is bound to impress and bring pure joy with every slice. Plus, with room for tasty variations, it can even cater to gluten-free and dairy-free diets if needed. Are you ready to uncover a dessert that’s as comforting as it is delightful? Let’s dive in!
Why Is This Cheesecake So Irresistible?
Simplicity at its finest: This recipe transforms everyday ingredients into a dreamy dessert, perfect for both novice bakers and seasoned chefs.
Decadent flavor: The combination of rich cream cheese and a perfectly caramelized top offers an indulgent experience that tantalizes the palate.
Portion control: Baking in a loaf pan makes it easy to enjoy just the right amount without any waste, making it ideal for small gatherings.
Customizable options: Feeling adventurous? Try adding citrus zest or chocolate chips for a unique twist, or explore gluten-free adaptations!
Effortless preparation: With straightforward instructions and minimal fuss, this cheesecake guarantees success every time, so you can impress guests without the stress.
For more creamy delights, don’t miss my easy Cookie Butter Cheesecake and Apple Cheesecake Bars—perfect companions for your dessert table!
Burnt Basque Cheesecake Ingredients
• To create this easy cheesecake, gather the following ingredients for a delightful dessert experience!
For the Cheesecake Batter
- Cream Cheese – Provides a rich and creamy base; ensure it’s softened for a smooth texture.
- Sugar – Balances the tang of the cream cheese; standard granulated sugar is perfect.
- Eggs – Contributes to the custard-like structure; add them one at a time for better integration.
- Heavy Cream – Adds a silky richness; can be substituted with full-fat coconut cream for a dairy-free version.
- Vanilla Extract – Enhances the overall flavor; opt for pure extract for the best results.
- Salt – Amplifies all the flavors beautifully and balances sweetness.
- Flour – Provides slight structure; can be omitted for a gluten-free adaptation or replaced with a gluten-free blend.
Now you’re all set to whip up this spectacular Burnt Basque Cheesecake that will surely enchant family and friends! Enjoy!
Step‑by‑Step Instructions for Easy Burnt Basque Cheesecake in a Loaf Pan
Step 1: Preheat the Oven
Begin by preheating your oven to 400°F (200°C). This high temperature is crucial for achieving the perfect burnt top on your Burnt Basque Cheesecake. While the oven warms up, gather your ingredients and equipment—make sure you have a loaf pan and parchment paper ready for easy preparation.
Step 2: Prepare the Loaf Pan
Line your loaf pan with parchment paper, making sure to leave some overhang on the sides. This will help you easily remove the cheesecake once it has cooled. The parchment lining should cover the bottom and sides of the pan to prevent sticking and ensure a smooth release.
Step 3: Mix the Cream Cheese and Sugar
In a large mixing bowl, use an electric mixer to beat the softened cream cheese and granulated sugar together until the mixture is smooth and fluffy—about 2 to 3 minutes. Look for a creamy consistency that is free of lumps, as this will ensure a delightful texture in your Burnt Basque Cheesecake.
Step 4: Incorporate the Eggs
Add the eggs one at a time into the cream cheese mixture, mixing well after each addition. This step is essential for achieving the custard-like texture that defines your cheesecake. Make sure each egg is fully incorporated before adding the next; this will help maintain a smooth batter.
Step 5: Add Cream and Flavorings
Pour in the heavy cream, vanilla extract, and a pinch of salt. Beat the mixture on low speed until everything is well combined and smooth, about 1 to 2 minutes. As you mix, notice how the batter becomes richer and silkier, setting the stage for your delicious Burnt Basque Cheesecake.
Step 6: Fold in the Flour
If using flour for structure, sift it into the batter and gently fold with a spatula until just combined. Be careful not to overmix, as this could affect the texture. The goal is to integrate the flour while keeping the batter light and airy, ensuring the cheesecake bakes to perfection.
Step 7: Pour the Batter
Carefully pour the cheesecake batter into the prepared loaf pan. Give the pan a gentle tap on the countertop to release any air bubbles trapped inside. This step helps create a smooth, even surface on your Burnt Basque Cheesecake and contributes to its pleasing texture.
Step 8: Bake the Cheesecake
Place the loaf pan in the preheated oven and bake for 40–45 minutes. Keep an eye on it: the top should turn a deep golden brown while the center jiggles slightly when shaken. This visual cue indicates that your Burnt Basque Cheesecake is ready to come out of the oven.
Step 9: Cool and Chill
Once baked, allow the cheesecake to cool at room temperature for about 30 minutes. Afterward, transfer it to the refrigerator and let it chill for at least 4 hours, or preferably overnight. This resting time enhances the flavors and allows the texture to set beautifully before slicing into your creamy masterpiece.

Storage Tips for Burnt Basque Cheesecake
Fridge: Store the cheesecake in an airtight container or tightly covered with plastic wrap for up to 5 days to maintain its creamy texture and prevent absorption of other odors.
Freezer: If you have leftovers or want to make it ahead, wrap the cheesecake tightly in plastic wrap and aluminum foil, then freeze for up to 2 months. Thaw overnight in the fridge before serving.
Serving: For best flavor, serve the Burnt Basque Cheesecake chilled directly from the fridge. If you prefer a softer texture, let it sit at room temperature for 20-30 minutes before slicing.
Expert Tips for Burnt Basque Cheesecake
-
Room Temperature Ingredients: Ensure your cream cheese is fully softened to prevent lumps in the batter, resulting in a smooth cheesecake.
-
Don’t Skip Cooling: Allow the cheesecake to cool at room temperature before refrigerating; this resting time enhances flavor and texture.
-
Monitor Baking Time: Keep an eye on your cheesecake while baking; every oven is different, and slight adjustments may be needed to achieve that perfect caramelization on top.
-
Parchment Use: Lining your loaf pan with parchment paper is essential for easy release after baking—don’t skip this step!
-
Serving Chilled: For the best flavor and texture experience, serve your Burnt Basque Cheesecake chilled straight from the fridge.
Make Ahead Options
These Easy Burnt Basque Cheesecake in a Loaf Pan are perfect for busy home cooks looking to save time during the week! You can make the cheesecake batter ahead of time and store it in the refrigerator for up to 24 hours before baking—just be sure to cover it tightly to maintain freshness. Alternatively, bake the cheesecake and refrigerate it for up to 5 days. To serve, simply slice and enjoy chilled, or let it sit at room temperature for a few minutes for a softer texture. This way, you’ll have a delightful homemade dessert ready to impress your family and friends without the last-minute rush!
Burnt Basque Cheesecake Variations
Feel free to let your creativity shine and make this cheesecake your own with these delightful options!
-
Gluten-Free: Use a gluten-free flour blend or omit flour entirely to accommodate gluten-sensitive palates while still achieving that creamy texture.
-
Dairy-Free: Swap cream cheese with a dairy-free alternative like cashew cream for a lightened version without compromising taste.
-
Chocolate Chip Delight: Fold in mini chocolate chips to the batter for decadent bursts of chocolate in every slice, making it even more indulgent.
-
Citrus Zest: Grate lemon or orange zest into the batter to brighten up the flavors, adding a refreshing twist that elevates this cheesecake.
-
Swirls of Caramel: Drizzle caramel sauce into the batter before baking. The result? Beautiful, gooey swirls that bring both flavor and visual appeal.
-
Nutty Crunch: Top with crushed nuts, such as almonds or hazelnuts, after chilling for a delightful contrast in texture, enhancing every blissful bite.
-
Fruit Topping: Serve your cheesecake alongside a homemade fruit compote, like berry or peach, for a festive, colorful presentation and a refreshing flavor boost.
-
Coffee Infusion: Mix in a tablespoon of instant espresso powder to the batter for a subtle coffee flavor that pairs beautifully with the rich cheesecake and will perk up your dessert table.
These variations not only elevate your Burnt Basque Cheesecake but can also inspire you to explore delights such as Sugar Cookie Cheesecake or Brown Butter Cheesecake. Enjoy creating your masterpiece!
What to Serve with Easy Burnt Basque Cheesecake in a Loaf Pan
Elevate your dessert experience with delightful pairings that complement this creamy, caramelized cheesecake masterpiece.
-
Whipped Cream: A cloud of sweetened cream adds a light contrast to the rich cheesecake, enhancing its indulgent allure.
-
Fresh Berries: Raspberries or strawberries bring vibrant color and a tartness that balances the creamy richness beautifully.
-
Citrus Compote: A zesty orange or lemon compote introduces a bright, refreshing element that cuts through the cheesecake’s density.
-
Coffee: A bold cup of coffee or espresso perfectly complements the sweet, burnt flavors of the cheesecake, creating a cozy experience.
-
Chocolate Ganache: Drizzling silky chocolate ganache over each slice adds an extra layer of luxury and decadence.
-
Ice Cream: A scoop of vanilla or coconut ice cream enhances the creamy sensation, creating a delightful contrast of temperatures.
-
Nuts: Toasted almonds or hazelnuts add a pleasant crunch, enhancing the texture and bringing in a nutty flavor that pairs well.
-
Spiced Pears: Warm spiced poached pears can elevate the dessert into something elegant and sophisticated, ideal for special occasions.
-
Mint Tea: For a refreshing end to your meal, a soothing mint tea can cleanse the palate after enjoying the rich flavors of the cheesecake.
Easy Burnt Basque Cheesecake in a Loaf Pan Recipe FAQs
What should I look for when selecting cream cheese?
Absolutely! When choosing cream cheese, look for blocks labeled “full-fat,” as they provide the richest flavor and creaminess. Opt for a brand you trust, and check for any signs of spoilage, such as dark spots or unusual odors. It’s best if the cream cheese is at room temperature before mixing for a smooth batter.
How should I store leftovers of the cheesecake?
Very simple! Store any leftover Burnt Basque Cheesecake in an airtight container or tightly wrapped with plastic wrap in the refrigerator for up to 5 days. This helps maintain its creamy texture and prevents it from absorbing other flavors. Just remember to keep it chilled until you’re ready to serve!
Can I freeze the cheesecake, and if so, how?
Yes, you can! To freeze your cheesecake, wrap it tightly in plastic wrap and then again in aluminum foil to avoid freezer burn. It will keep well for up to 2 months. When you’re ready to enjoy it, simply thaw it overnight in the refrigerator. This slow thawing helps preserve the texture so you can savor every creamy bite.
What if my cheesecake cracks while baking?
No worries! Cracking can happen, and it doesn’t ruin the taste. If the cheesecake cracks while baking, it’s usually because of rapid temperature changes or overmixing. To prevent this, make sure your cream cheese is softened completely and incorporate eggs one at a time. Additionally, let it cool gradually in the oven with the door slightly ajar to avoid sudden temperature drops.
Is this recipe suitable for gluten-free or dairy-free diets?
Absolutely! To make a gluten-free Burnt Basque Cheesecake, simply omit the flour or use a gluten-free flour blend. For a dairy-free version, substitute the cream cheese with a dairy-free alternative like cashew cream or vegan cream cheese, and use coconut cream in place of heavy cream. Just keep in mind that this may alter the texture slightly, but it will still be delicious!
Can I add flavors or toppings to this cheesecake?
Very much so! This cheesecake is quite versatile. You can fold in citrus zest for brightness, mix in chocolate chips for a decadent touch, or swirl in caramel before baking. After it’s cooled, serve it with whipped coconut cream, fresh berries, or a fruit compote for a delightful finishing touch!
Irresistibly Creamy Burnt Basque Cheesecake Recipe Guide
Ingredients
Equipment
Method
- Preheat your oven to 400°F (200°C) and gather your ingredients and equipment.
- Line your loaf pan with parchment paper, leaving overhang on the sides.
- Beat the softened cream cheese and sugar together until smooth and fluffy.
- Add the eggs one at a time, mixing well after each addition.
- Pour in the heavy cream, vanilla extract, and salt, beating until smooth.
- If using, sift the flour into the batter and fold gently until just combined.
- Pour the cheesecake batter into the prepared loaf pan and tap gently to remove air bubbles.
- Bake for 40–45 minutes until the top is deep golden brown and the center jiggles slightly.
- Allow the cheesecake to cool at room temperature for about 30 minutes before refrigerating for at least 4 hours.
Leave a Reply