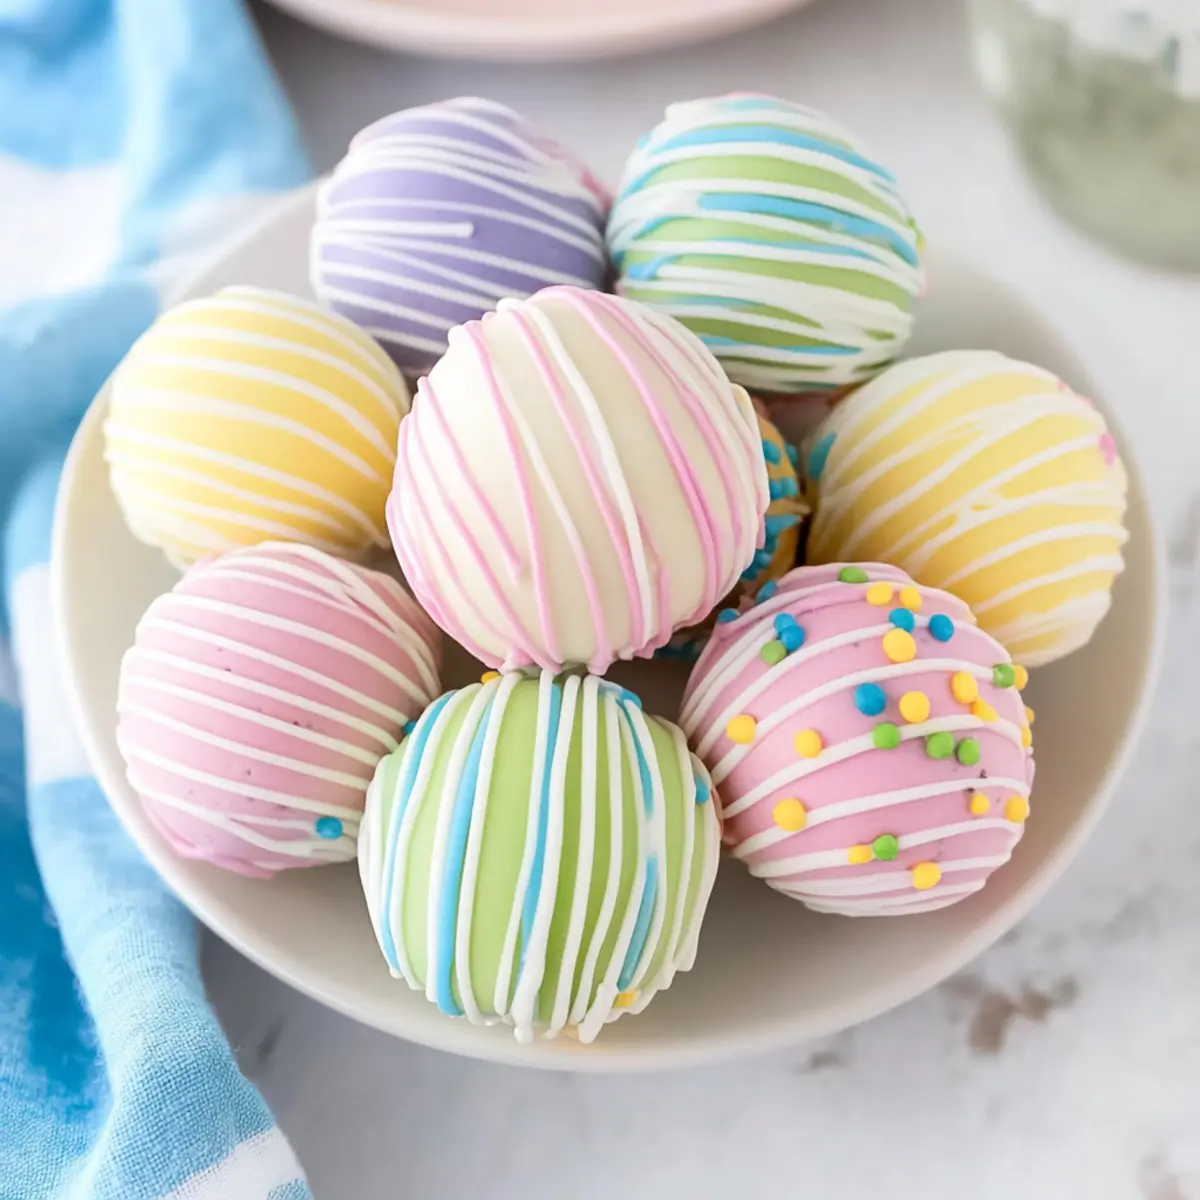
As the blossoms bloom and the days grow warmer, my kitchen transforms into a celebration of joy with vibrant colors and delicious scents. The highlight of this season? These Fun & Easy No-Bake Easter Egg Oreo Cookie Balls! Imagine the excitement on your loved ones’ faces as they bite into these creamy, delightful treats that mix the buttery goodness of Golden Oreos with velvety cream cheese. Not only are they a breeze to whip up—perfect for busy days—but their cheerful appearance makes them an instant hit at any gathering, ensuring smiles all around, from kids to adults. Ready to dive into the delightful world of these no-bake creations? Let’s make this Easter unforgettable!
Why Are These Cookie Balls So Special?
No-Bake Delight: These Easter Egg Oreo Cookie Balls require no oven time, making them perfect for busy bakers or anyone just wanting to avoid the heat!
Kid-Friendly Fun: Kids will love helping out in the kitchen—rolling the eggs and decorating them with sprinkles adds a delightful touch.
Vibrant and Festive: With their cheerful pastel colors, these treats are the star of any celebration and will brighten your dessert table, especially when served alongside other festive goodies like bunny cupcakes or chocolate nests!
Flavorful Twist: Feel free to get creative! Substitute different Oreo flavors for a unique twist, whether it’s mint or birthday cake, ensuring there’s a cookie ball for everyone.
Make-Ahead Magic: These are easy to prepare in advance, allowing you to enjoy more time with family and friends during the festivities. Keep them chilled for freshness and surprise guests with these delightful bites!
Easter Egg Oreo Cookie Balls Ingredients
For the Batter
• Golden Oreos – The buttery base provides a delightful vanilla flavor; for a twist, use Chocolate Oreos for a richer taste.
• Cream Cheese – Softened cream cheese binds the cookie crumbs together, adding a velvety texture that enhances the flavor profile.
For the Coating
• White Candy Coating – This sweet shell is key for creating that irresistible crunch—be sure to melt it slowly to avoid scorching.
For the Color
• Gel Icing Colors – Ideal for achieving beautiful pastel shades; avoid liquid food dye to keep your coating from losing its texture.
For Decoration
• Optional Decorations (sprinkles, sanding sugar) – Add fun textures and visual appeal; sprinkle on before the coating sets to ensure they stick well.
With these ingredients ready, you’re all set to make your Easter Egg Oreo Cookie Balls a hit at this year’s festivities!
Step‑by‑Step Instructions for Easter Egg Oreo Cookie Balls
Step 1: Prep Cookies
Start by crushing 14.3 oz of Golden Oreos into fine crumbs using a food processor or a resealable plastic bag and a rolling pin. Aim for a consistency resembling fine sand without any large chunks. This step sets the foundation for your Easter Egg Oreo Cookie Balls, ensuring that they’ll hold their shape when combined with the cream cheese.
Step 2: Mix Dough
In a large mixing bowl, combine the crushed Oreo crumbs with 8 oz of softened cream cheese. Use a spatula or your hands to knead the mixture until it is smooth and sticks together, typically around 2-3 minutes. This creamy blend will form the delicious filling for your Easter Egg Oreo Cookie Balls, creating that irresistible texture everyone loves.
Step 3: Shape Eggs
Using a medium-sized cookie scoop or about 1½ tablespoons of the dough, roll the mixture into egg-like ovals. Place each shaped egg onto a sheet of parchment paper, ensuring there’s enough space between them. This step is crucial for creating the festive appearance of the Easter Egg Oreo Cookie Balls and helps them maintain their shape when chilled.
Step 4: Chill Eggs
Cover the shaped eggs with plastic wrap and refrigerate for at least 1 hour. Chilling helps the eggs firm up, making them easier to dip in the candy coating later. You’ll know they’re ready when they feel solid to the touch and hold their shape well, allowing for perfectly coated treats.
Step 5: Melt Coating
While the eggs chill, slowly melt 10 oz of white candy coating in a microwave-safe bowl. Heat it in 30-second intervals, stirring in between until smooth and fully melted—this should take about 1.5-2 minutes total. Keeping the temperature low prevents scorching, ensuring a silky coating for your Easter Egg Oreo Cookie Balls.
Step 6: Dip Eggs
Once the eggs are chilled and the candy coating is melted, dip each egg into the melted coating using a fork, letting excess drip off before placing them back on parchment paper. Ensure that each egg is fully covered for a delightful, creamy bite. This step transforms them into the eye-catching Easter Egg Oreo Cookie Balls we all adore.
Step 7: Decorate
For a touch of pastel charm, melt additional candy coating and tint it using gel icing colors. Drizzle or pipe it over the dipped eggs to create fun patterns that add color and personality. This step allows you to showcase your creativity, making your Easter Egg Oreo Cookie Balls not just delicious but also a visual delight.
Step 8: Add Sprinkles
Before the coating sets, sprinkle optional decorations like colorful sprinkles or sanding sugar over the eggs for added flair. This final touch not only enhances the visual appeal but also adds texture, inviting everyone to grab a bite of your delightful Easter Egg Oreo Cookie Balls.
Step 9: Store
Once the decorated eggs have set completely, transfer them to an airtight container. Keep them chilled in the refrigerator until ready to serve, where they can last for up to one week. This step ensures that your Easter Egg Oreo Cookie Balls stay fresh, making them a perfect make-ahead treat for springtime gatherings.

Easter Egg Oreo Cookie Balls Variations
Feel free to play around and customize these delightful treats to suit your family’s tastes!
-
Chocolate Twist: Substitute Chocolate Oreos to make a richer version with a delightful cocoa flavor. This will result in a deep, indulgent experience.
-
Minty Fresh: Use Mint Oreos for a refreshing mint chocolate flavor that adds a fun twist, perfect for spring celebrations. Your guests will be pleasantly surprised!
-
Coconut Crunch: Mix in shredded coconut to the cookie dough for added texture and flavor, creating a tropical-inspired treat that’s a hit with coconut lovers.
-
Creamy Peanut Butter: Replace half the cream cheese with peanut butter for a nutty, creamy blend. It will take your cookie balls to the next level of indulgence!
-
Fruit Flavored: Swap in Lemon Oreos or Birthday Cake Oreos for a unique, fruity taste that enhances the seasonal spirit. The change in profile will brighten anyone’s day!
-
Decorative Delight: Instead of candy coating, try rolling the shaped eggs in finely chopped nuts or crushed graham crackers for a crunchy, textured bite that adds a fun visual appeal.
-
Spicy Kick: For the adventurous, add a touch of cayenne or chili powder to the cream cheese mixture for a surprising spicy kick that balances the sweetness beautifully.
For more ways to get creative, check out my other festive treats like Cookie Butter Cheesecake Cups for additional inspiration!
Make Ahead Options
These Easter Egg Oreo Cookie Balls are a fantastic choice for meal prep, allowing you to save time and stress as you approach your celebrations! You can prepare the egg-shaped dough and refrigerate it for up to 24 hours before coating. Simply follow the initial steps of crushing the Oreos and mixing with cream cheese, then shape and chill the eggs. Keep them tightly wrapped in plastic wrap to prevent drying out. When you’re ready to serve, just dip the firmed eggs in the melted candy coating and decorate them as desired. This method ensures your treats are just as delicious and fresh, making your festivities that much easier!
Expert Tips for Easter Egg Oreo Cookie Balls
-
Crush Carefully: Ensure your Oreos are crushed to a fine consistency. Large chunks can affect the structure and prevent the candy coating from adhering properly.
-
Soften Cream Cheese: Always use softened cream cheese for easier mixing. It creates a smoother dough, ensuring a creamy texture in your Easter Egg Oreo Cookie Balls.
-
Melt Slowly: Melt the white candy coating in short intervals, stirring frequently to avoid scorching. This ensures a silky coating that glides smoothly over your treats.
-
Chill Properly: Don’t rush the chilling step! Properly chilled cookie balls will hold their shape and allow for better coating, ensuring a delightful bite every time.
-
Decorate Promptly: Add decorations like sprinkles right after dipping while the coating is still wet. This helps them stick better and enhances the festive look!
How to Store and Freeze Easter Egg Oreo Cookie Balls
Fridge: Keep your Easter Egg Oreo Cookie Balls in an airtight container; they will stay fresh for up to 1 week. This is perfect for satisfying sweet cravings throughout the week!
Freezer: For longer storage, freeze the cookie balls in a single layer on a baking sheet. Once set, transfer them to a freezer bag or airtight container, where they can last for up to 3 months.
Thawing: When ready to enjoy, transfer the frozen Easter Egg Oreo Cookie Balls to the fridge to thaw overnight or for a few hours before serving.
Serving Cold: These treats are best served chilled but can also be enjoyed at room temperature. Just be sure to consume them within a week if stored in the fridge!
What to Serve with Easter Egg Oreo Cookie Balls?
As you gather with family and friends, let’s create a delightful spread that complements these creamy, no-bake treats!
-
Fresh Fruit Salad: A refreshing mix of seasonal fruits balances the rich sweetness, bringing a burst of color to your dessert table. Juicy strawberries, tangy kiwis, and sweet pineapple harmonize beautifully with the cookie balls.
-
Whipped Cream: Light and airy whipped cream adds a luscious layer that enhances the delicious flavors, making every bite feel indulgent and satisfying. Serve it in a bowl for dipping, inviting guests to personalize their treats!
-
Chocolate-Covered Strawberries: These bite-sized delights mirror the festive aesthetics of your cookie balls, bringing a touch of elegance and decadence to your spread. Their sweet and slightly tart flavor pairs wonderfully with the creamy Oreo filling.
-
Mini Cupcakes: Bright, colorful mini cupcakes with light frosting provide a delightful nod to the festive spirit, allowing guests to enjoy variety. Choose flavors like vanilla or lemon to complement the sweetness of the cookie balls.
-
Spring Punch: A citrusy, sparkling beverage with hints of mint is perfect for toasting to the season. Its refreshing taste contrasts beautifully with the richness of the Easter Egg Oreo Cookie Balls, ensuring a lively gathering.
-
Peanut Butter Dip: Creamy peanut butter dip with sliced apples or pretzels creates a delightful contrast to the cookie balls’ sweetness. It adds a fun, savory touch that your guests will love!
-
Coffee or Tea: A warm cup of coffee or herbal tea helps balance the sweetness, offering a comforting end to your meal, perfect for relaxing together. The rich flavors enhance the festive cheer of your gathering!
-
Chocolate Fudge Brownies: Rich, fudgy brownies add a decadent touch to the dessert table, allowing guests to indulge in layers of chocolatey goodness that pair delightfully with the creamy Easter Egg Oreo Cookie Balls.

Easter Egg Oreo Cookie Balls Recipe FAQs
How do I choose the best Oreos for this recipe?
Absolutely! For the best flavor, I recommend using Golden Oreos as they provide a delightful buttery vanilla base for your cookie balls. If you’re looking for a twist, feel free to substitute with Chocolate Oreos; just keep in mind they will yield a deeper color and richer flavor in the final treat!
What is the best way to store Easter Egg Oreo Cookie Balls?
To keep your Easter Egg Oreo Cookie Balls fresh and delicious, store them in an airtight container in the fridge, where they will last for up to one week. Make sure the container is not overcrowded to prevent them from sticking together. Enjoy them as a delightful sweet treat throughout the week!
Can I freeze Easter Egg Oreo Cookie Balls?
Yes! For longer storage, freeze your Easter Egg Oreo Cookie Balls in a single layer on a baking sheet until set. Once firm, transfer them to a freezer bag or an airtight container, where they can be stored for up to 3 months. When you’re ready to enjoy, simply move them to the fridge to thaw overnight or for a few hours before serving.
Why is my candy coating not smooth?
Very! If your candy coating isn’t smooth, it might be too hot or have come into contact with water, causing it to seize. To rescue it, gradually heat more candy coating in short intervals, stirring frequently. If it thickens, mixing in a teaspoon of coconut oil can help restore its smooth texture, making your Easter Egg Oreo Cookie Balls a beautiful treat!
Are there any dietary considerations for making these cookie balls?
It’s important to note that this recipe contains cream cheese, which may not be suitable for lactose-intolerant individuals. If you’re making these for someone with lactose issues, you can opt for a dairy-free cream cheese alternative. Additionally, always check the packaging of your Oreos for any allergen information, as they may contain gluten or different allergens.

Easter Egg Oreo Cookie Balls: No-Bake Joy for Everyone
Ingredients
Equipment
Method
- Crush Golden Oreos into fine crumbs using a food processor or a rolling pin.
- Mix crushed Oreo crumbs with softened cream cheese in a bowl until smooth and sticky.
- Roll the dough into egg-like ovals using a cookie scoop.
- Chill the shaped eggs in the refrigerator for at least 1 hour.
- Melt white candy coating in a microwave-safe bowl in short intervals.
- Dip each chilled egg into the melted coating and let excess drip off.
- Melt additional candy coating and tint it with gel icing for decoration.
- Drizzle the tinted coating over the dipped eggs for decorative patterns.
- Before the coating sets, add sprinkles or decorations over the eggs.
- Store the decorated eggs in an airtight container in the refrigerator.
Leave a Reply