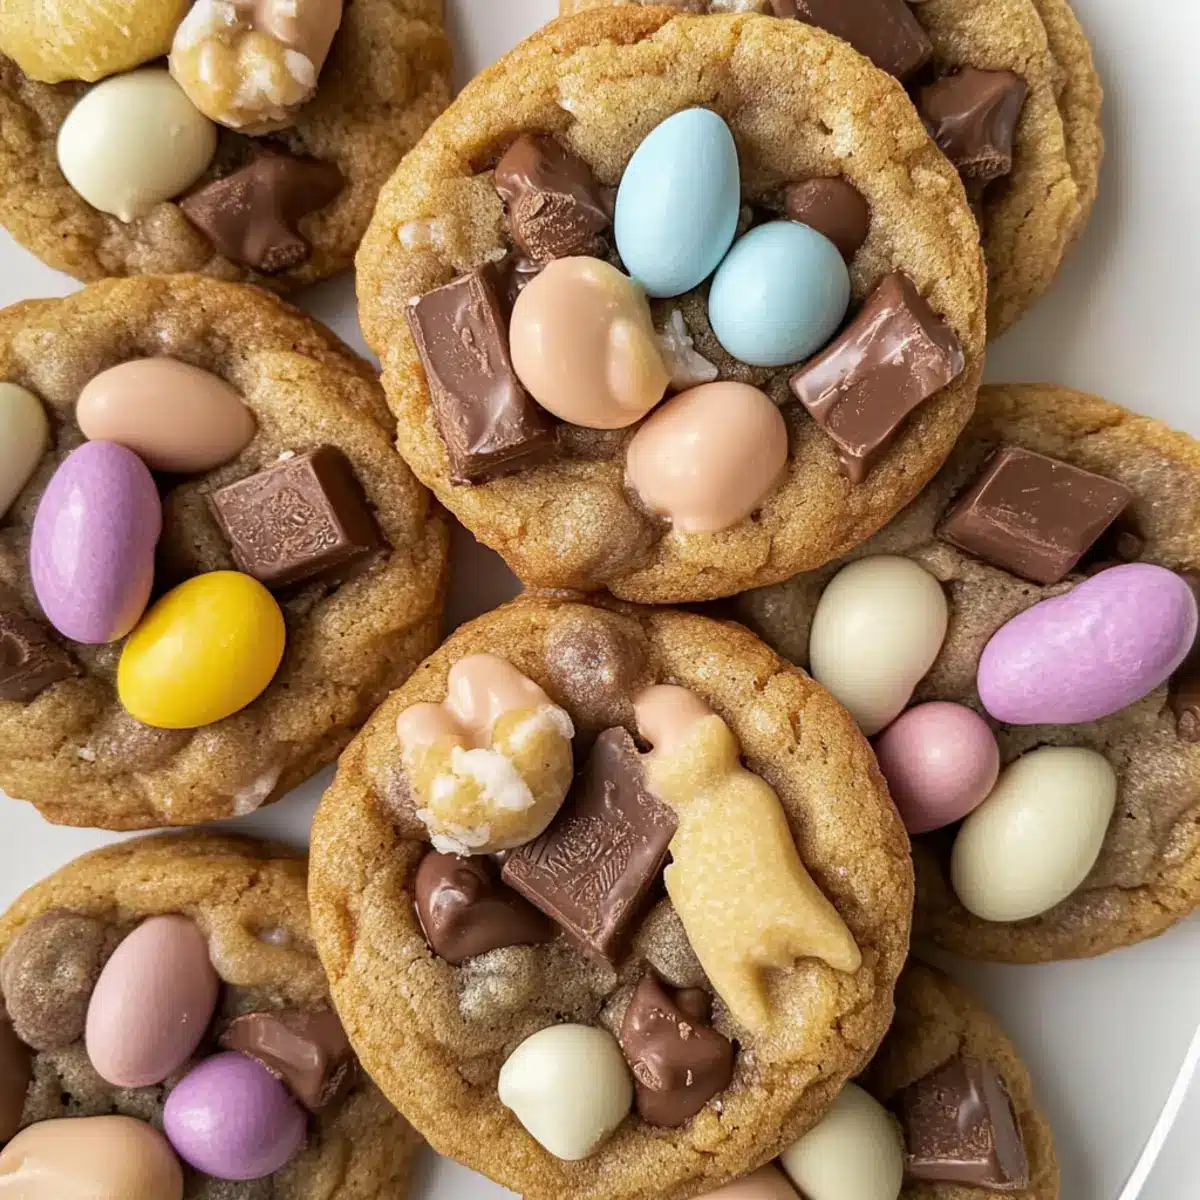
As the scent of warm cookies wafts through your kitchen, it feels like a hug from the inside out. This Easter, let’s elevate the classic cookie with my Chewy Easter Chocolate Cookies, adorned with whimsical Malteser Bunnies and Mini Eggs. This quick and easy recipe is perfect for those who crave delightful homemade treats without the hassle—who doesn’t love a delicious one-bowl wonder? Not only are they incredibly simple to whip up, but they also make for a charming centerpiece at your Easter celebration or a sweet surprise for friends and family. Imagine serving these colorful cookies alongside a steaming cup of tea, creating memories over every bite. Are you ready to spread some joy with chocolatey goodness?

Why Are These Cookies So Special?
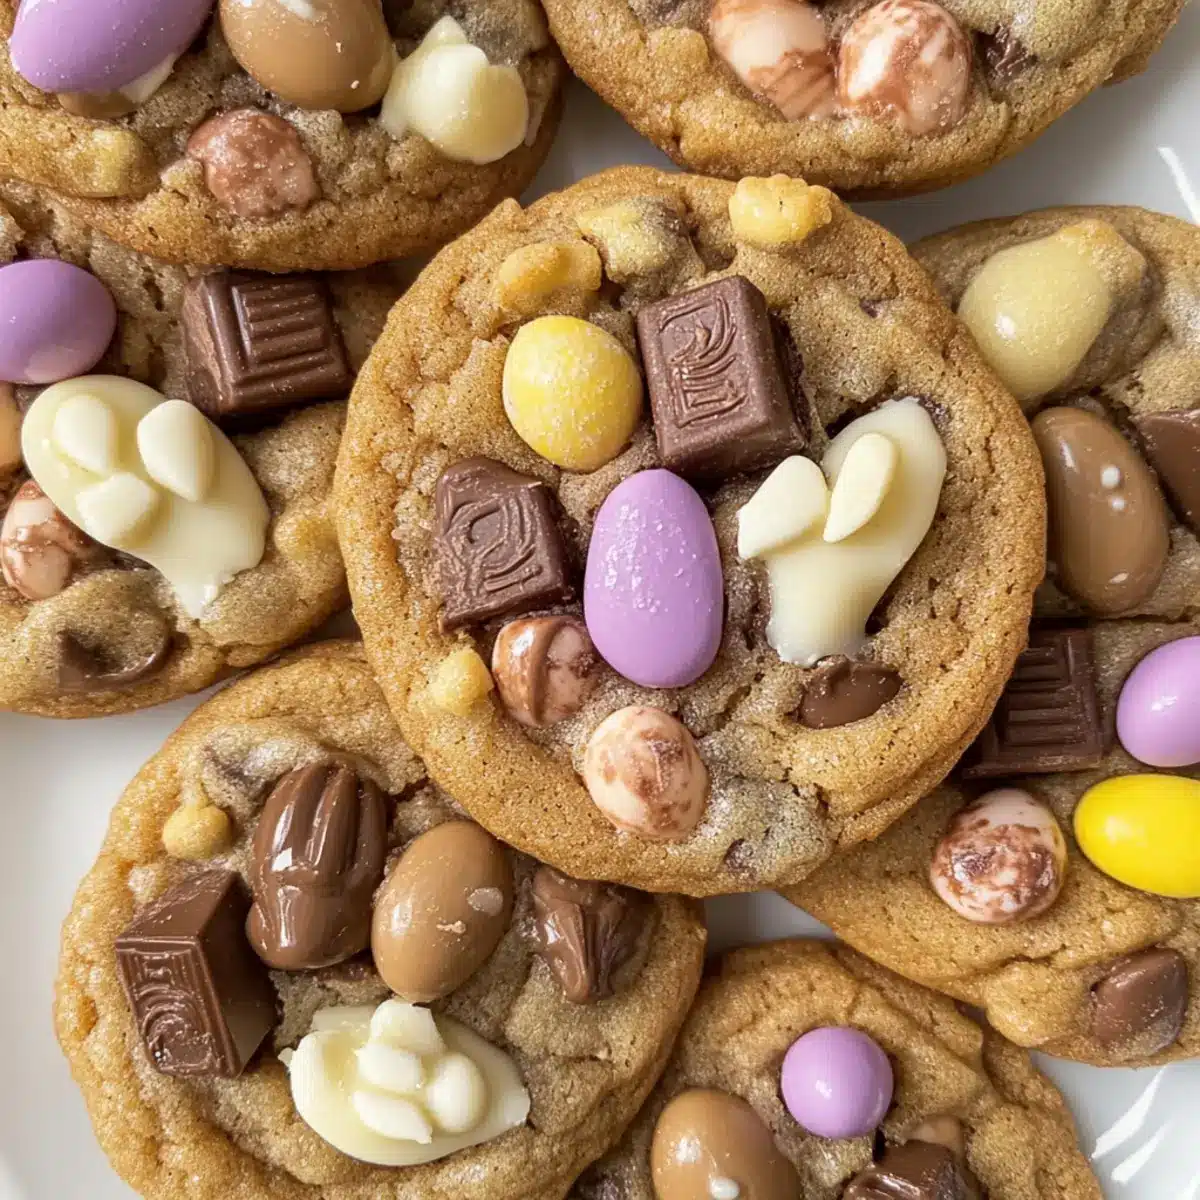
Irresistible flavor: The combination of rich chocolate with festive Malteser Bunnies and vibrant Mini Eggs creates a cookie that’s a feast for both the eyes and taste buds.
One-Bowl Wonder: No need for multiple bowls or complicated processes, making these Easter Chocolate Cookies a breeze to prepare.
Make-Ahead Magic: You can chill the dough overnight, which not only saves time but enhances the flavors beautifully—a true game changer for busy bakers!
Crowd-Pleasing: Whether at an Easter gathering or holiday party, these cookies are sure to wow your guests, becoming the conversation piece at the table.
Versatile Creations: Feel free to switch up the chocolate types or seasonal candies to suit your taste or occasion. If you’re a cookie fanatic, you’ll also love my Chocolate Chip Cookies and Gooey Butter Cookies for more delicious options!
Delightful texture: Expect a chewy exterior with a gooey center—just like a perfect brownie—but in cookie form. You’ll be reaching for seconds in no time!
Easter Chocolate Cookies Ingredients
Here’s everything you need to whip up these delightful Easter Chocolate Cookies!
For the Dough
- Unsalted Butter – Adds richness and moisture; substitute with salted butter, reducing added salt.
- White Caster Sugar – Contributes sweetness; regular granulated sugar can be used, but may affect texture.
- Light Brown Sugar – Provides chewiness and subtle caramel flavor; dark brown sugar works for a deeper taste.
- Eggs (1 whole + 1 yolk) – Provides structure and enhances chewiness; consider a flax egg for a vegan option.
- Vanilla Extract – Enhances overall flavor; skip if using vanilla-flavored chocolate.
- Self-Raising Flour – Creates lightness and structural integrity; all-purpose flour suffices with added baking powder.
- Salt – Balances sweetness and enhances flavors.
For the Chocolatey Goodness
- Chocolate (milk, white, or mixed) – Adds sweetness and richness; chocolate chips are a convenient alternative.
- Mini Malteser Bunnies – Decorative and add extra chocolatey flavor; swap in any small chocolate treats if needed.
- Mini Eggs – Festive and chocolatey; can be replaced with any candy eggs for a fun twist.
Get ready to bake these Easter Chocolate Cookies that will wow your guests!
Step‑by‑Step Instructions for Easter Chocolate Cookies
Step 1: Prep Dough
Begin by melting 100g of unsalted butter in a microwave-safe bowl, about 30 seconds. Mix in 75g white caster sugar and 75g light brown sugar until fully combined. Add 1 whole egg and 1 egg yolk along with 1 teaspoon of vanilla extract, stirring until the mixture is smooth and creamy, setting the foundation for your Easter Chocolate Cookies.
Step 2: Combine Dry Ingredients
Next, fold in 200g of self-raising flour and a pinch of salt into the butter and sugar mixture. As you mix, the dough will start to come together. Gently stir in your choice of chocolate chunks—milk, white, or a mix—to create pockets of delight. This rich dough will be the base of your chewy Easter Chocolate Cookies.
Step 3: Chill Dough
Cover the mixing bowl with plastic wrap and refrigerate the dough for at least 5 hours; overnight is even better for enhanced flavor. This chilling time is crucial, ensuring your Easter Chocolate Cookies will bake to a chewy perfection with a more developed taste.
Step 4: Preheat & Bake
When you’re ready to bake, preheat your oven to 180°C fan/200°C conventional. Line a baking tray with parchment paper. Scoop portions of the chilled dough into balls, roughly the size of a golf ball, and space them out on the tray. Bake for 10 minutes, or until the edges are golden brown while the centers remain soft, making them irresistibly chewy.
Step 5: Decorate
As soon as your cookies come out of the oven, gently press a Mini Malteser Bunny and a Mini Egg into the center of each cookie. This festive touch not only adds delightful charm but also infuses the cookies with extra chocolate goodness. Make sure to do this step quickly while the cookies are still warm.
Step 6: Cool Down
Leave the cookies to firm up on the baking tray for about 20 minutes. This allows them to set perfectly while keeping them soft in the center. Once they are cool enough to handle, transfer them to a wire rack to cool completely, ready to be enjoyed as delightful Easter Chocolate Cookies!
Expert Tips for Easter Chocolate Cookies
-
Chill Dough: Don’t skip this crucial step; refrigerating the dough for at least 5 hours intensifies the flavors and leads to a perfect chewy texture.
-
Underbake slightly: To maintain that soft center everyone loves, take the cookies out of the oven just 1-2 minutes early—they’ll continue to firm up outside.
-
Oven Accuracy: Always preheat your oven properly. An accurate temperature ensures even baking so your Easter Chocolate Cookies turn out just right.
-
Mix Chocolate Varieties: Get creative with your chocolate choices! Mixing white and dark chocolate or using seasonal treats keeps every batch exciting and unique.
-
Storage Suggestions: For optimum freshness, store your cookies in an airtight container at room temperature for up to 5 days, ensuring they stay soft and chewy.
Make Ahead Options
These Easter Chocolate Cookies are perfect for busy bakers looking to save time during the festivities! You can prepare the cookie dough up to 24 hours in advance by chilling it in the refrigerator, allowing the flavors to deepen beautifully. Simply cover the bowl tightly with plastic wrap to prevent it from drying out. If you’re feeling particularly organized, you can even scoop the dough into balls and freeze them for up to 3 months. On baking day, just pop the frozen dough balls straight onto the baking tray (no need to thaw!) and add an extra minute or two to the baking time. What a simple way to ensure fresh, homemade treats right when you want them!
Easter Chocolate Cookies Variations & Substitutions
Feel free to unleash your creativity and customize these cookies to suit your taste buds!
-
Dairy-Free: Use coconut oil or vegan butter to replace the unsalted butter for a dairy-free option that retains the chewiness.
For a delightful flavor twist, consider adding coconut flakes to enhance that tropical vibe! -
Flour Alternatives: Swap self-raising flour with gluten-free flour or almond flour for a gluten-free version.
This gives a nutty richness and keeps your cookies equally delectable, perfect for anyone avoiding gluten. -
Chocolate Swap: Experiment with dark chocolate or white chocolate based on your preference or use all three for a decadent mix!
The variety not only adds richness but makes every bite exciting, creating a treasure of flavors! -
Nutty Infusion: Add a handful of chopped nuts like pecans or walnuts to the dough for a delightful crunch.
The nuts bring a wonderful contrast to the cookie’s soft center, making for a satisfying texture. -
Heat Things Up: Sprinkle a hint of cayenne pepper or cinnamon into the dough for a little unexpected warmth.
This subtle kick can elevate the cookie and surprise your guests, turning a sweet treat into a flavor adventure. -
Seasonal Candies: Swap out Mini Eggs for seasonal candies like caramel-filled chocolates or chocolate-covered pretzels for delightful variation.
If you want that nostalgia, look for your favorite childhood candies to mix things up a bit! -
Flavor Boost: Add a tablespoon of espresso powder to the dough for a coffee-flavored twist that enhances the chocolate.
Enjoy the deep, rich flavors that awaken your senses and make these cookies an instant favorite! -
Decorative Touches: For a festive look, sprinkle edible glitter or colored sugar before baking to add a sparkly finish.
This not only makes them visually stunning but can also make a fun addition to any Easter dessert table.
Don’t forget, if you’re craving more delightful cookie recipes, check out my Crispy Chocolate Oat Cookies or the indulgent Chocolate Thumbprint Cookies for additional sweet inspiration!
Embrace the joy of baking—your kitchen is about to smell heavenly!
What to Serve with Easter Chocolate Cookies
Warm, chewy cookies are a delightful treat, but pairing them right can transform your dessert moment into a memorable occasion.
- Vanilla Ice Cream: A scoop of creamy vanilla perched atop a warm cookie creates a delicious contrast of temperatures and textures.
- Fresh Berries: Strawberries or raspberries add a refreshing tang that balances the sweetness of the chocolate cookies beautifully.
- Coffee or Espresso: The bold flavor of coffee enhances the chocolate richness, making it a classic pairing that coffee lovers will adore.
- Milk: A tall glass of cold milk is the perfect nostalgic duo for children and adults alike, enhancing the chocolate experience.
- Chocolate Sauce Drizzle: Elevate your cookie presentation by drizzling warm chocolate sauce over the top; it’s an indulgent way to impress guests.
- Peanut Butter Cup Pairing: For chocolate lovers, serving cookies alongside mini peanut butter cups adds an unexpected yet delightful twist.
- Mint Tea: The refreshing notes of mint tea provide a palate cleanser between sweet bites, making it a soothing combination.
- Pecan Pie Squares: Their caramel flavor compliments the cookies without overpowering them, making for a delightful dessert spread.
- Marshmallow Fluff Dip: This sweet, creamy dip adds a fun and whimsical touch; perfect for dipping your cookies into!
- Mini Fruit Tarts: Colorful and festive, they add a beautiful contrast to your dessert table while appealing to fruit lovers.
Storage Tips for Easter Chocolate Cookies
Room Temperature: Store your cookies in an airtight container at room temperature for up to 5 days to keep them soft and chewy.
Fridge: If you prefer, you can refrigerate the cookies for extended freshness. However, allow them to come to room temperature before enjoying for the best texture.
Freezer: For longer storage, freeze individually wrapped cookies for up to 3 months. To enjoy, simply thaw at room temperature or warm them in the oven for a few minutes.
Dough Storage: If you want to make ahead, wrap the cookie dough tightly in plastic wrap and refrigerate for up to 48 hours before baking. This chilling time enhances the flavors of your Easter Chocolate Cookies!
Easter Chocolate Cookies Recipe FAQs
What kind of chocolate should I use in these cookies?
Absolutely! You can use a mix of milk, white, or dark chocolate based on your personal preference. I often blend them to create a delicious contrast. If you’re short on time, chocolate chips are a convenient alternative and melt beautifully within the cookie dough.
How do I know when the cookies are done baking?
Very! To ensure you achieve that desirable chewy center, look for golden edges with soft centers—about 10 minutes in the oven is perfect. If you want that extra gooeyness, underbake by 1-2 minutes; the cookies will continue baking slightly as they cool on the tray.
Can I freeze these cookies?
Of course! If you want to extend their deliciousness, freeze the cookies wrapped individually in plastic wrap for up to 3 months. When you’re ready to enjoy, simply let them thaw at room temperature or warm them in the oven for a few minutes. This method keeps them soft and enjoyable!
How do I store leftover cookies?
That’s a great question! Store your Easter Chocolate Cookies in an airtight container at room temperature for up to 5 days. This keeps them soft and chewy. If you refrigerate them, just allow them to come back to room temperature before diving in for the best texture.
What if my cookie dough is too sticky?
No worries! If you find your dough is too sticky to handle, it could be due to the butter being too warm or too much moisture. You can chill the dough for a bit longer to help firm it up. Additionally, you might want to incorporate a tablespoon or two of extra flour until you achieve the right consistency.
Can I make these cookies vegan?
Absolutely! To make vegan Easter Chocolate Cookies, simply substitute the eggs with a flax egg—mix 1 tablespoon of ground flaxseed with 2.5 tablespoons of water and let it sit for a few minutes to thicken. Use a plant-based butter in place of the unsalted butter, and you’re good to go!

Easter Chocolate Cookies That Will Wow Your Guests
Ingredients
Equipment
Method
- Begin by melting 100g of unsalted butter in a microwave-safe bowl, about 30 seconds. Mix in 75g white caster sugar and 75g light brown sugar until fully combined. Add 1 whole egg and 1 egg yolk along with 1 teaspoon of vanilla extract, stirring until the mixture is smooth and creamy, setting the foundation for your Easter Chocolate Cookies.
- Next, fold in 200g of self-raising flour and a pinch of salt into the butter and sugar mixture. As you mix, the dough will start to come together. Gently stir in your choice of chocolate chunks—milk, white, or a mix—to create pockets of delight.
- Cover the mixing bowl with plastic wrap and refrigerate the dough for at least 5 hours; overnight is even better for enhanced flavor.
- Preheat your oven to 180°C fan/200°C conventional. Line a baking tray with parchment paper. Scoop portions of the chilled dough into balls, and space them out on the tray. Bake for 10 minutes, or until the edges are golden brown while the centers remain soft.
- As soon as your cookies come out of the oven, gently press a Mini Malteser Bunny and a Mini Egg into the center of each cookie.
- Leave the cookies to firm up on the baking tray for about 20 minutes. Once they are cool enough to handle, transfer them to a wire rack to cool completely.
Leave a Reply