The air is filled with the sweet smell of chocolate, bringing back memories of my favorite childhood Easter celebrations. These Dense and Chewy Easter Brownies are not just a dessert; they’re a delicious way to add a sprinkle of nostalgia to your holiday table. Rich, fudgy chocolate cake mingles with just a hint of coffee to create a flavor explosion, while colorful pastel toppings invite joy and whimsy. Plus, this Easter Brownies Recipe is perfect for those last-minute gatherings, requiring minimal prep and time in the kitchen—what more could a home chef want? Whether you’re embracing the holiday spirit or simply craving a sweet treat, these brownies are sure to be a hit. Are you ready to transform your celebration into a chocolatey masterpiece?
Why are these brownies a must-try?
Nostalgic Flavors: Experience the delightful blend of chocolate and subtle coffee, reminiscent of childhood Easters.
Vibrant Decorations: Add a pop of color with pastel toppings, making each brownie a festive treat.
Easy Preparation: Enjoy a straightforward baking process, perfect for those last-minute holiday gatherings.
Endless Variations: Get creative with unique twists, whether it’s bunny shapes or flavored additions.
Crowd-Pleasing Delight: Serve them at parties alongside options like a Dirty Strawberry Soda or a classic Gingerbread Latte Cake for the ultimate indulgence.
This Easter Brownies Recipe promises to be a delightful centerpiece for any celebration!
Easter Brownies Recipe Ingredients
For the Brownies
• Butter – Adds richness and moisture to the brownies; substitute with margarine for a dairy-free option.
• Granulated Sugar – Contributes sweetness and a crisp top layer; no direct substitutes suggested, but reduce for less sweetness.
• Brown Sugar – Creates a chewy texture; can swap with coconut sugar for a unique flavor.
• Eggs – Provide structure and richness; ensure they are fresh. For a vegan option, substitute with applesauce (1/4 cup per egg).
• Vanilla Extract – Enhances flavor; use pure vanilla for best results.
• All-Purpose Flour – Provides structure; substitute with a gluten-free flour blend for gluten-free brownies.
• Cocoa Powder – Central to the brownie’s chocolate flavor; use unsweetened for the best results.
• Salt – Balances sweetness; no substitutions recommended.
• Chocolate Chips – Adds delightful pockets of melted chocolate; use semi-sweet or dark chocolate.
For the Topping
• Coconut Oil – Used for the glossy chocolate topping; substitute with vegetable oil if needed.
• Gel Food Coloring (optional) – For vibrant pastel colors in the topping; gel is preferable for consistency.
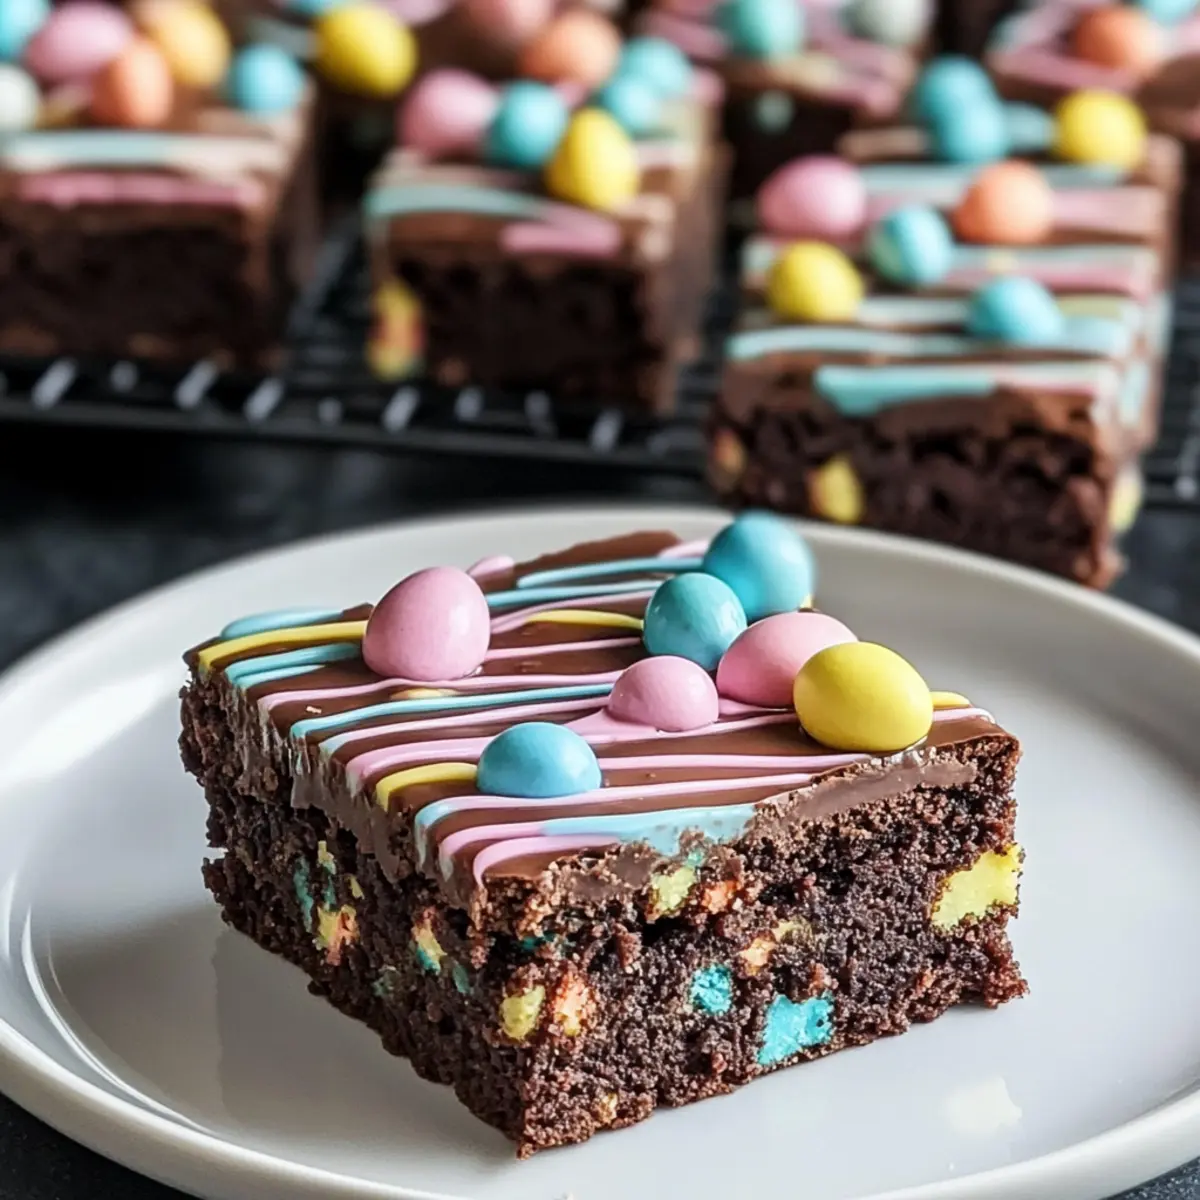
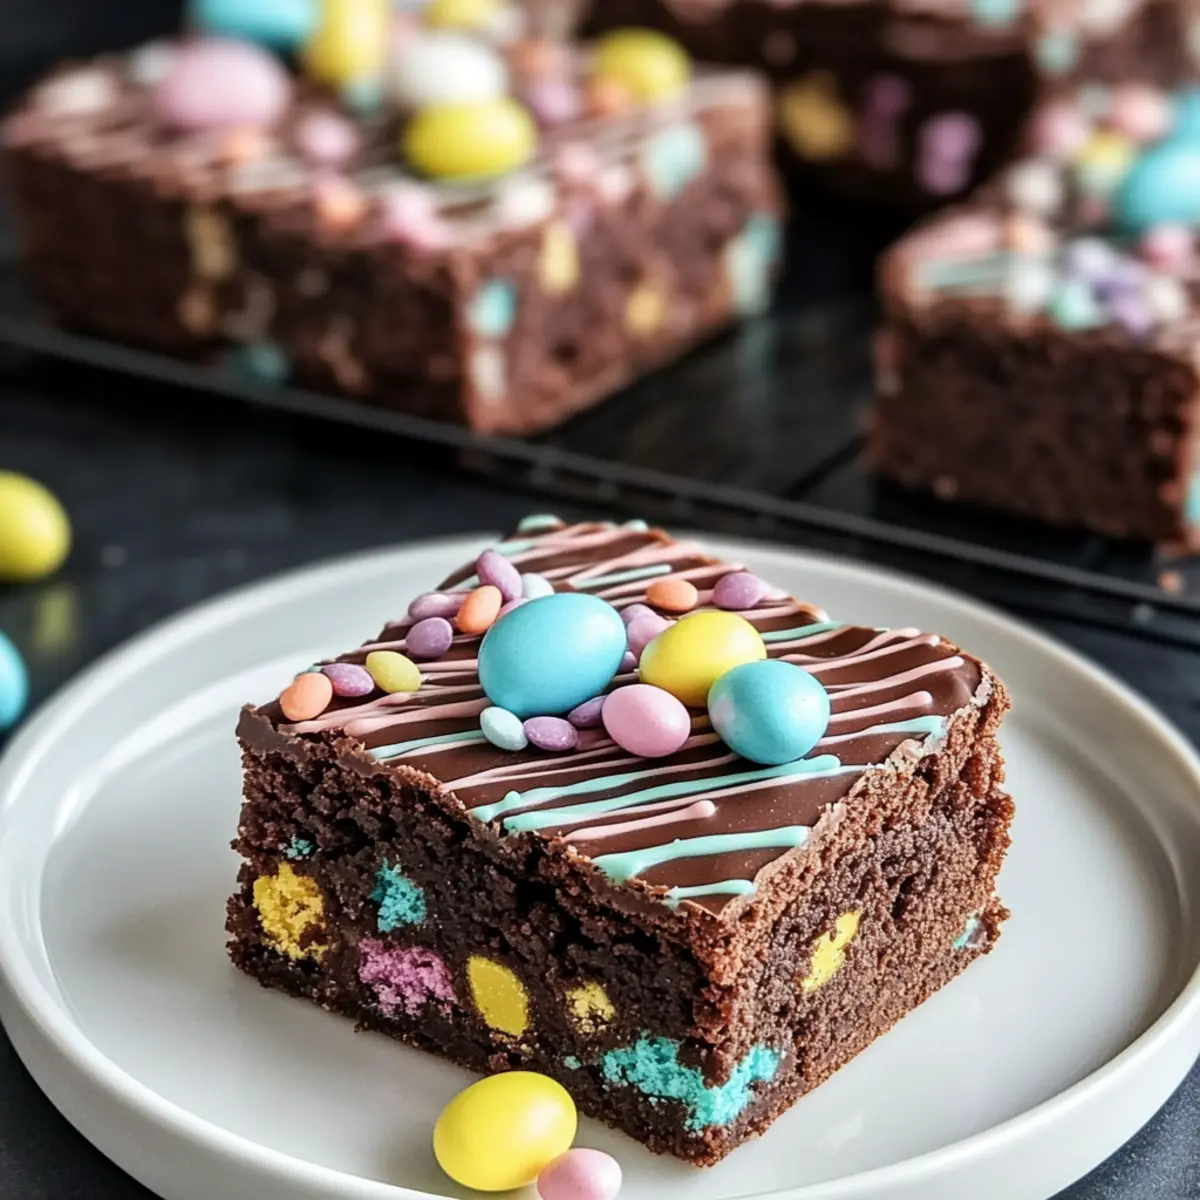
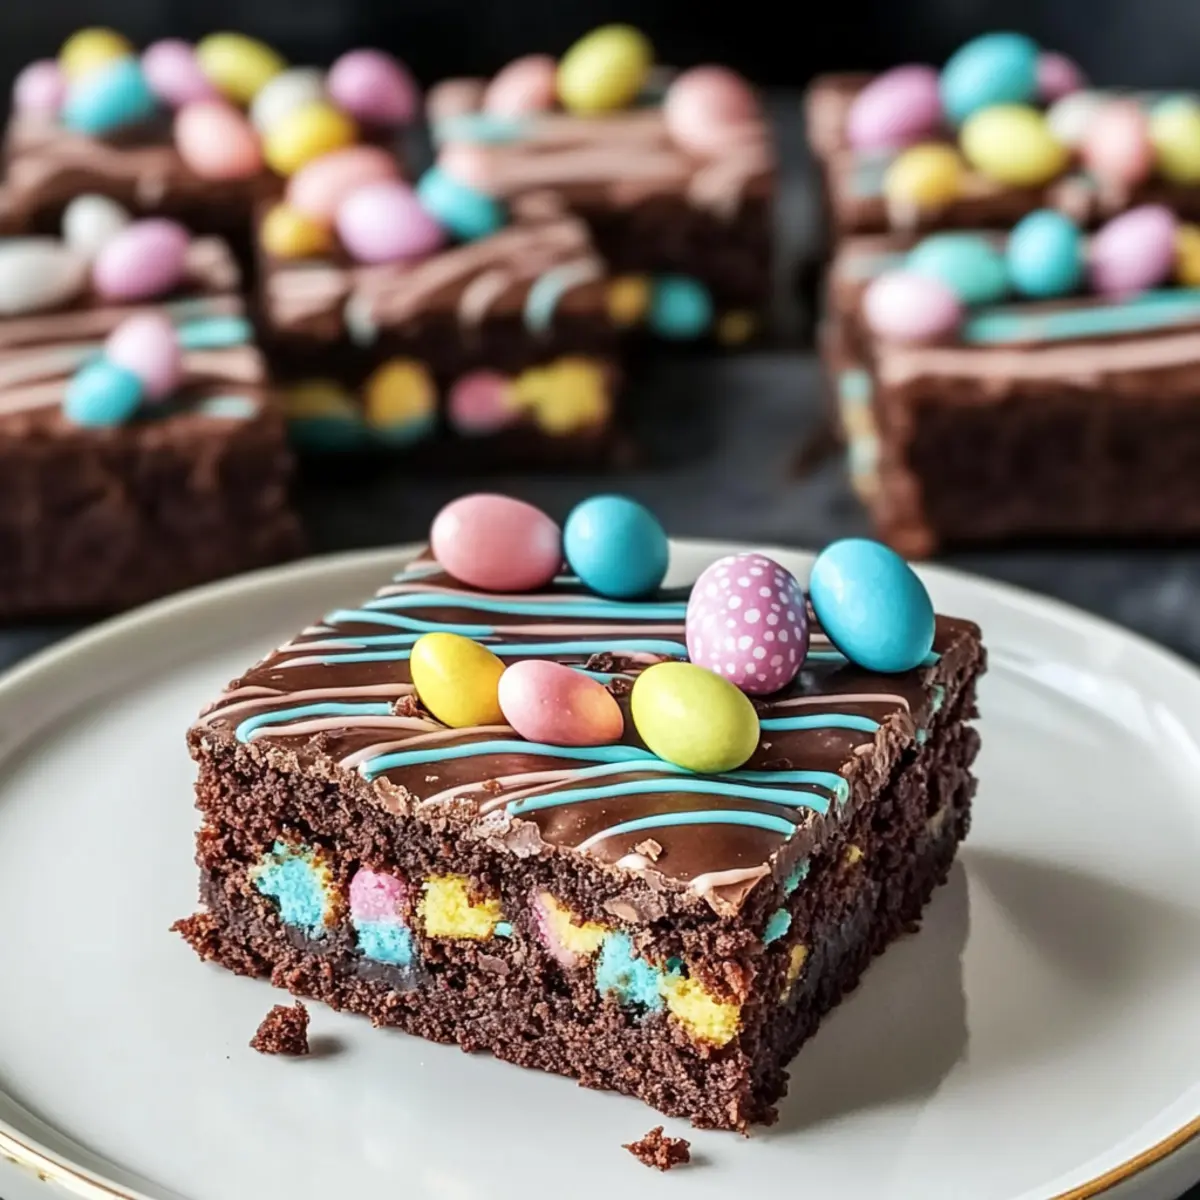
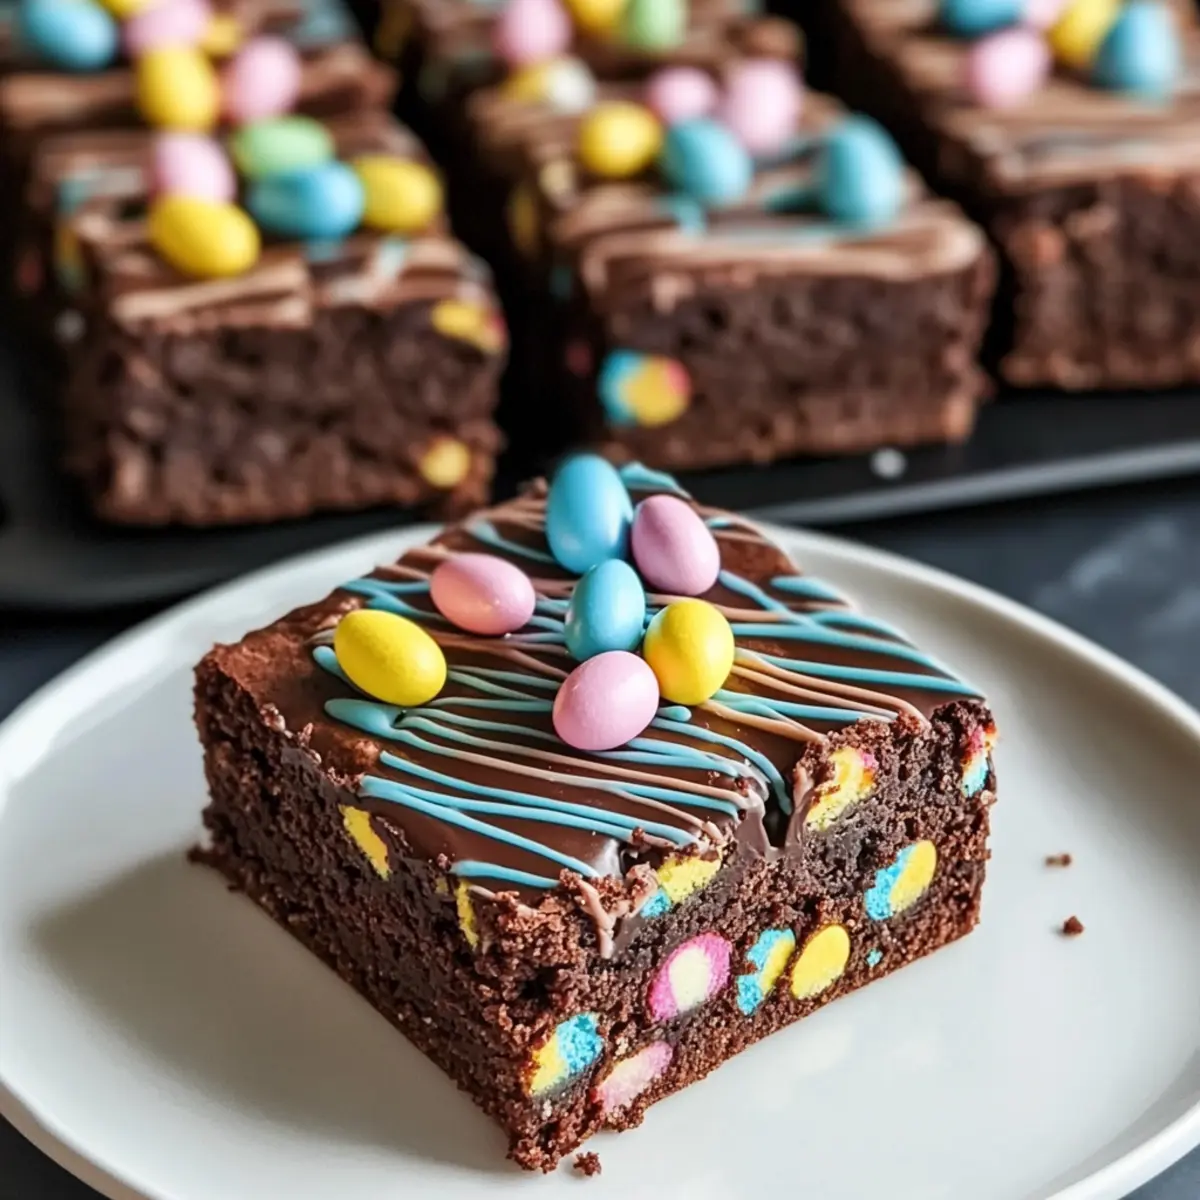
• Sprinkles and Mini Candy Eggs – Perfect for decoration, adding festive appeal to this Easter brownies recipe.
Step‑by‑Step Instructions for Easter Brownies Recipe
Step 1: Prepare Baking Pan
Begin by preheating your oven to 350°F (175°C). While the oven heats up, line an 8×8-inch baking pan with parchment paper, allowing some overhang on the sides for easy removal later. This step ensures that your Easter Brownies bake evenly and don’t stick to the pan.
Step 2: Mix Wet Ingredients
In a medium bowl, melt 1 cup of butter in the microwave or on the stovetop until fully liquid. Combine the melted butter with 1 cup of granulated sugar and 1 cup of brown sugar, mixing well until smooth. Add in 4 fresh eggs one at a time, stirring after each addition, and finish with 1 teaspoon of pure vanilla extract to enhance the flavor of your brownies.
Step 3: Combine Dry Ingredients
In a separate bowl, sift together 1 cup of all-purpose flour, 1/2 cup of unsweetened cocoa powder, and a pinch of salt. Gradually incorporate this dry mixture into the wet ingredients, stirring gently until just combined. Be careful not to overmix; a smooth batter will yield dense and chewy Easter Brownies.
Step 4: Add Chocolate Chips
Fold in 1 cup of semi-sweet chocolate chips with a spatula, distributing them evenly throughout the batter. This will create delightful pockets of melted chocolate that enrich each bite of your Easter Brownies. Ensure the mixture is well combined without extensive stirring.
Step 5: Bake
Pour the brownie batter into the prepared baking pan, smoothing the top with a spatula. Bake in the preheated oven for 30–35 minutes. Check for doneness by inserting a toothpick into the center; it should come out with a few moist crumbs for that perfect fudgy texture.
Step 6: Cool
Once baked, remove the pan from the oven and allow your Easter Brownies to cool completely in the pan on a wire rack. This cooling step is crucial before adding any toppings, as it helps set the brownies and makes them easier to decorate.
Step 7: Prepare Topping
In a microwave-safe bowl, melt 1 cup of chocolate chips with 2 tablespoons of coconut oil for a glossy finish. Heat in 30-second intervals, stirring between each, until fully melted and smooth. This rich topping will coat the cooled brownies beautifully.
Step 8: Decorate
If desired, add gel food coloring to the melted chocolate for vibrant pastel swirls. Drizzle or spread the colorful chocolate topping over the brownies in a fun, decorative pattern. Then, sprinkle with mini candy eggs and festive sprinkles to create a charming Easter theme.
Step 9: Slice
After the topping has cooled and set, use a sharp knife warmed in hot water to cut the brownies into squares cleanly. This method ensures tidy edges and enhances the visual appeal of your Easter Brownies, making them ready to be served at your holiday gathering.
Make Ahead Options
These Easter Brownies are perfect for busy home cooks who want to make their holiday preparations a breeze! You can prepare the brownie batter up to 24 hours in advance. Simply mix all the wet and dry ingredients together, and store the batter in an airtight container in the refrigerator to keep it fresh. When you’re ready to bake, just pour it into your prepared pan and proceed as usual—this helps to save valuable time on the day of serving. The decorated brownies can also be kept in an airtight container for up to 3 days, ensuring they remain just as delicious when you’re ready to enjoy them!
Easter Brownies Recipe Variations
Feel free to let your creativity run wild and personalize these brownies with vibrant twists and delightful substitutions!
- Dairy-Free: Substitute butter with margarine or coconut oil for a rich, dairy-free treat that everyone can enjoy.
- Nutty Crunch: Fold in chopped walnuts, pecans, or hazelnuts for an added layer of crunch and nutty goodness. Nuts not only enhance the texture but also complement the chocolate beautifully.
- Flavored Brownies: Infuse your batter with a splash of mint or almond extract for a refreshing twist that brings a new depth of flavor. Imagine minty chocolate brownies perfect for spring!
- Gluten-Free: Swap all-purpose flour for a gluten-free flour blend—your brownies will still be chewy and delicious without any gluten. This twist allows everyone to indulge without worries!
- Bunny Paws: Use cookie cutters to create fun Easter shapes like bunny paws. Decorate with icing for a whimsical touch that will make your desserts the talk of the table!
- Melted Caramel: Drizzle warm caramel sauce over the brownies before adding the chocolate topping for a gooey, indulgent surprise. The sweet caramel adds a decadent flavor to each bite.
- White Chocolate Swirls: Mix white chocolate chips into the batter or use them for a decorative topping to create a stunning visual contrast and add sweetness. Just wait until you see those swirls!
- Spicy Kick: For those who love a little heat, sprinkle in a dash of cayenne pepper or chili powder into the batter for a surprising chocolate spice combo. It’s an adventurous take that can be oh-so-delicious!
By exploring these ideas, your Easter Brownies can transform into an even more special treat—add your personal touch and watch them disappear at every gathering! As a delightful companion, consider pairing with a festive Gingerbread Latte Cake for a full dessert table experience. Enjoy the joy of baking!
What to Serve with Easter Brownies
Indulging in these festive brownies pairs perfectly with delightful accompaniments that elevate your holiday feast.
-
Vanilla Ice Cream: The creamy sweetness balances the rich chocolate, creating a delightful contrast. Imagine a warm brownie melting with a scoop of cold ice cream—pure bliss!
-
Fresh Berries: The brightness of strawberries or raspberries adds a refreshing touch. Their tartness complements the chocolate flavor beautifully, making each bite a celebration of spring.
-
Whipped Cream: A dollop of light, airy whipped cream enhances richness without overwhelming sweetness. It’s like adding a fluffy cloud to your brownies that invites you to savor every moment.
-
Chocolate Sauce: Drizzling some extra chocolate sauce intensifies the chocolate experience. This can intensify the dessert and transform each bite into a lavish treat!
-
Mint Chocolate Chip Milkshake: The coolness of mint and the sweetness of chocolate chips create a decadent drink that’s perfect for sipping with brownies. It’s indulgent and refreshing, a classic combo!
-
Coffee: A cup of brewed coffee enhances the brownie’s rich cocoa flavors. The coffee’s warmth invites cozy conversations and pairs perfectly for an after-dinner treat.
-
S’mores Dip: Serve along with some graham crackers and marshmallows for a deliciously interactive dessert experience. Dip your brownies into warm s’mores dip for a twist that ignites nostalgia!
-
Mint Chocolate Chip Cookies: These cookies’ refreshing mint flavor balances perfectly with the brownies. It’s like having two favorites at once!
With these serving suggestions, your Easter Brownies Recipe will undoubtedly steal the show at any gathering!
Expert Tips for the Best Easter Brownies
- Melted Butter Magic: Ensure your butter is completely melted for smooth incorporation. This helps create the perfect dense texture in your Easter Brownies.
- Egg Temperature Matters: Use room temperature eggs to blend seamlessly into the wet ingredients, enhancing the overall richness of your brownies.
- Mix with Care: Avoid overmixing the batter to prevent tough brownies; mix until just combined for that ideal chewy consistency.
- Fudgy Perfection: Aim for a toothpick come out with a few moist crumbs, as slightly underbaked brownies yield that rich, fudgy center everyone loves.
- Topping Tip: Allow the brownies to cool completely before adding toppings; this ensures your decorations stay intact and look gorgeous on the plate.
- Creative Variations: Feel free to add your twist—like nuts or flavorings—to personalize this Easter Brownies Recipe to your family’s tastes!
How to Store and Freeze Easter Brownies
Room Temperature: Store the Easter Brownies in an airtight container at room temperature for up to 3 days to maintain their chewy texture and flavor.
Fridge: If you need them to last longer, refrigerate the brownies in a sealed container for up to a week, keeping them fresh and delicious.
Freezer: For longer storage, wrap the brownies tightly in plastic wrap and place them in a freezer-safe bag or container. They can be frozen for up to 3 months.
Reheating: When ready to enjoy, thaw the brownies in the fridge overnight, then bring them to room temperature before serving, or warm them up in the microwave for a few seconds for that fresh-baked taste!
Easter Brownies Recipe FAQs
How do I choose the right butter for my brownies?
Absolutely! Using unsalted butter is best for baking as it allows you to control the saltiness of your brownies. Make sure your butter is at room temperature for easier mixing. If you’re looking for a dairy-free option, margarine or coconut oil can work well!
How should I store leftover Easter Brownies?
Very simply! You can store your Easter Brownies in an airtight container at room temperature for up to 3 days. If you want them to last longer, refrigerate them for up to a week. Just ensure they’re sealed tight to keep that delightful fudgy texture.
Can I freeze my Easter Brownies for later?
Absolutely! To freeze, wrap the brownies tightly in plastic wrap, then place them inside a freezer-safe bag or container. They can be kept frozen for up to 3 months. When you’re ready to indulge, let them thaw in the fridge overnight before bringing them to room temperature or gently reheating them for that just-baked experience.
What should I do if my brownies come out too cakey?
No worries! If your brownies turned out more cake-like than chewy, it’s likely due to overmixing or baking them too long. To achieve that dense texture, mix just until the ingredients are combined and aim for a toothpick test that yields a few moist crumbs rather than a clean pick!
Are there any dietary considerations for the toppings I use?
Yes, definitely take note! If you’re decorating with sprinkles or candy, check the package for allergens, such as gluten or dairy. For an allergy-friendly option, consider using dark chocolate and natural decorations like chopped nuts or fruits. Whatever your preference, the more the merrier when it comes to personalizing your Easter Brownies recipe!
How long do topped brownies last compared to plain ones?
Plain Easter Brownies can last up to a week in the fridge when stored properly; however, once topped, keep in mind that the decorations may last only 3 to 5 days due to perishable ingredients like toppings or cream. It’s best to enjoy them fresh and within that timeframe!
Delicious Easter Brownies Recipe with Colorful Toppings
Ingredients
Equipment
Method
- Preheat your oven to 350°F (175°C) and line an 8x8-inch baking pan with parchment paper.
- Melt 1 cup of butter and mix with 1 cup of granulated sugar and 1 cup of brown sugar until smooth. Add eggs one at a time and finish with 1 teaspoon of vanilla extract.
- Sift together 1 cup of flour, 1/2 cup of cocoa powder, and a pinch of salt in a separate bowl. Gradually incorporate into the wet ingredients.
- Fold in 1 cup of chocolate chips evenly throughout the batter.
- Pour the batter into the prepared pan and bake for 30–35 minutes until a toothpick comes out with a few moist crumbs.
- Cool the brownies completely in the pan on a wire rack before adding toppings.
- Melt 1 cup of chocolate chips with 2 tablespoons of coconut oil in a microwave-safe bowl.
- Optionally, add gel food coloring to the melted chocolate and spread it over the brownies. Decorate with sprinkles and mini candy eggs.
- Once the topping has cooled and set, cut the brownies into squares using a sharp knife warmed in hot water.
Leave a Reply