The vibrant colors of spring bring a wave of inspiration to the kitchen, and nothing captures that festive spirit quite like an Easter JELLO Cheesecake. This no-bake dessert radiates joy with its playful pastel layers and creamy texture, making it both a delight to create and a showstopper at any gathering. Best of all, it simplifies your holiday prep—chill it while you juggle Easter egg hunts or family brunches, and emerge from the kitchen with a stress-free treat that pleases both kids and adults alike. Whether you opt for classic flavors or get adventurous with colorful twists, this layered dessert will undoubtedly become an annual favorite. Ready to discover how easy it is to make a cheesecake that sparks joy?
Why is this Easter JELLO Cheesecake a must-try?
Vibrant, Eye-Catching Layers: The pastel colors not only celebrate the spirit of spring but also create a stunning visual appeal that will wow your guests.
No-Bake Convenience: Say goodbye to long hours in the kitchen! This recipe requires minimal effort, allowing you to spend more time enjoying your holiday festivities.
Creamy, Fluffy Texture: With layers of Jell-O and Cool Whip, each slice offers a delightful melt-in-your-mouth experience that’s simply irresistible.
Endless Customization: Feeling creative? You can easily swap flavors and colors to match your unique tastes or holiday themes—try our Sugar Cookie Cheesecake for another festive treat!
Kid-Friendly Fun: The colorful layers make this dessert a hit with children, making dessert time a fun and memorable experience for the whole family.
Perfect for Any Occasion: Beyond Easter, this cheesecake shines at any gathering, be it parties, brunches, or family reunions.
Easter JELLO Cheesecake Ingredients
For the Cheesecake Base
• Jell-O Classic No-Bake Cheesecake Mix – This serves as the foundational layer that provides rich creaminess; follow the box instructions for additional ingredients.
• Cooking Spray – A vital step to ensure easy removal from the springform pan; prevents sticking and ensures a beautiful presentation.
For the Colorful Layers
• Blue Jell-O Powder – Adds a fun vibrant blue layer; you’ll need 3 tablespoons for a striking contrast.
• Strawberry or Cherry Jell-O Powder – Infuses a delightful pink or red layer; use 3 tablespoons for a perfect pop of color.
• Boiling Water – Essential for dissolving Jell-O powders; use ⅓ cup for the blue layer and ½ cup for the pink layer.
• Ice Cold Water – Helps in firming up the Jell-O mixes; add ½ cup for each color to get that perfect texture.
For Whipped Cream Layers
• Cool Whip – Provides that fluffy, creamy texture; three tubs (8 oz each) are required to achieve lightness throughout the layers.
Optional Toppings
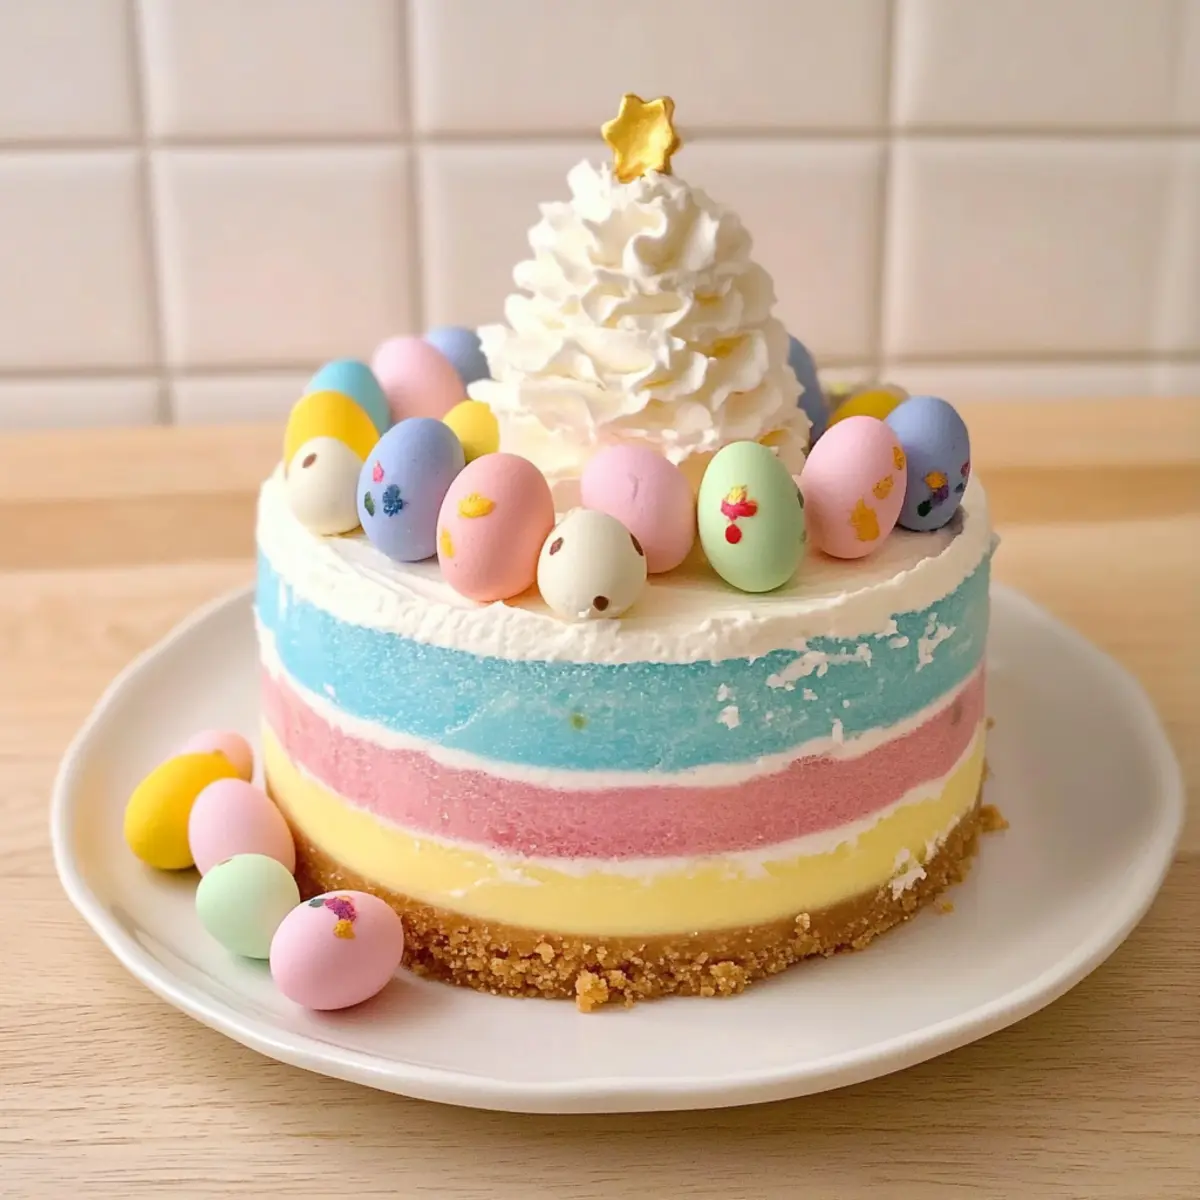
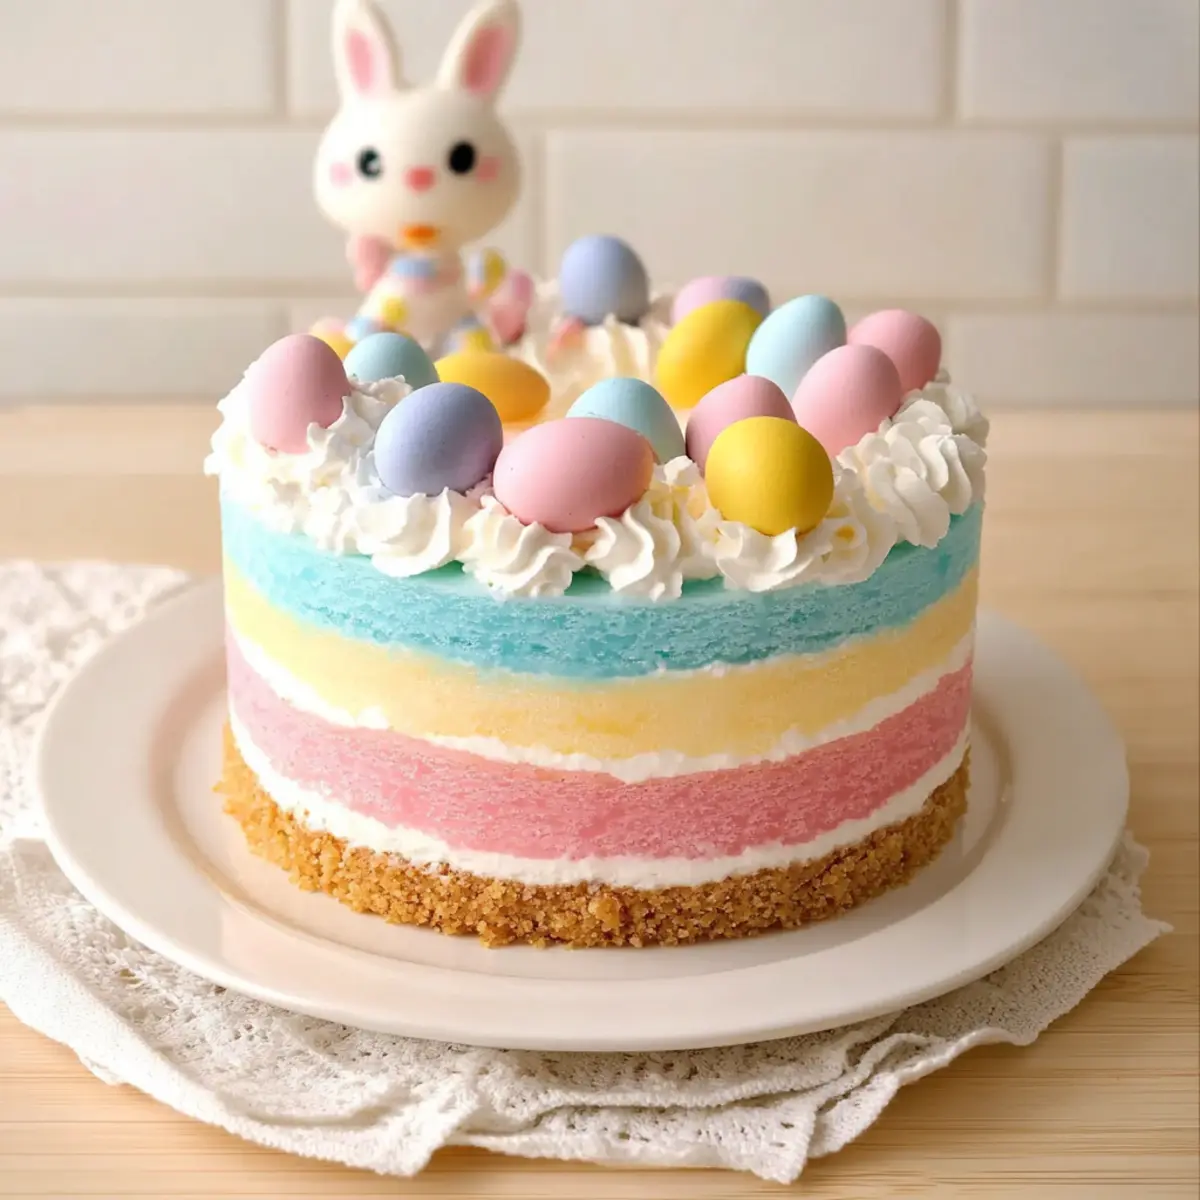
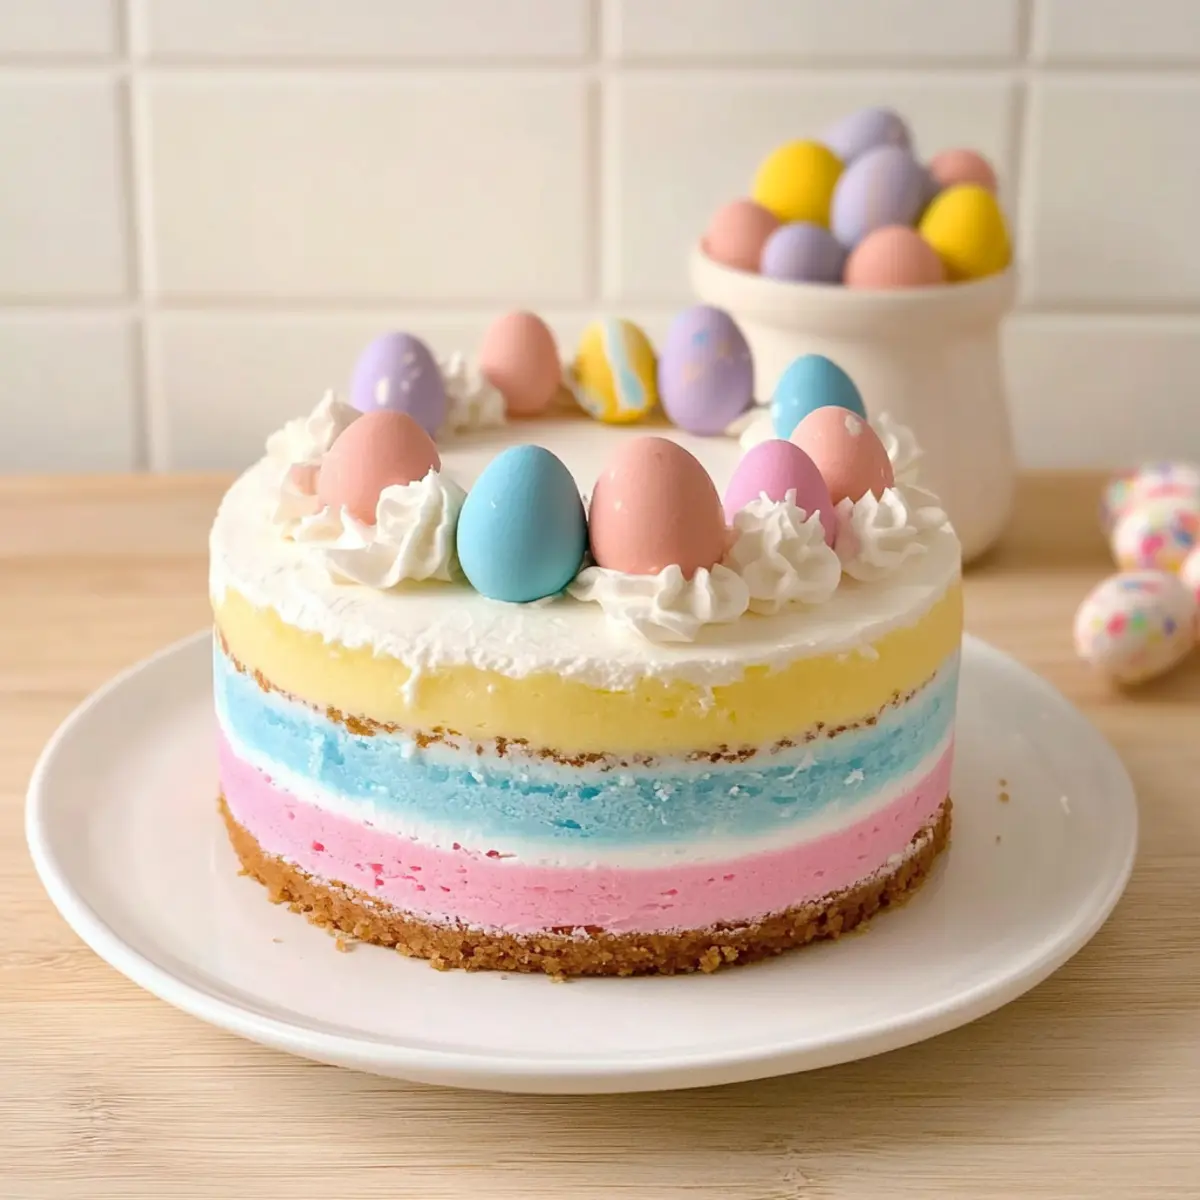
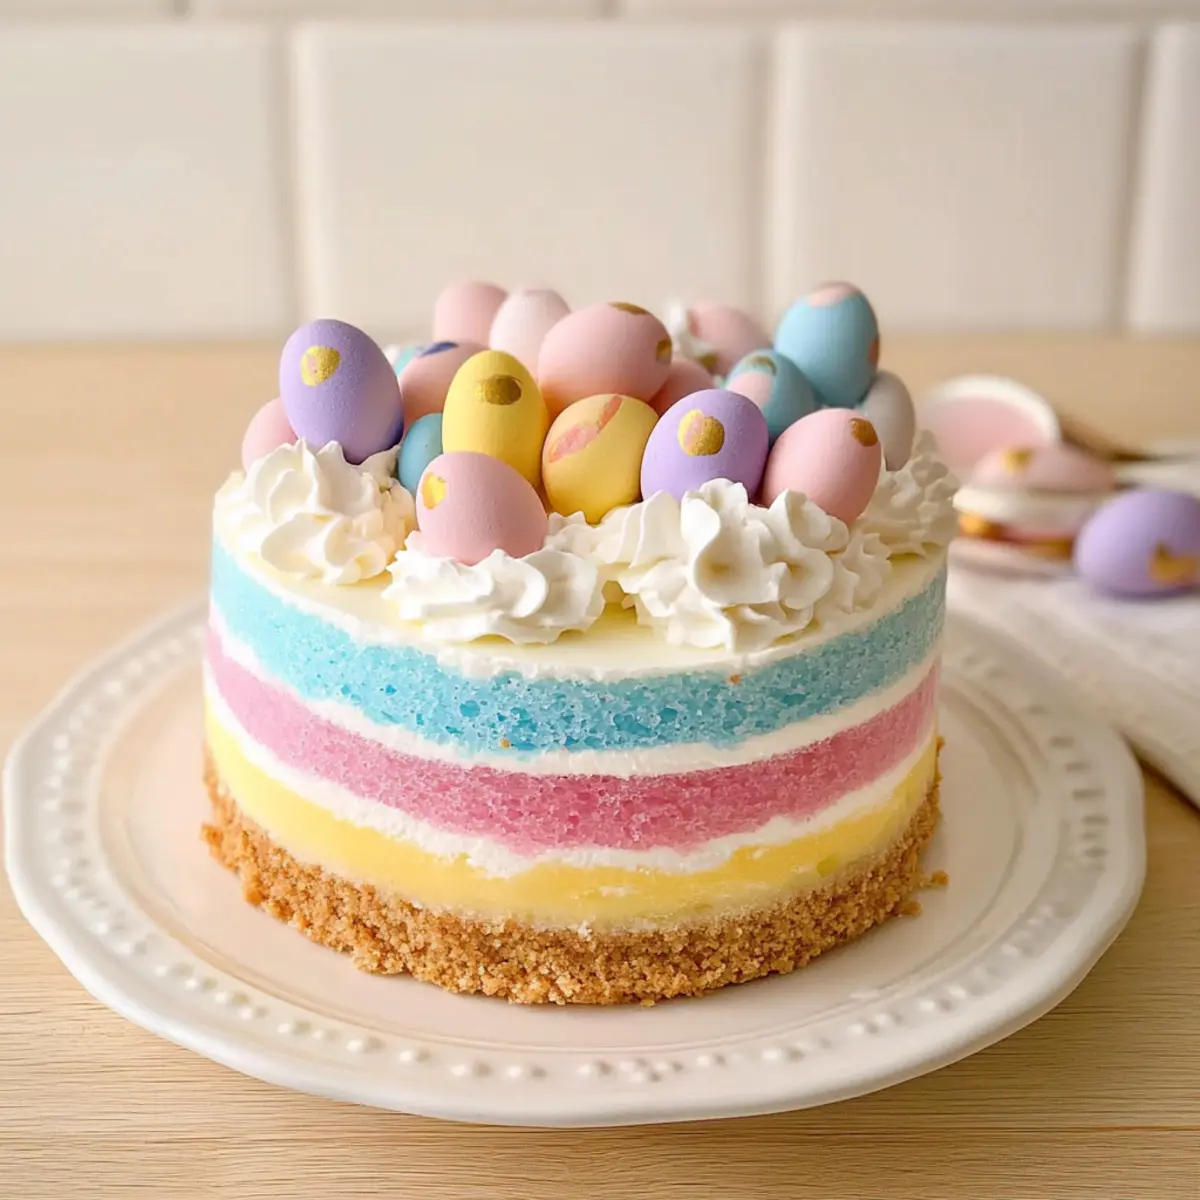
• Cadbury Pastel Mini Eggs – They bring an extra festive flair to your cheesecake; use them for decoration that’s both delightful and delicious!
This Easter JELLO Cheesecake will not only charm your guests with its look but also satisfy their sweet tooth effortlessly!
Step‑by‑Step Instructions for Easter JELLO Cheesecake
Step 1: Prepare the Pan
Start by greasing a 9-inch springform pan with cooking spray to prevent the cheesecake from sticking. Press the crust from the Jell-O Classic No-Bake Cheesecake mix firmly into the bottom of the pan, ensuring an even layer. Place the pan in the refrigerator to chill while you prepare the cheesecake filling, about 10 minutes.
Step 2: Make the Cheesecake Layer
Follow the box instructions for the Jell-O Classic No-Bake Cheesecake Mix to prepare the creamy filling. Once mixed, pour it over the chilled crust in the springform pan. Smooth the top with a spatula, and refrigerate for 30 minutes, allowing it to set slightly before adding the colorful Jell-O layers.
Step 3: Prepare Blue Jell-O Layer
In a mixing bowl, dissolve 3 tablespoons of blue Jell-O powder in ⅓ cup boiling water, stirring until completely dissolved. Add ½ cup of ice cold water to help it cool, then fold in one tub of Cool Whip until the mixture is light and fluffy. Chill this layer for 30 minutes, then gently spread it over the cheesecake layer, ensuring the top is smooth.
Step 4: Prepare Pink Jell-O Layer
Now, dissolve 3 tablespoons of strawberry or cherry Jell-O powder in ½ cup boiling water, stirring until melted. Add ½ cup of ice cold water, then allow it to cool for a few minutes. Fold in another tub of Cool Whip to create a rich, fluffy mixture. Carefully spread it over the blue layer, making sure to cover evenly, and chill for an additional 30 minutes.
Step 5: Final Chill
Refrigerate the entire cheesecake for at least 4 hours, or even better, overnight until fully set. This allows the layers to firm up and gives you that clean, layered effect. Once it’s firm, take the last tub of Cool Whip and spread or pipe it on top of the cheesecake to create a fluffy finish.
Step 6: Serve
When ready to serve your Easter JELLO Cheesecake, keep it chilled until you are ready to slice. To achieve neat slices, use a warmed knife, rinsing it in hot water and wiping it dry between cuts. If you like, sprinkle the optional Cadbury Pastel Mini Eggs on top for a festive touch!
What to Serve with Easter JELLO Cheesecake?
Bring your Easter gathering to life with delicious accompaniments that enhance the joyful spirit of this vibrant dessert.
-
Fresh Fruit Salad: A colorful mix of berries, melons, and citrus complements the creamy layers perfectly, adding a refreshing contrast.
-
Classic Deviled Eggs: These delightful finger foods provide a savory balance to the sweetness of the cheesecake, making them a potluck favorite.
-
Sparkling Lemonade: This bubbly drink adds a festive touch, offering a zesty sparkle that pairs well with the cheesecake’s playful flavors.
-
Honey-Glazed Carrots: Their slightly sweet, earthy flavor harmonizes beautifully with the cheesecake, creating a well-rounded meal.
-
Zucchini Bread: A slice of moist, spiced zucchini bread offers a comforting contrast, enhancing the overall experience of your Easter spread.
-
Chocolate-Covered Strawberries: For an indulgent touch, these treats echo the sweet layers of the cheesecake while adding a touch of romance.
Dive into the joy of Easter with these delightful pairings that create a memorable dining experience for you and your loved ones!
Expert Tips for Easter JELLO Cheesecake
-
Layer Chilling Time: Make sure each layer is fully chilled before adding the next. This keeps those vibrant colors distinct and beautiful in your Easter JELLO Cheesecake.
-
Warmed Knife Trick: Use a warmed knife for cutting. Rinse it in hot water and wipe dry—this helps you achieve cleaner, neater slices every time.
-
Make Ahead Strategy: Consider preparing this cheesecake a day in advance. It allows for proper chilling and guarantees a stress-free presentation on the day of the event.
-
Cooling Between Steps: Don’t rush the cooling phases—patience is key! Each layer needs ample time in the fridge to set properly before adding the next.
-
Decorative Flair: Feel free to get creative with your toppings! Sprinkles, coconut, or fresh fruits can enhance presentation and flavor, making your dessert even more special.
Make Ahead Options
These Easter JELLO Cheesecakes are perfect for busy home cooks looking to save time during holiday preparations! You can prepare the cheesecake base and Jell-O layers up to 24 hours in advance, allowing for stress-free serving on the big day. Simply complete Steps 1 through 4 of the recipe, and store the cheesecake covered in the refrigerator to maintain its freshness and prevent drying out. When you’re ready to impress your guests, add the final layer of Cool Whip and any optional toppings right before serving, ensuring it looks just as delightful as it tastes! By prepping ahead, you’ll enjoy a delicious dessert ready to wow both kids and adults alike while freeing up your time for Easter festivities.
How to Store and Freeze Easter JELLO Cheesecake
Fridge: Keep the cheesecake stored in the refrigerator, tightly covered, for up to 3 days to maintain its freshness and vibrant colors.
Freezer: If you need to save it longer, you can freeze the cheesecake for up to 2 months. Wrap it well in plastic wrap and foil to prevent freezer burn.
Reheating: When you’re ready to enjoy, thaw the Easter JELLO Cheesecake in the fridge overnight. Avoid refreezing after thawing for the best texture.
Serving: Always serve the cheesecake chilled for optimal flavor and texture—this keeps those delightful layers looking their best!
Easter JELLO Cheesecake Variations
Let your creativity flow with these customizable twists on the classic Easter JELLO Cheesecake that will make your dessert shine!
-
Lemon Layer: Swap blue Jell-O for lemon Jell-O for a sunny yellow layer, adding a zesty brightness to every slice. Just imagine that refreshing taste of lemon bursting forth in the spring sunshine!
-
Rainbow Surprise: Use a mix of grape and lime Jell-O to create a rainbow effect, charming guests and adding a playful touch. It’s like a colorful surprise party for your taste buds!
-
Fruit Toppings: Top the cheesecake with fresh berries or sliced fruit to bring a burst of color and natural sweetness. Strawberries or blueberries pair beautifully with the creamy layers—nature’s beautiful garnish!
-
Coconut Bliss: Add shredded coconut on top of the whipped cream layer for a tropical twist, enhancing the texture and flavor. It adds a delightful chewiness reminiscent of sun-kissed beaches.
-
Chocolate Indulgence: Drizzle melted chocolate over the Cool Whip topping for a decadent finish that satisfies chocoholics. The rich chocolate pairs beautifully with the creamy layers, turning it into an irresistible dessert.
-
Sprinkle Fun: Customize your JELLO Cheesecake’s presentation by adding colorful sprinkles, making it a hit for kids and adults alike. The sprinkles add a fun crunch that complements the smooth creaminess.
-
Nutty Crunch: For extra texture, sprinkle chopped nuts like pecans or almonds over the top. Their toasty flavor adds an irresistible crunch and a hint of warmth, creating a perfect balance.
-
Minty Freshness: Swap in mint Jell-O for a refreshing twist that brings a cool note to your cheesecake. This will surprise your guests with an invigorating flavor profile that tastes like spring!
Feel free to explore these variations and make this Easter JELLO Cheesecake your own. If you’re feeling adventurous, you might also enjoy the delightful experience of creating Apple Cheesecake Bars or a rich Brown Butter Cheesecake that will wow your family during the holiday season!
Easter JELLO Cheesecake Recipe FAQs
What kind of Jell-O should I use for the layers?
For the layers of your Easter JELLO Cheesecake, I recommend using classic flavors such as blue raspberry for the blue layer and strawberry or cherry for the pink layer. These vibrant colors not only enhance the festive look but also add delightful fruity flavors to your cheesecake.
How do I store leftovers of the cheesecake?
Absolutely! Store any leftover cheesecake in the refrigerator, tightly covered, for up to 3 days. This will help maintain the moisture and the beautiful colors. If you want to keep it longer, consider freezing it.
Can I freeze Easter JELLO Cheesecake?
Yes, you can freeze your cheesecake for up to 2 months! Here’s how: Wrap the cheesecake tightly in plastic wrap and then cover it with aluminum foil to prevent freezer burn. When you’re ready to enjoy it, thaw it in the refrigerator overnight for the best texture before serving.
Why does my cheesecake have a grainy texture?
Very likely, the mixture wasn’t properly blended or the cream cheese wasn’t soft enough when mixed. Ensure that the cream cheese is at room temperature before mixing—this helps achieve a smooth filling. If you notice any graininess, try mixing it longer to create a creamy consistency.
Can I adjust this recipe for dietary restrictions?
Definitely! For a lighter version, I often recommend using reduced-fat cream cheese and light Cool Whip, which don’t compromise on taste but lower the calories. Also, if you’re catering to those with allergies, be sure to check for gluten or dairy-free alternatives with your Jell-O and whipped topping choices.
Can my pets eat the Easter JELLO Cheesecake?
No, it’s best to keep this dessert away from pets. While the cheesecake may look tempting, ingredients like Jell-O and Cool Whip can contain sugars and other compounds that are not suitable for furry friends. Always ensure they enjoy pet-safe treats instead!
Easter JELLO Cheesecake: Creamy Layers of Spring Delight
Ingredients
Equipment
Method
- Step 1: Prepare the Pan - Grease a 9-inch springform pan with cooking spray and press the cheesecake crust firmly into the bottom. Chill for 10 minutes.
- Step 2: Make the Cheesecake Layer - Follow box instructions to prepare the cheesecake filling. Pour over the crust and smooth. Refrigerate for 30 minutes.
- Step 3: Prepare Blue Jell-O Layer - Dissolve blue Jell-O powder in boiling water. Add cold water and fold in one tub of Cool Whip. Chill for 30 minutes.
- Step 4: Prepare Pink Jell-O Layer - Dissolve strawberry or cherry Jell-O in boiling water. Add cold water and fold in another tub of Cool Whip. Spread over blue layer.
- Step 5: Final Chill - Refrigerate the cheesecake for at least 4 hours, preferably overnight. Spread the last tub of Cool Whip on top.
- Step 6: Serve - Keep chilled until ready to slice. Use a warmed knife for neat slices and optional Cadbury eggs for topping.
Leave a Reply